Warrior III (Sanskrit terms: Virabhadrasana III)
September and October’s newsletter featured Warrior I and Warrior II, respectively. This month’s practice pose completes the “Warrior ensemble”. September opened with a reference to the meaning of the Sanskrit word for Warrior Pose as well as a warrior reference in regard to the Solar Plexus Chakra. October quoted Renee LeVerrier from Yoga for Movement Disorders regarding Warrior I and Warrior II and how the back arm and leg represent the past and the front limbs symbolize the future. Please refer to the archives for more—I have these two newsletters archived on my new Website!
This month’s I found a reference which combines all three warrior poses in what Nancy Gerstein refers to as “the peaceful-warrior flow series” in the “Asana and Peace” section, Chapter 3, from her excellent book, Guiding Yoga’s Light: “Those of us who practice yoga benefit from nonviolence and a peaceful spirit. Our asana practice brings about a peaceful frame of mind because it asks us to become more sensitive, more conscious, and more aware of ourselves as bodies, minds, and spirits. This awareness makes us clearer and calmer, more awakened to truth and thus better able to handle life’s endless challenges.
As we become more awakened, we move away from forcing and controlling events, and we move toward letting the universe take care of many of our daily dilemmas. In turn these changes influence the consciousness and actions of everyone we meet. The sensitivity we develop on our yoga mats affects everyone around us. You soon begin to see and notice that slowly, yogi by yogi, we can shift the direction of the world.”
She then goes into the “Asanas for Deepening” and within that section she introduces the peaceful-warrior flow series: “..moving from Virabhadrasana II to Virabhadrasana I to Virabhadrasana III. Practice using the intuitive feeling of courage. Be bold. Feel the fortitude, the firmness, the determination it takes to practice the postures. Dare to confront the difficulties of life with a peaceful intent to face internal conflicts head on.” Her “Practice off the mat” focus for this section, advises us to “Breathe thoroughly and look for peace in every situation”. Her “Wise Words” ending for this section suggest you “Spread peace wherever you go. The surest way to be happier is to do all you can to improve the lives of others.”
Now for the pose:
As a recap from the tips on balance covered in my June newsletter: A useful tip for all balance poses: Find a spot in the room that doesn’t move to focus on. It really helps! The Sanskrit word for this focus point is “dristhi”. Regularly practicing balance poses will help you focus both on and off the mat cultivating concentration skills.
Preferably, balance poses are best done on a firm, hard surface. If your yoga floor is carpeted or cushioned, it will make your balance poses that much harder. Sometimes even the thickness of your mat can be too unstable. So proceed with caution.
I learned this pose starting in Mountain Pose, so let’s begin there with feet hip distance apart. I like to keep my hands at heart center in prayer or “Namasté” position. Next you’ll want to have contact with the floor with all four corners of the feet (big toe mound, little toe mound, and both sides of the heel) with the weight on the feet evenly distributed between the inner and outer foot and the heel and ball of the foot. You’ll want a wide base, as in all yoga poses. So lift the toes, spread them wide, and plop them down. This really activates those arches, which is also important.
We’ll start with balancing on the right foot. As you focus on your spot in the room and start to kick your left leg back, notice the toes of the grounded foot and concentrate on keeping them relaxed vs. gripping the floor. Just as you don’t want gripping, in a balance pose, you also don’t want the toes lifted. You want even, relaxed weight distribution across the whole foot.
I also like to tell my students as they’re balancing that each day is different. Each side is different. Depending on how flustered your life has been, or if you have a cold—any disturbance mentally, emotionally, or physically—all elements can affect balance.
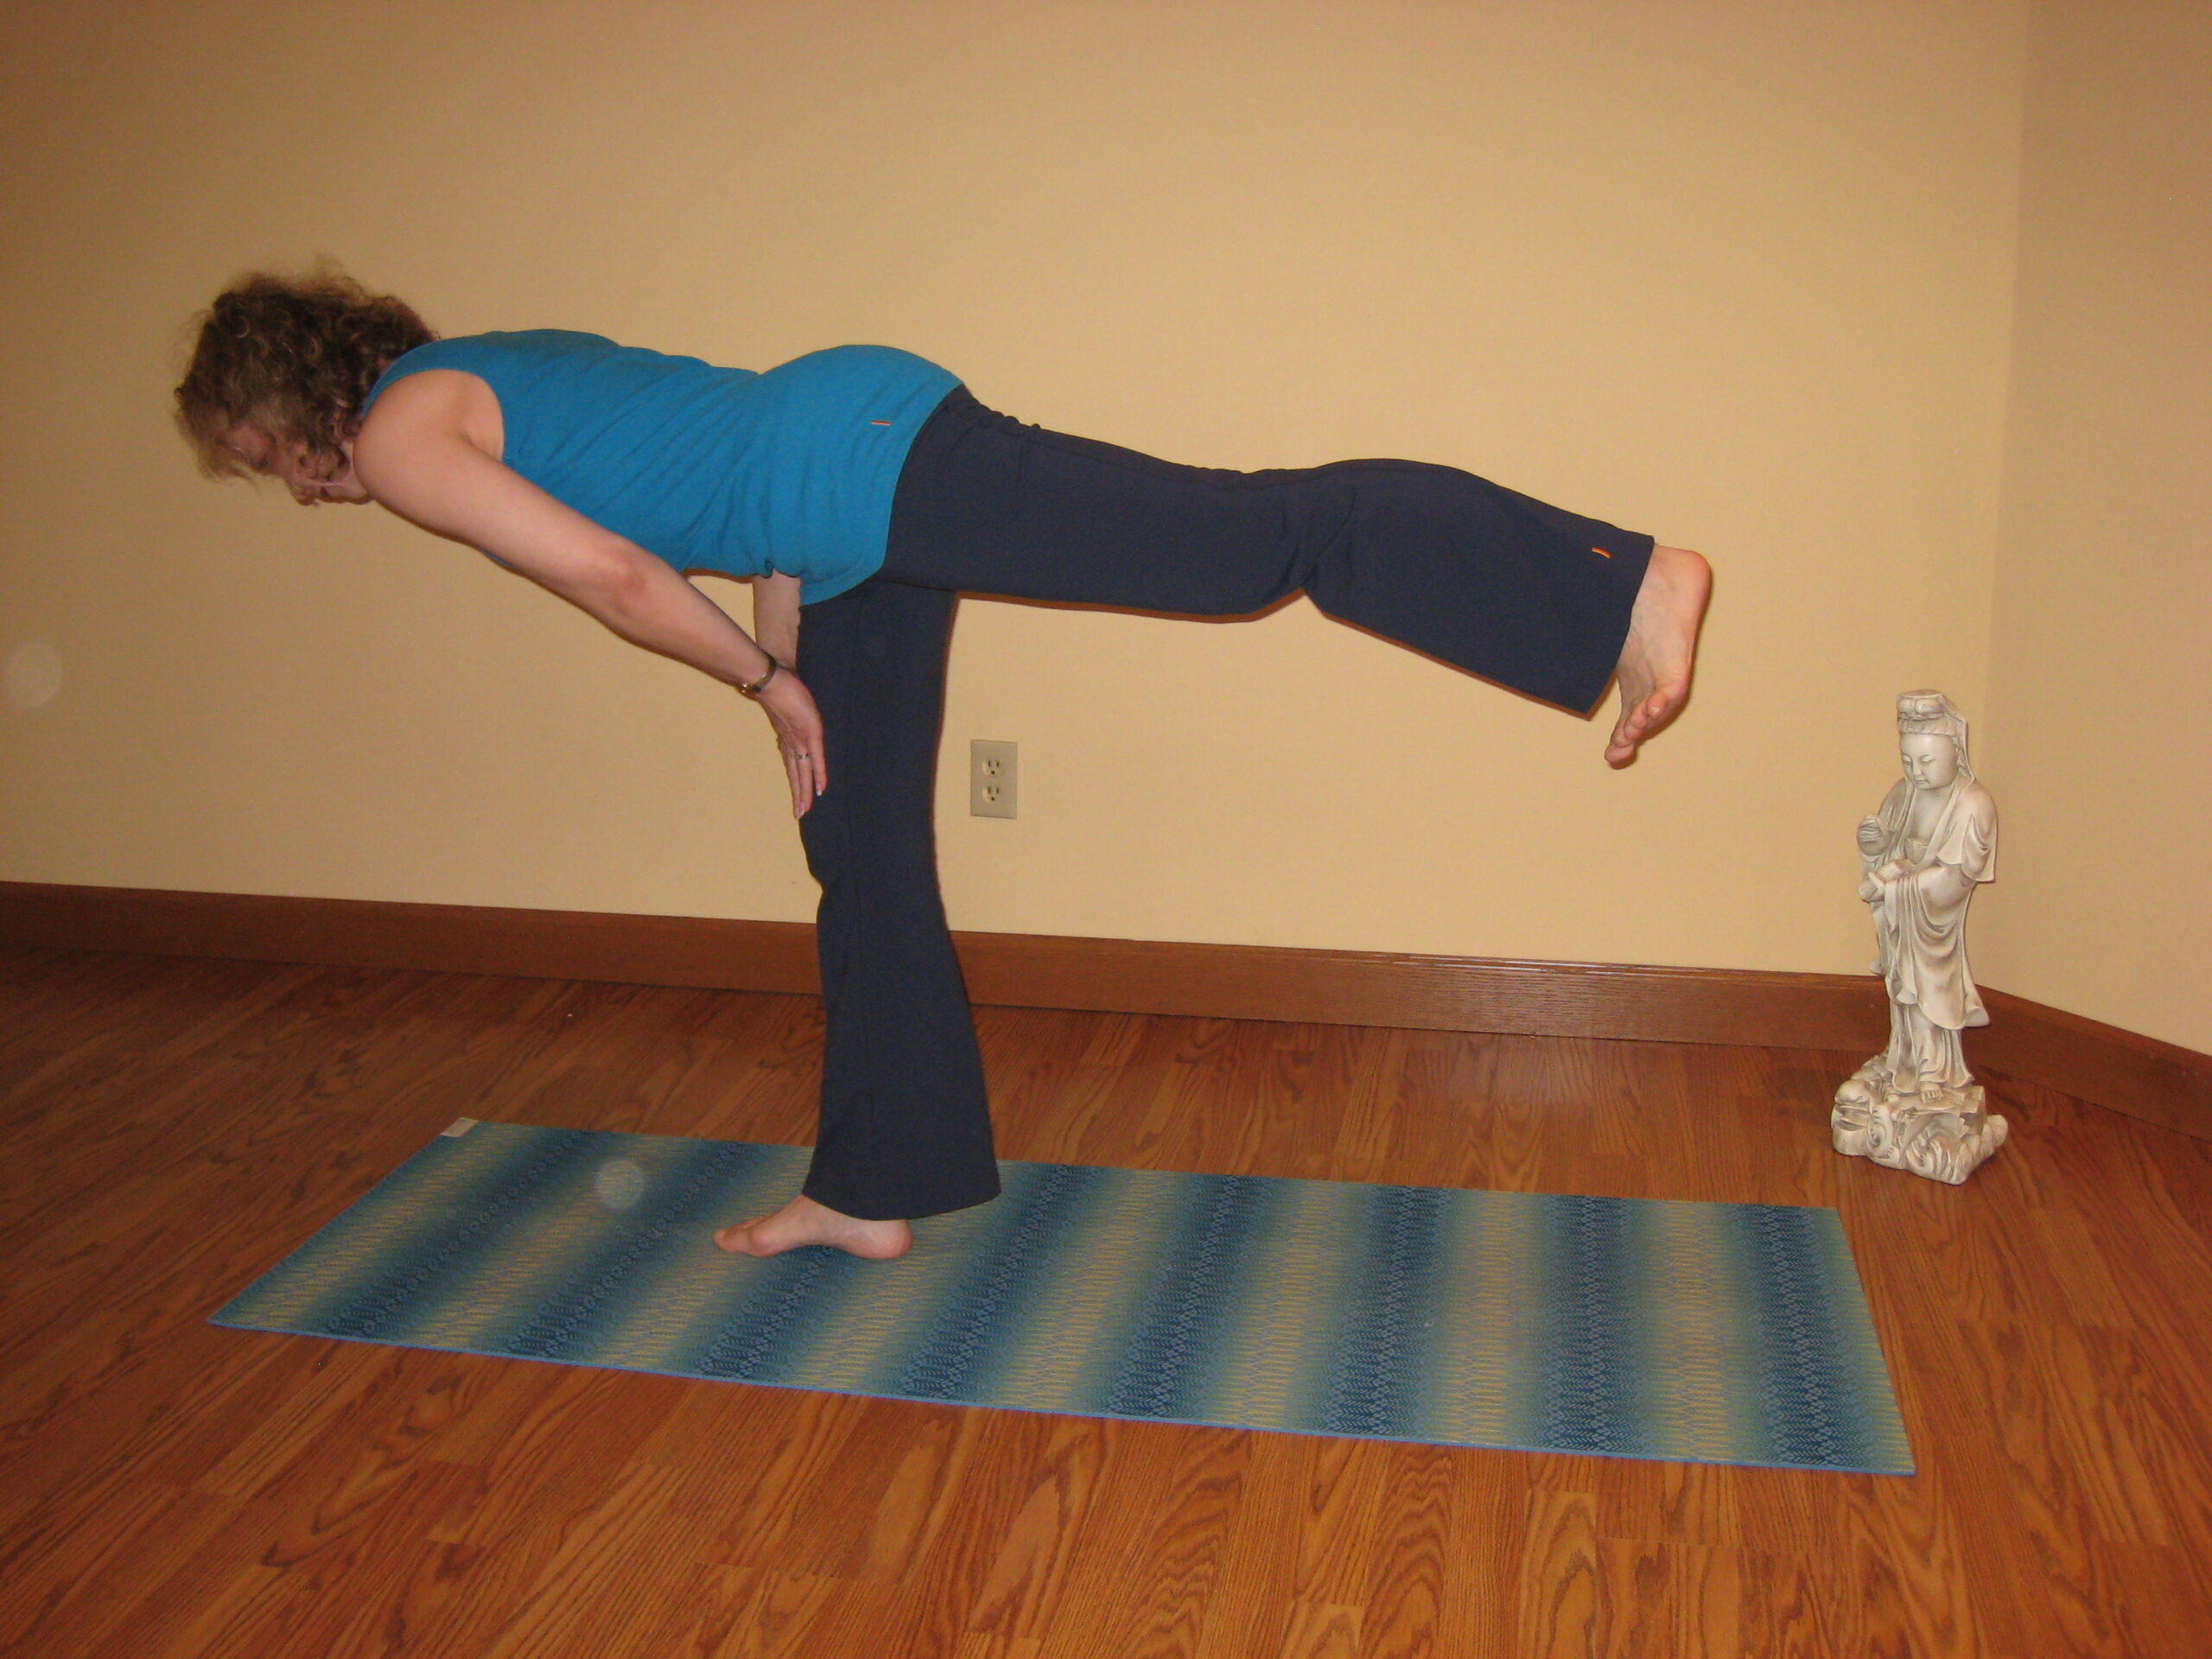
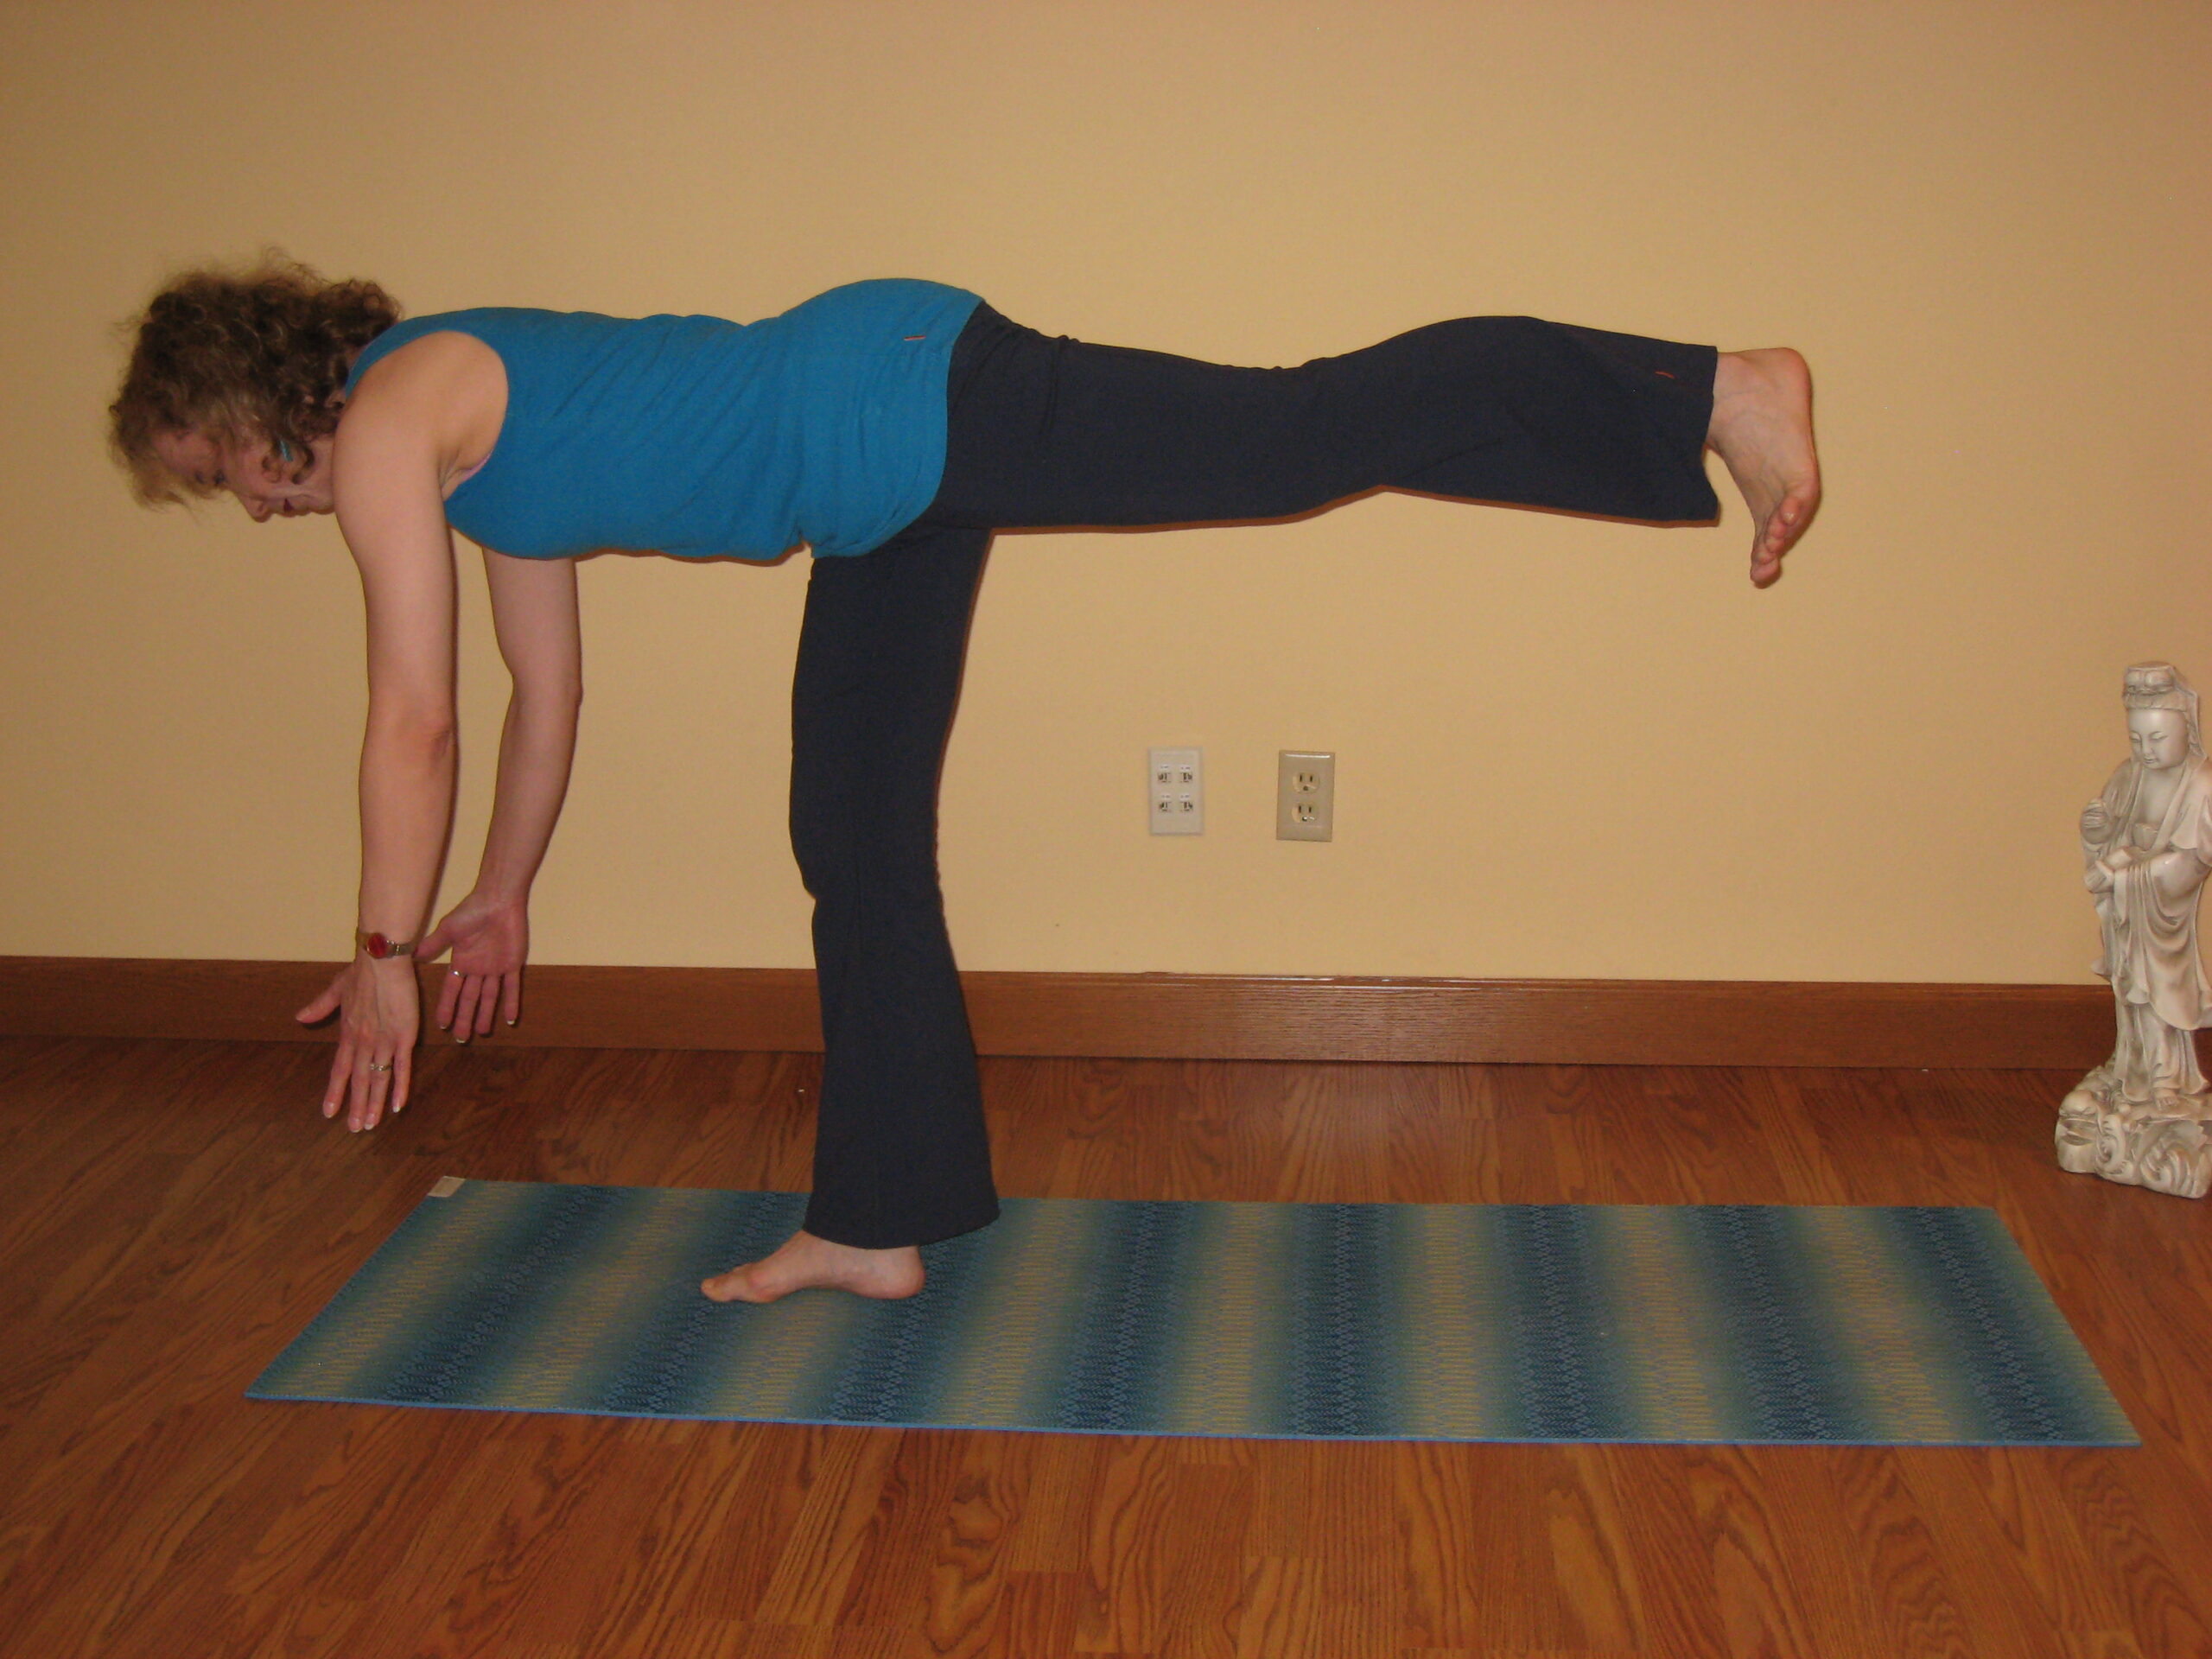
As you start to kick the left leg back, think of your body as if it’s a stick. Hinge at the hip and lower the upper body, as the left leg goes back and up in unison—like the body is a stick. Drop the torso no further than parallel to the floor, and keep a slight bend in the standing leg. “Nose and toes to the mat” which also keeps the back knee facing the floor.
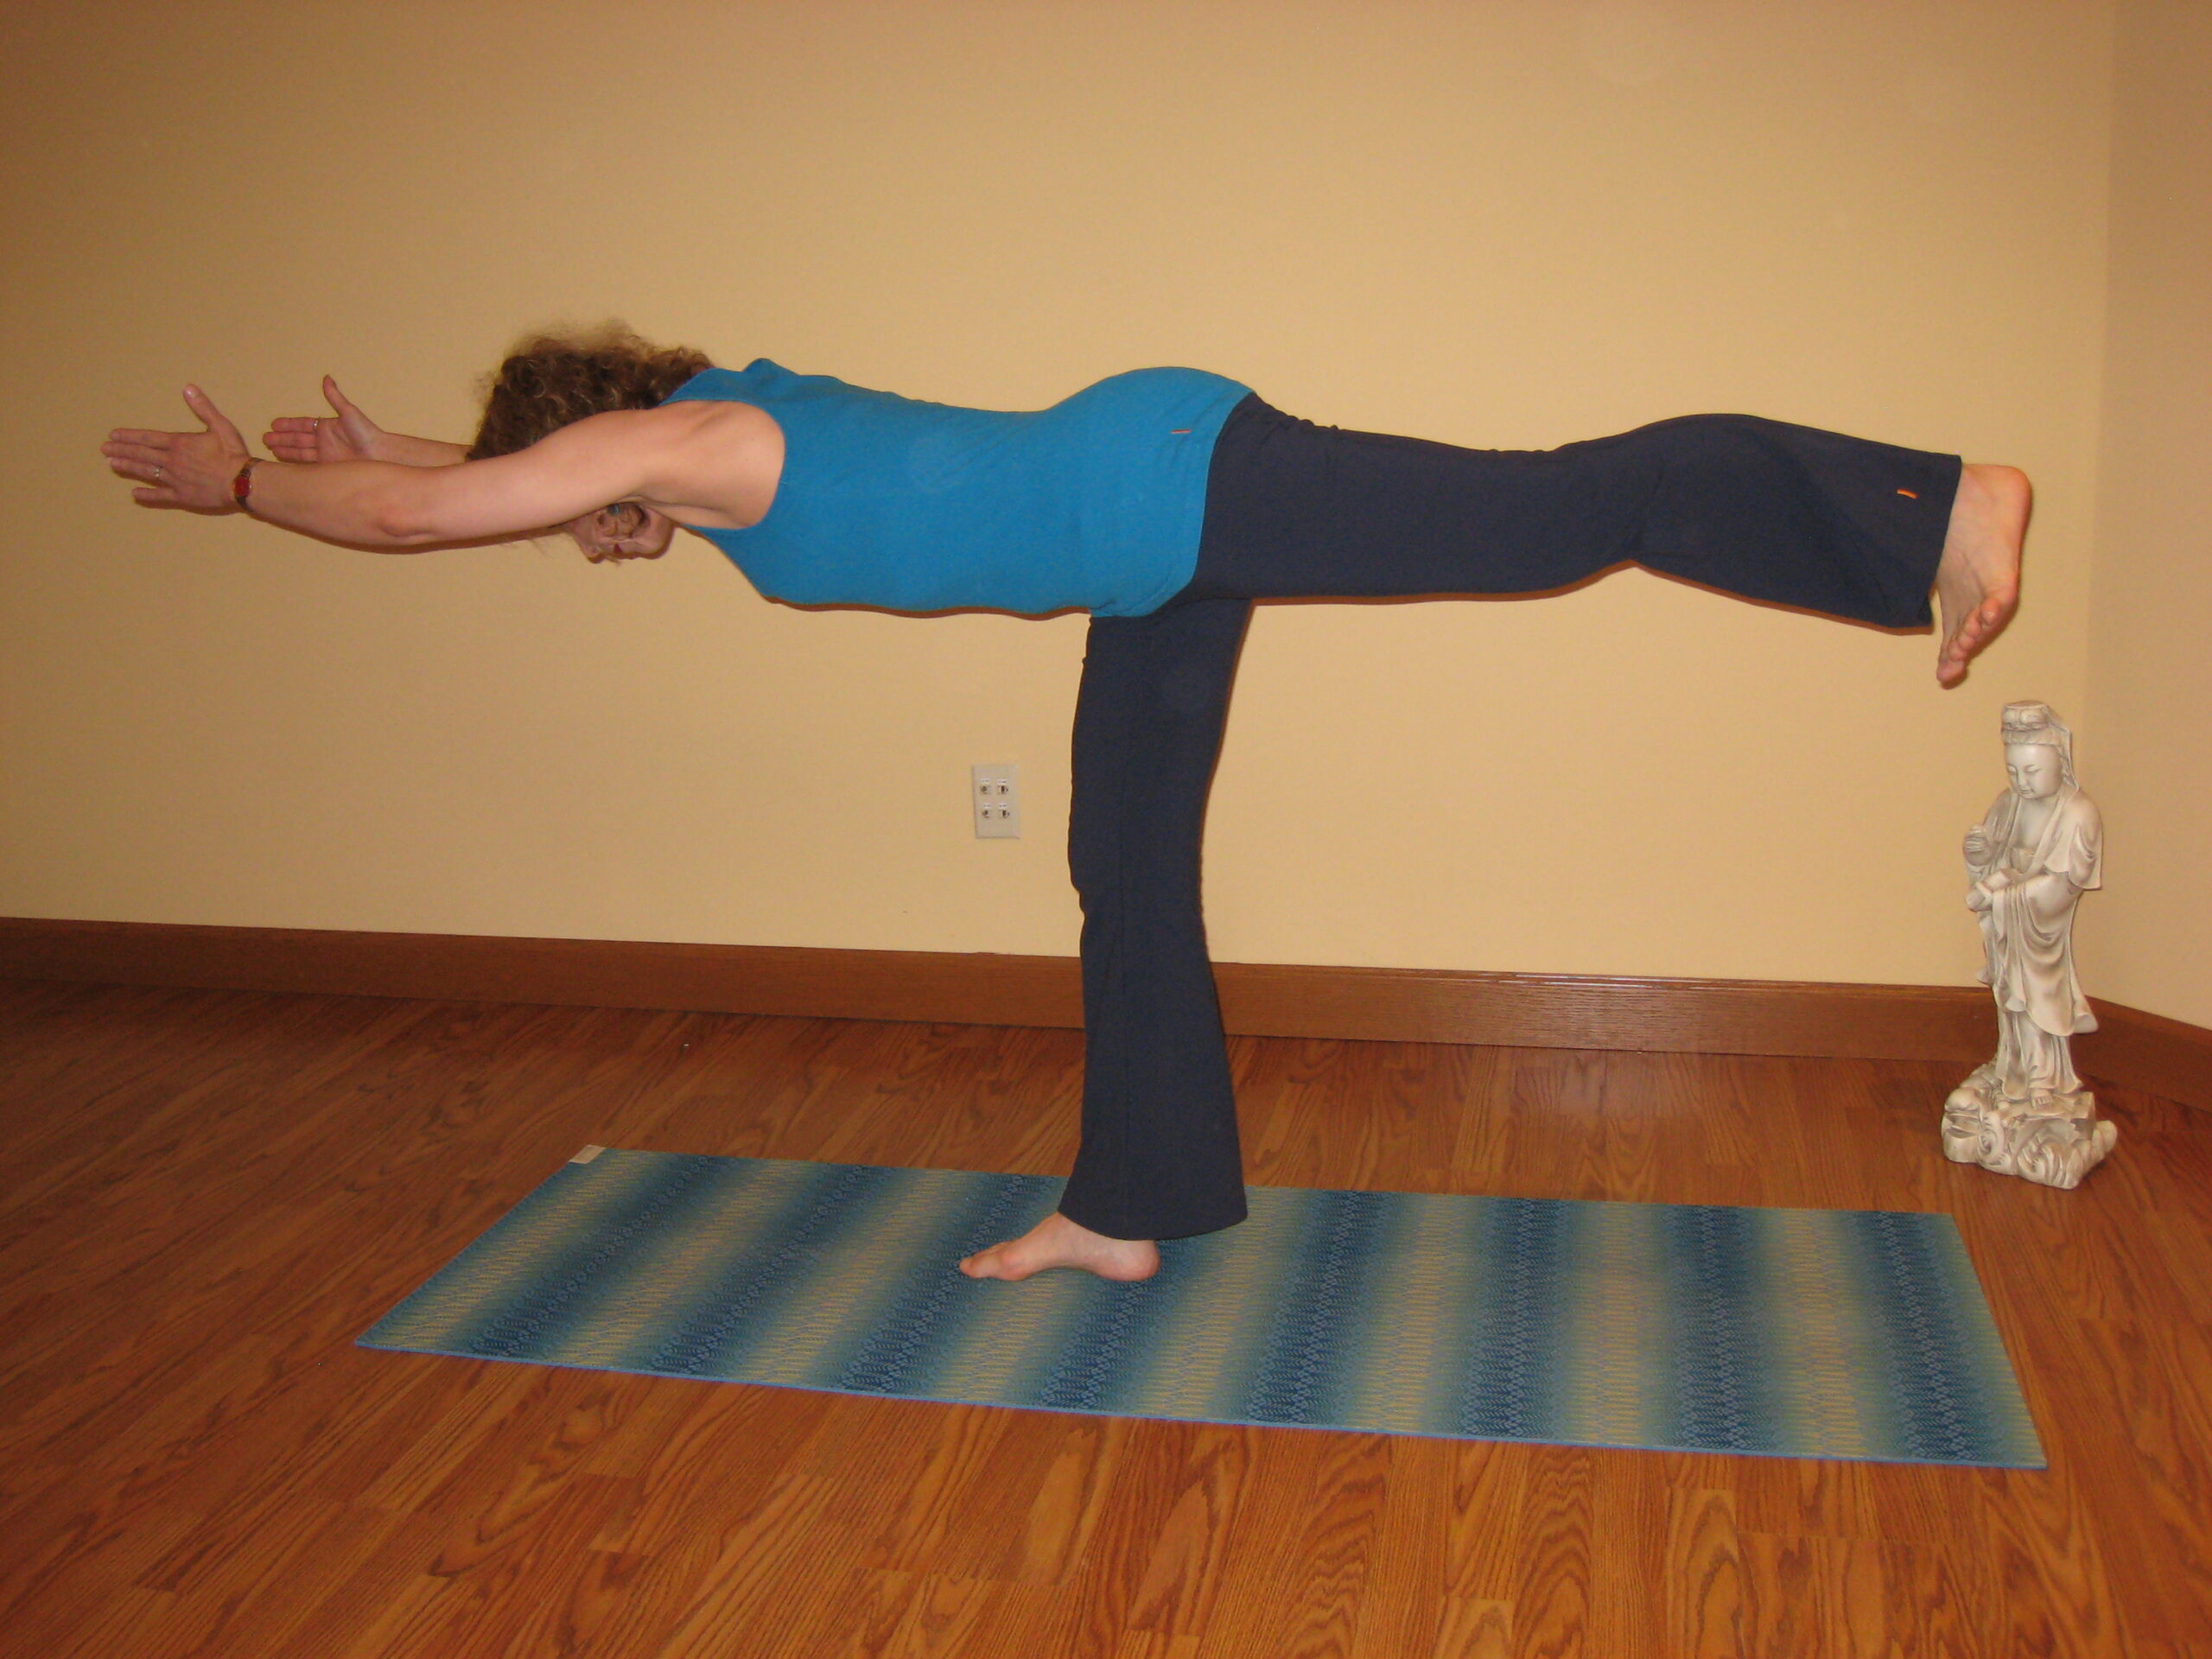
Arm Options: The classic expression of this pose has both the torso and back leg parallel to the floor with the arms stretched forward like superman.
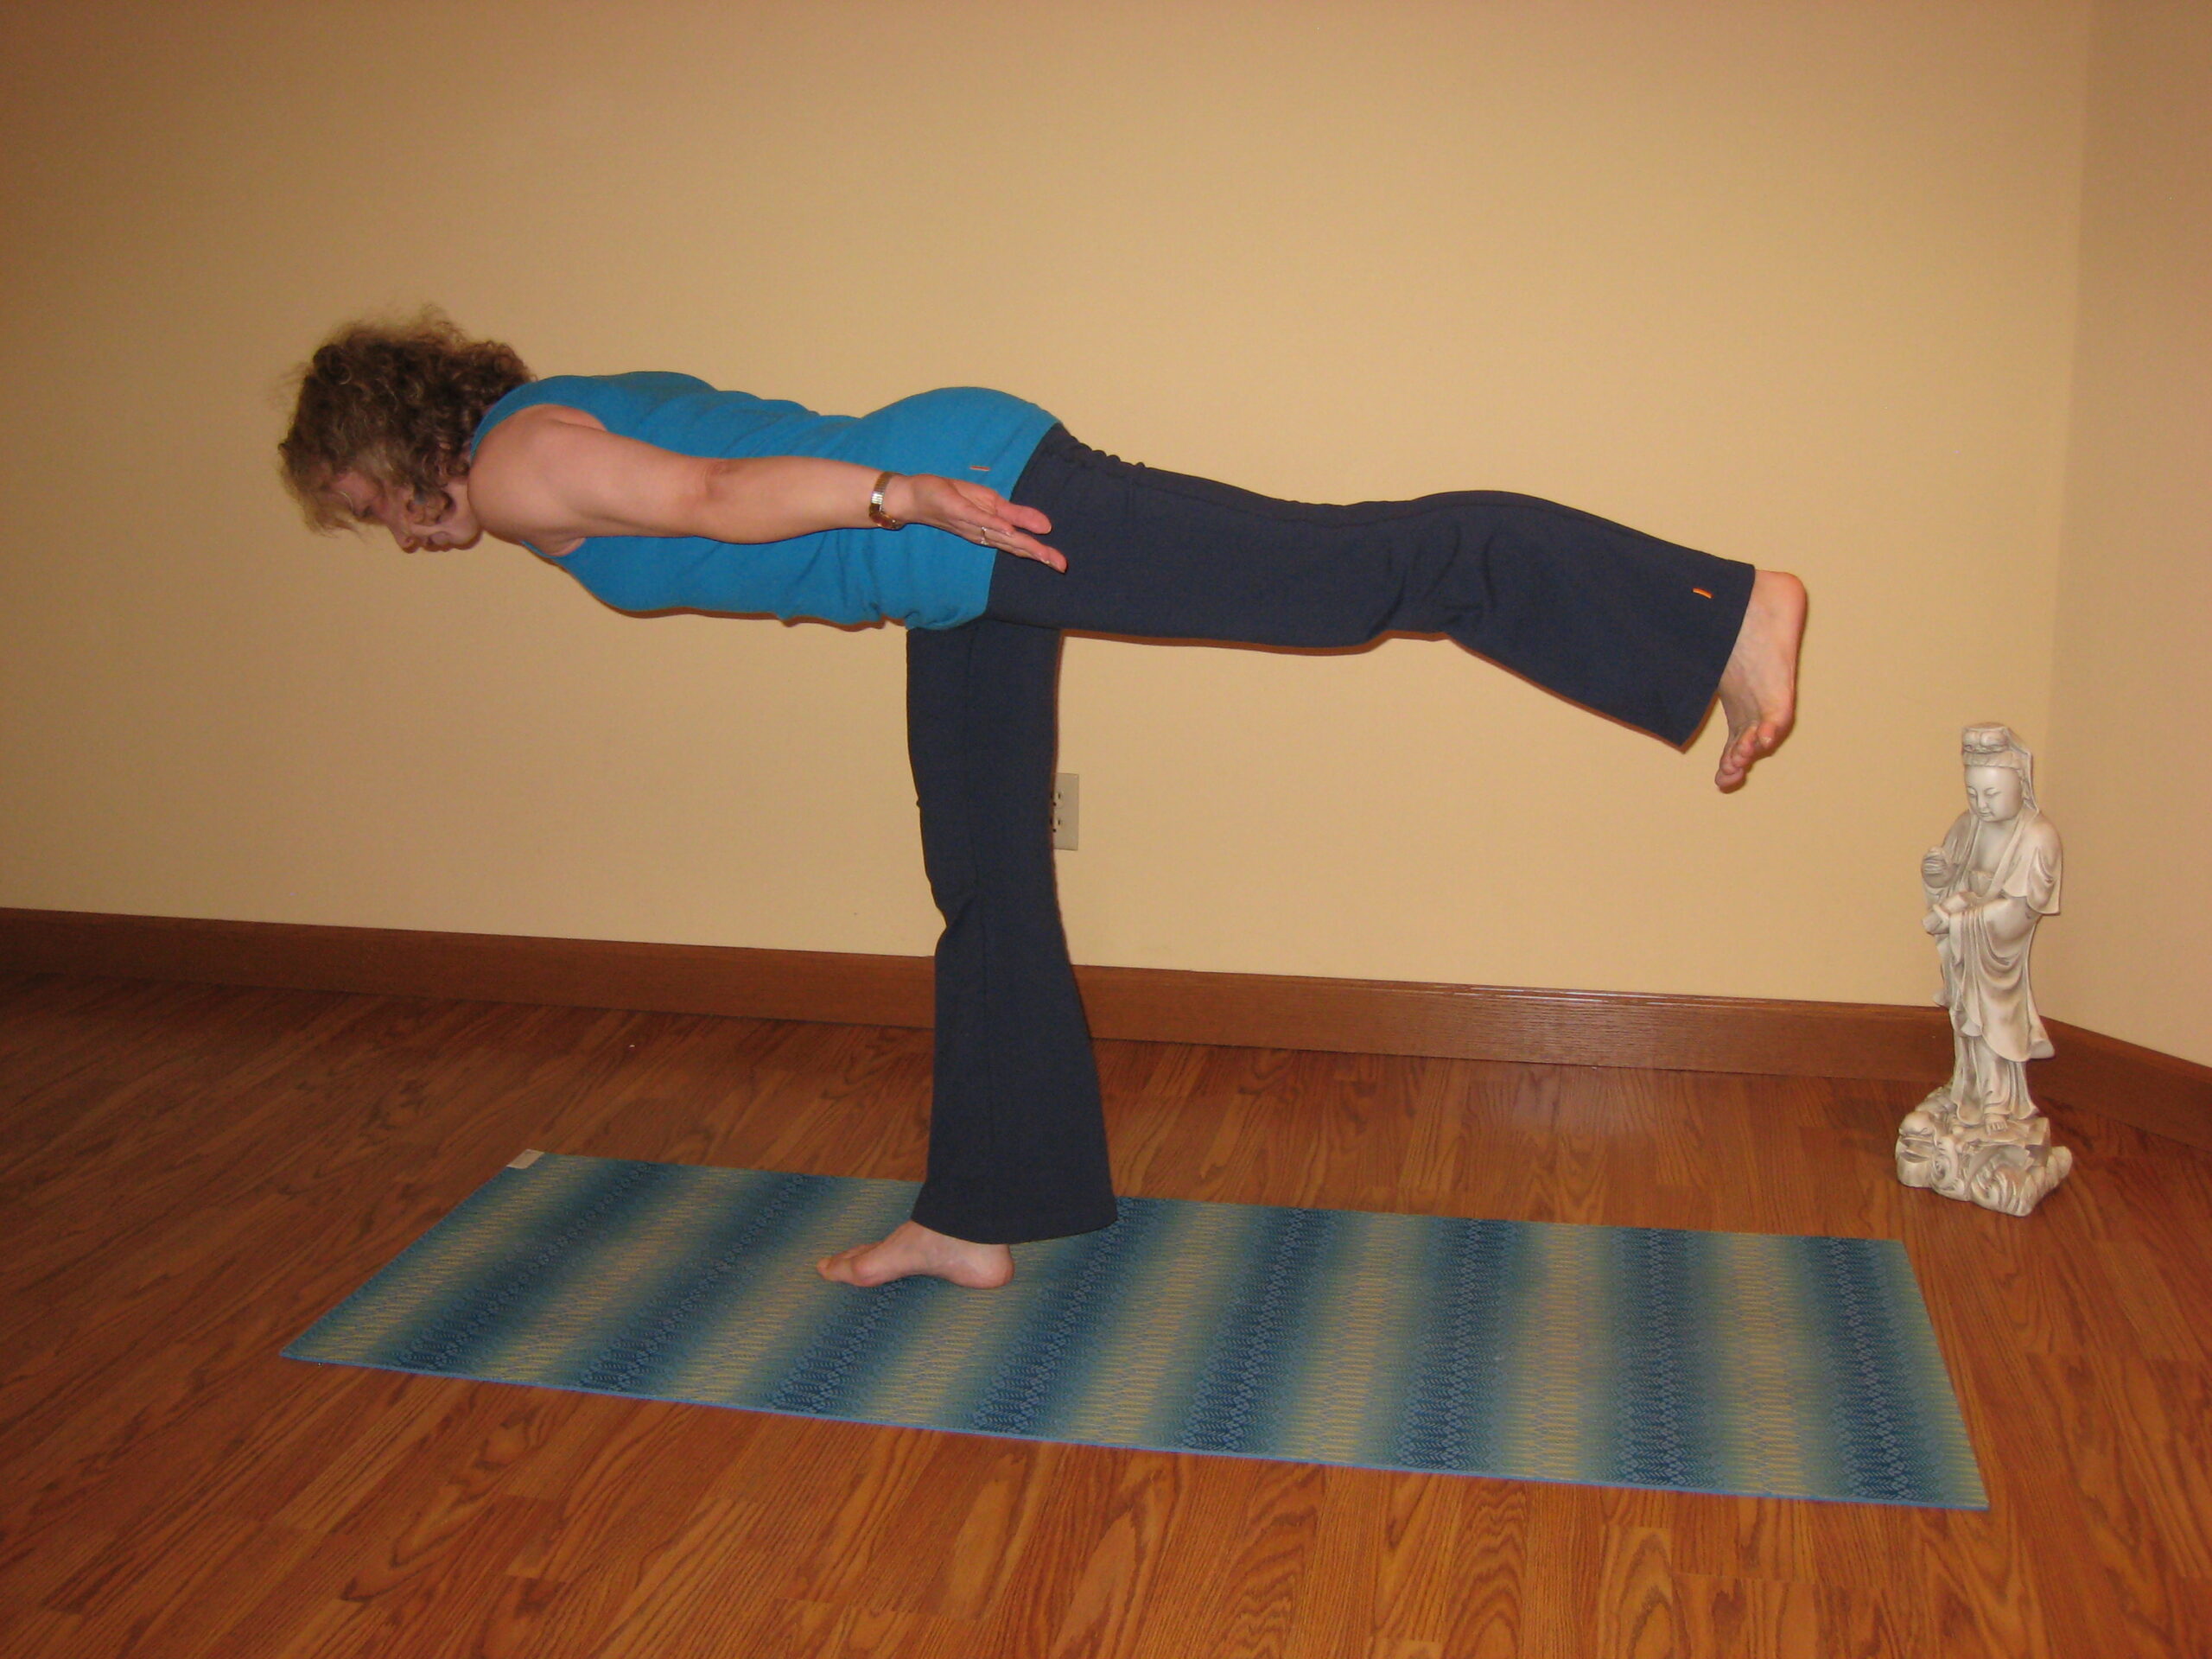
YogaFit® teaches to always cue airplane arms with arms out to the side to protect the low back by shortening the lever length of the body.
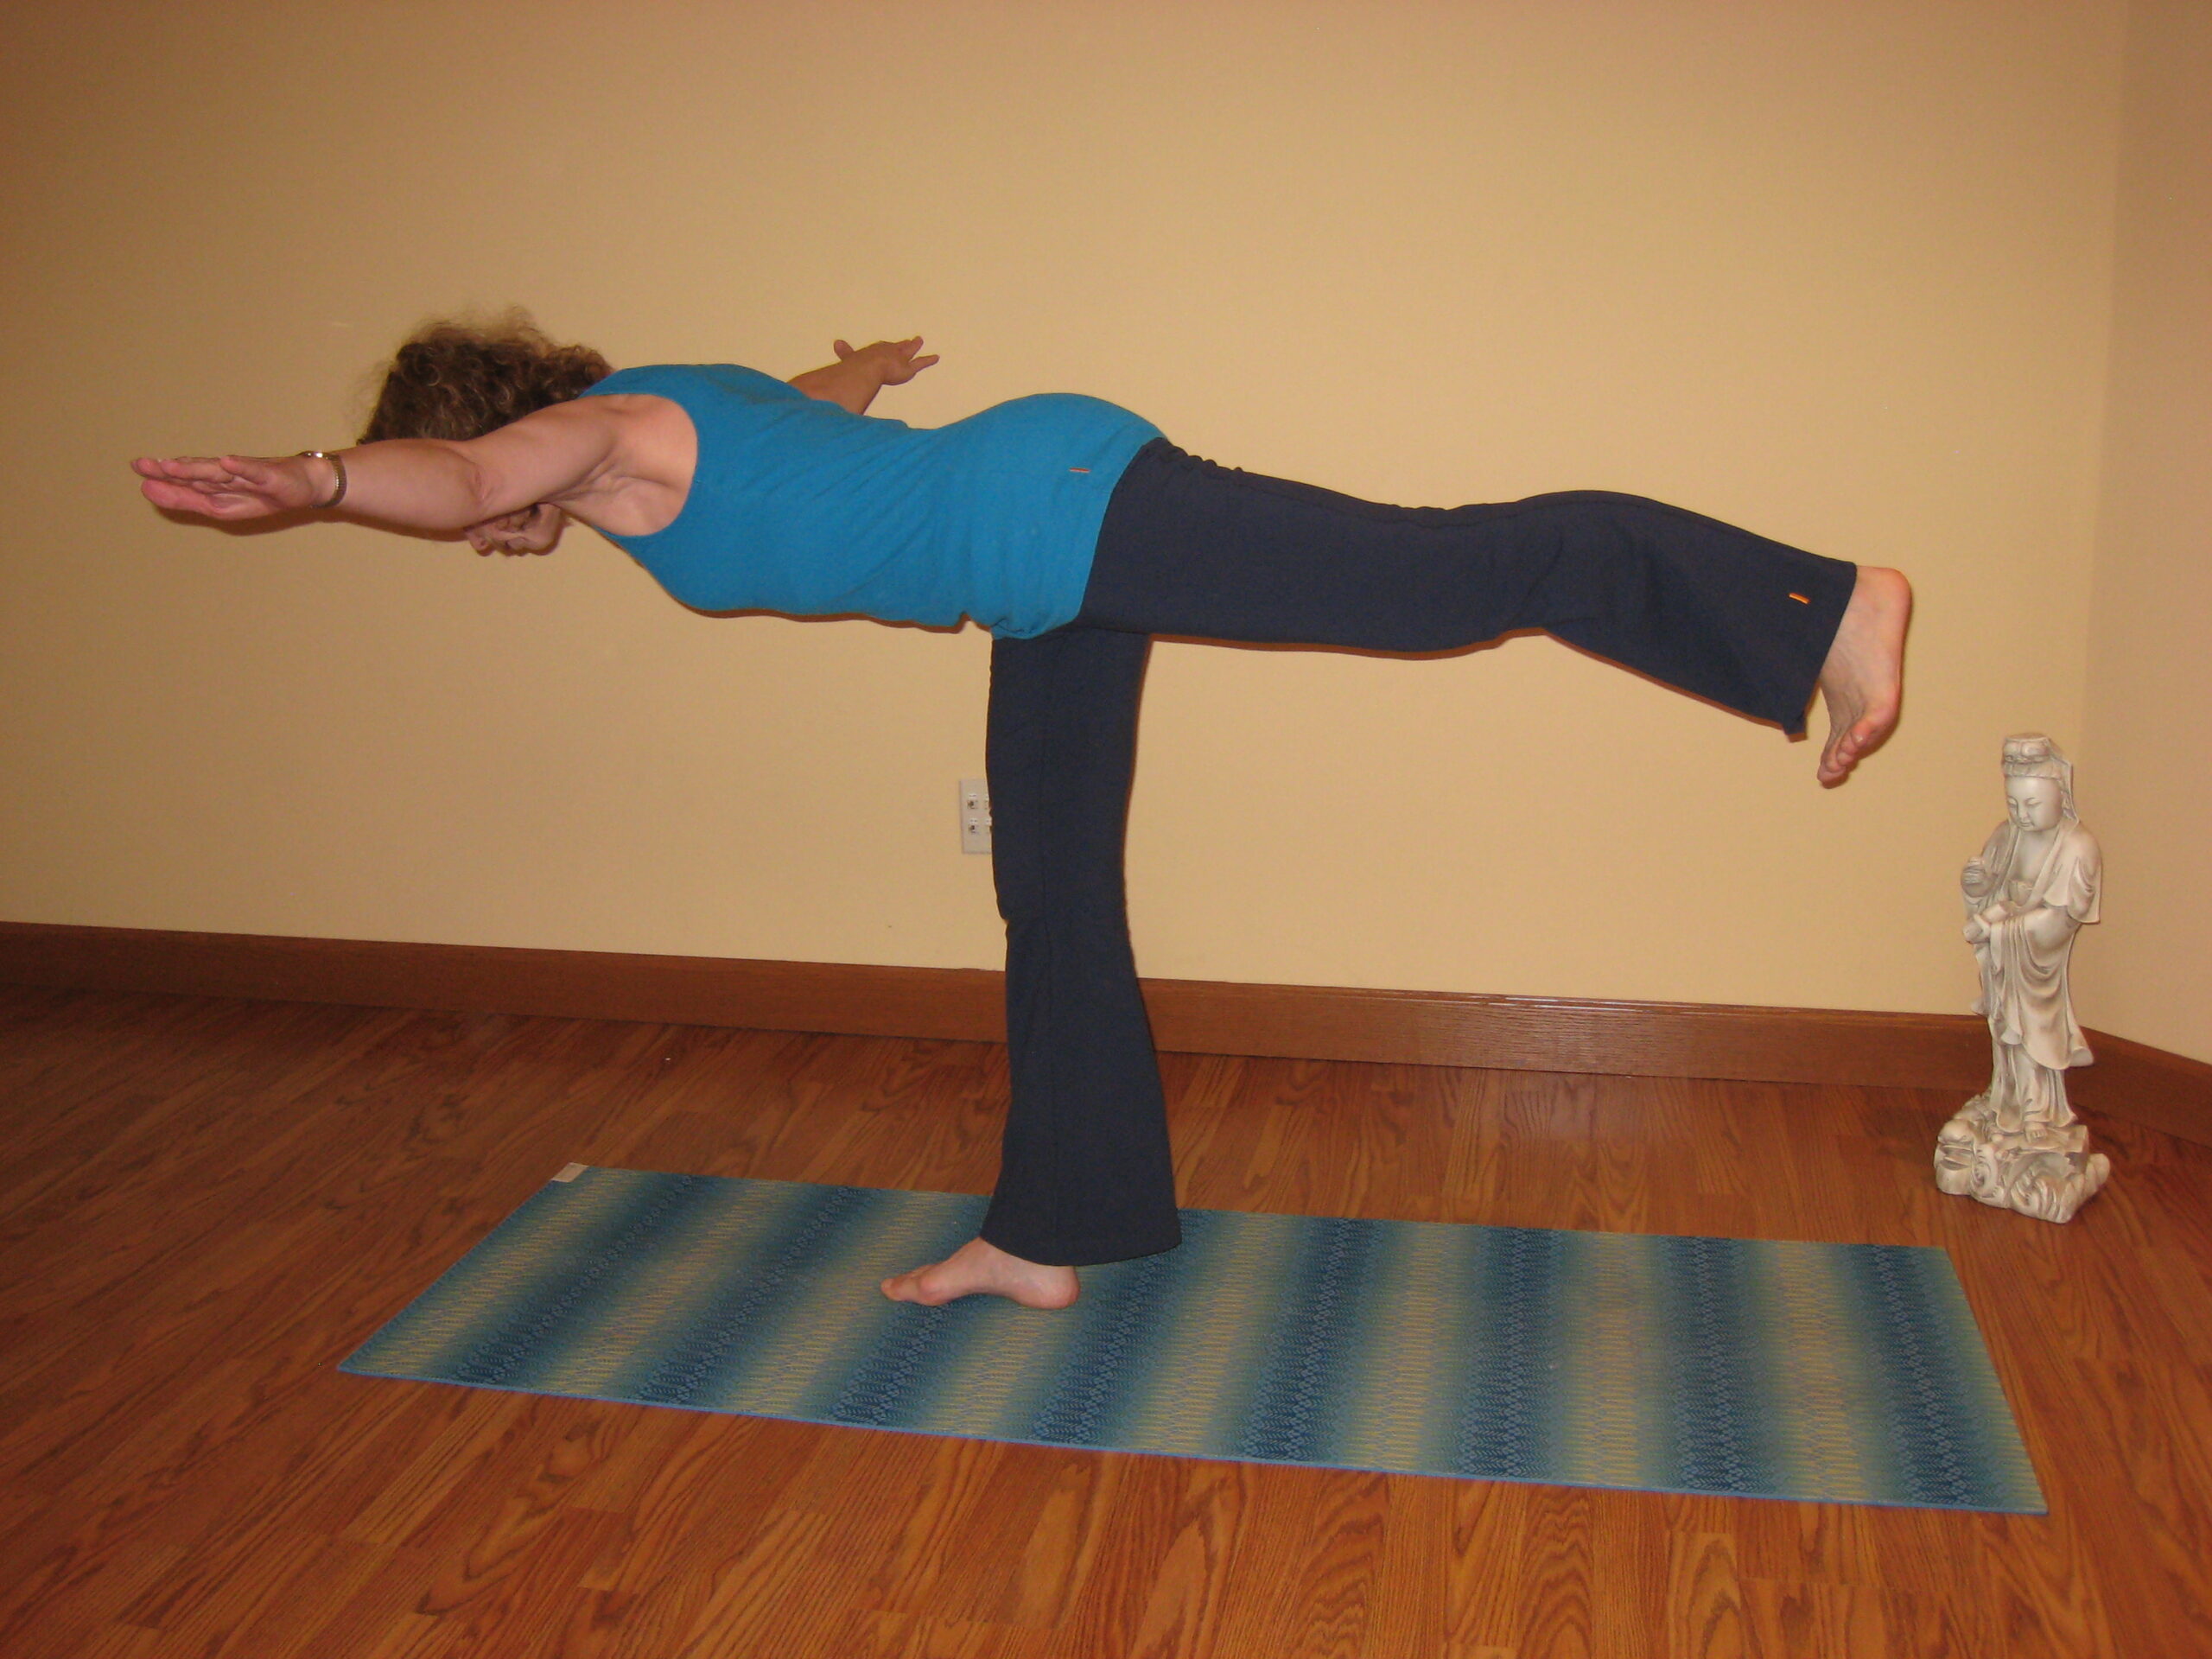
You can also reach the arms back behind you, palms facing up, along the sides of the torso.
I tell my students to go as far forward as they wish, no further than parallel. It’s all about how the pose feels in your body. As you hold the pose, extend out from the hip socket of the standing leg, lengthening the body. Keep the top ribs pulled in resisting the urge to sink into the low back so your abs are strong and your back is flat. Keep the neck happy by keeping your gaze on the floor in front of you, which also aides balance. Lastly, keep the hips aligned horizontally, squared to the mat.
See the beginner’s pose section for other options on both the arms and legs. See advanced options below for other ways to come into the pose.
Benefits:
- Strengthens the ankles, shoulders, glutes, hips, upper and lower back, as well as abs
- Stretches the hamstrings
- Improves balance, focus, memory, concentration, and posture
- Encourages determination
- Increases stamina
Beginner’s tip: Still unsure on your form or new to yoga? You can try a practice pose.
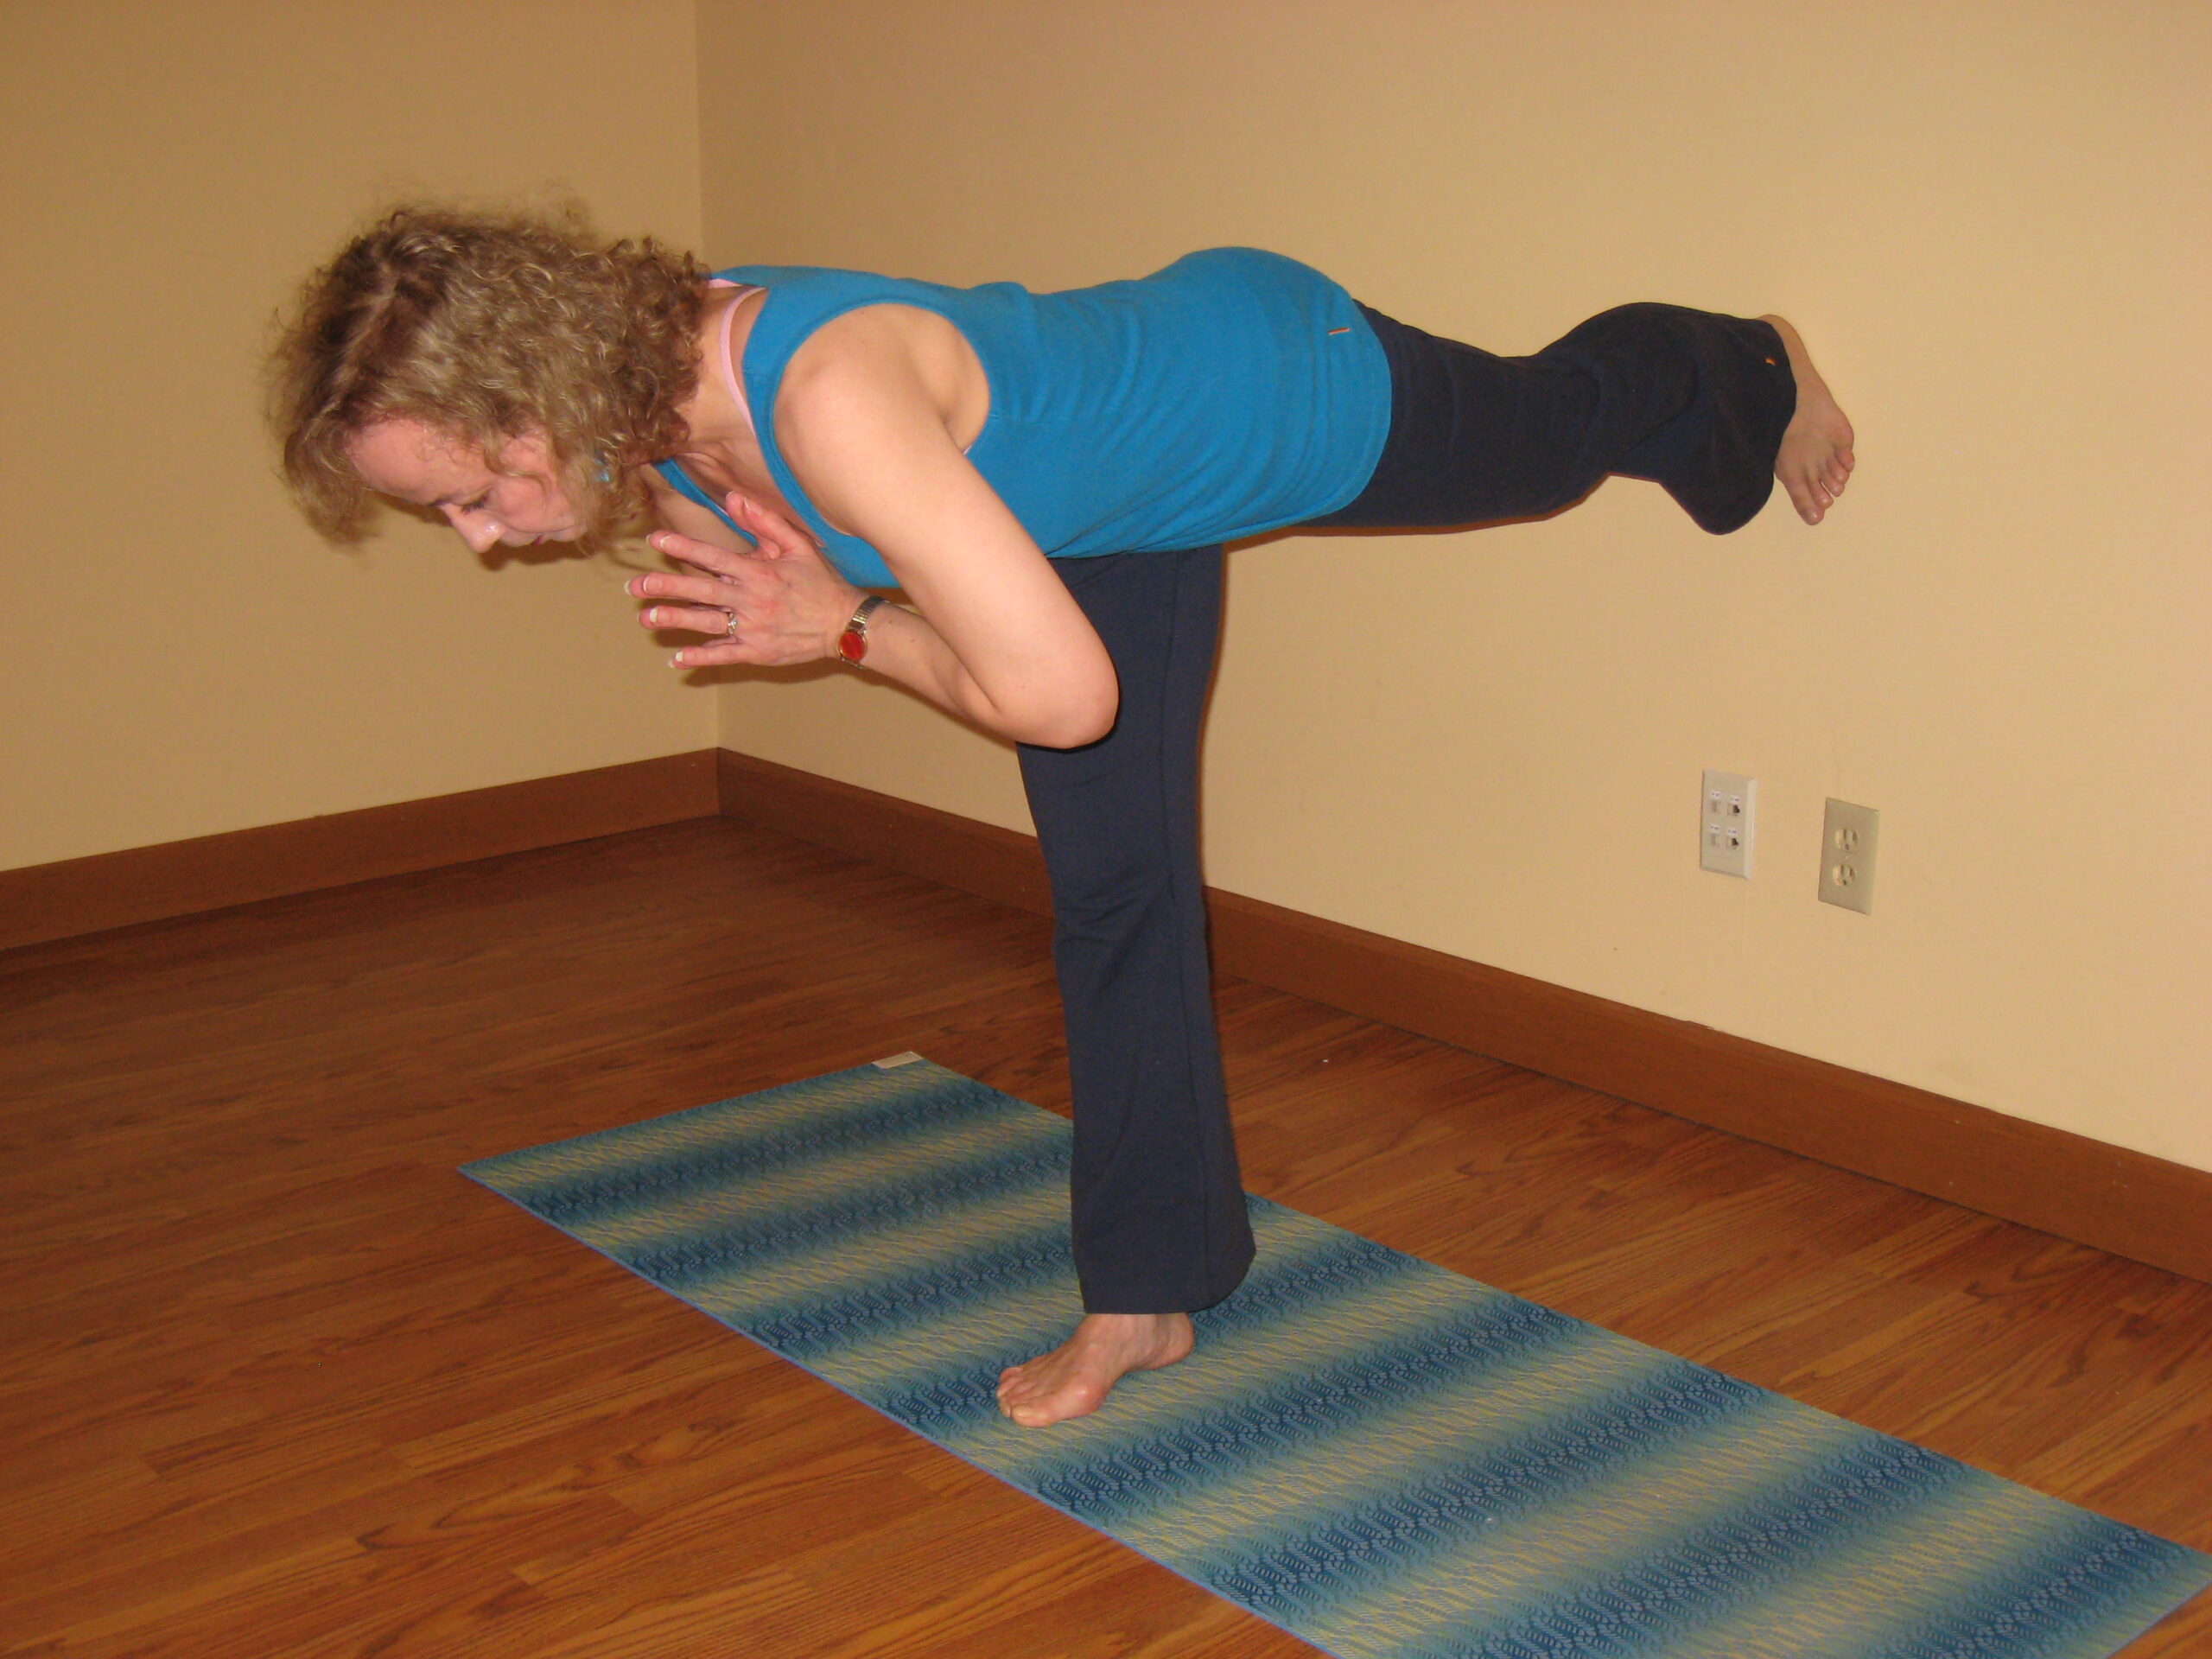
For less intensity, you can add more of a bend in the standing leg, bending or straightening the standing leg as needed for balance. You can also rest your arms lightly on the standing thigh.
Your hands can also stay at heart center in Namasté (prayer hands) position, (not pictured).
Add a chair: For those who have trouble supporting yourself in this pose, you can place your hands on the back of a chair
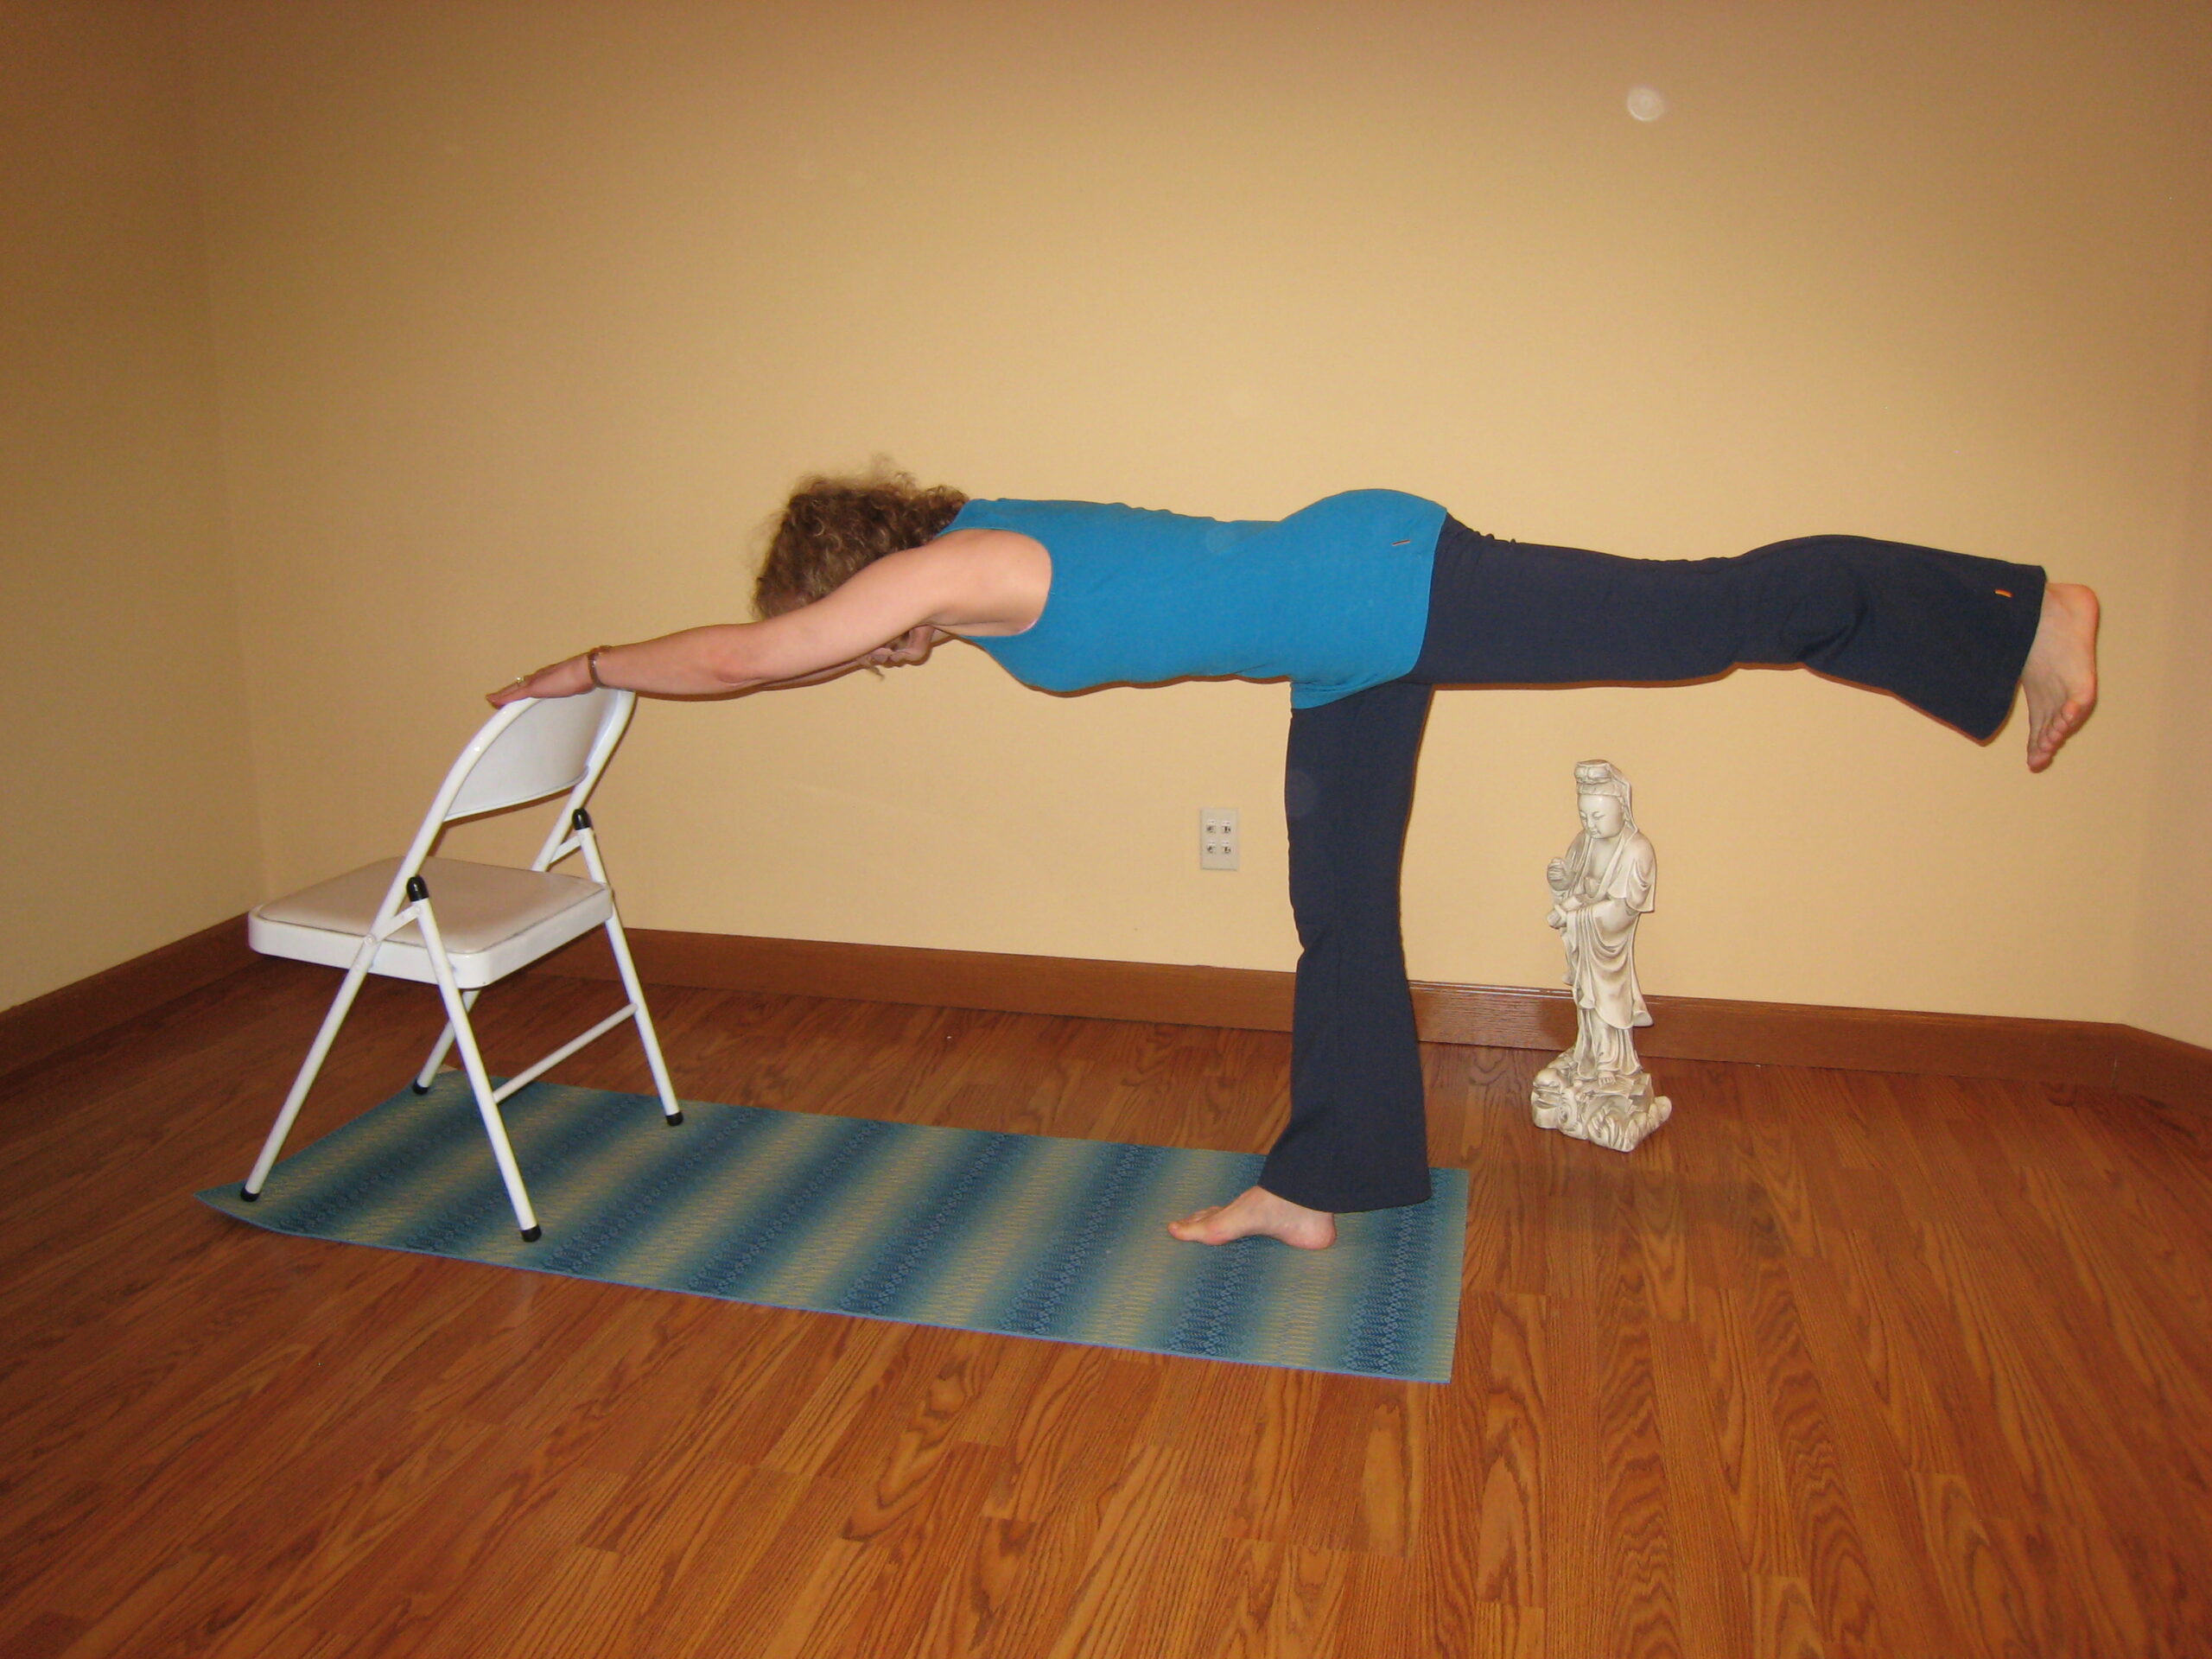
Make sure the chair is fully on your sticky mat! Similarly, you can place the hands on the wall in front of you for support (not pictured).
Another option to aide in balance, but not necessarily “beginners”, would be to stand with your back facing the wall behind you at a distance where kicking the back leg back will land the back foot onto the wall’s surface for support.
Advanced options:
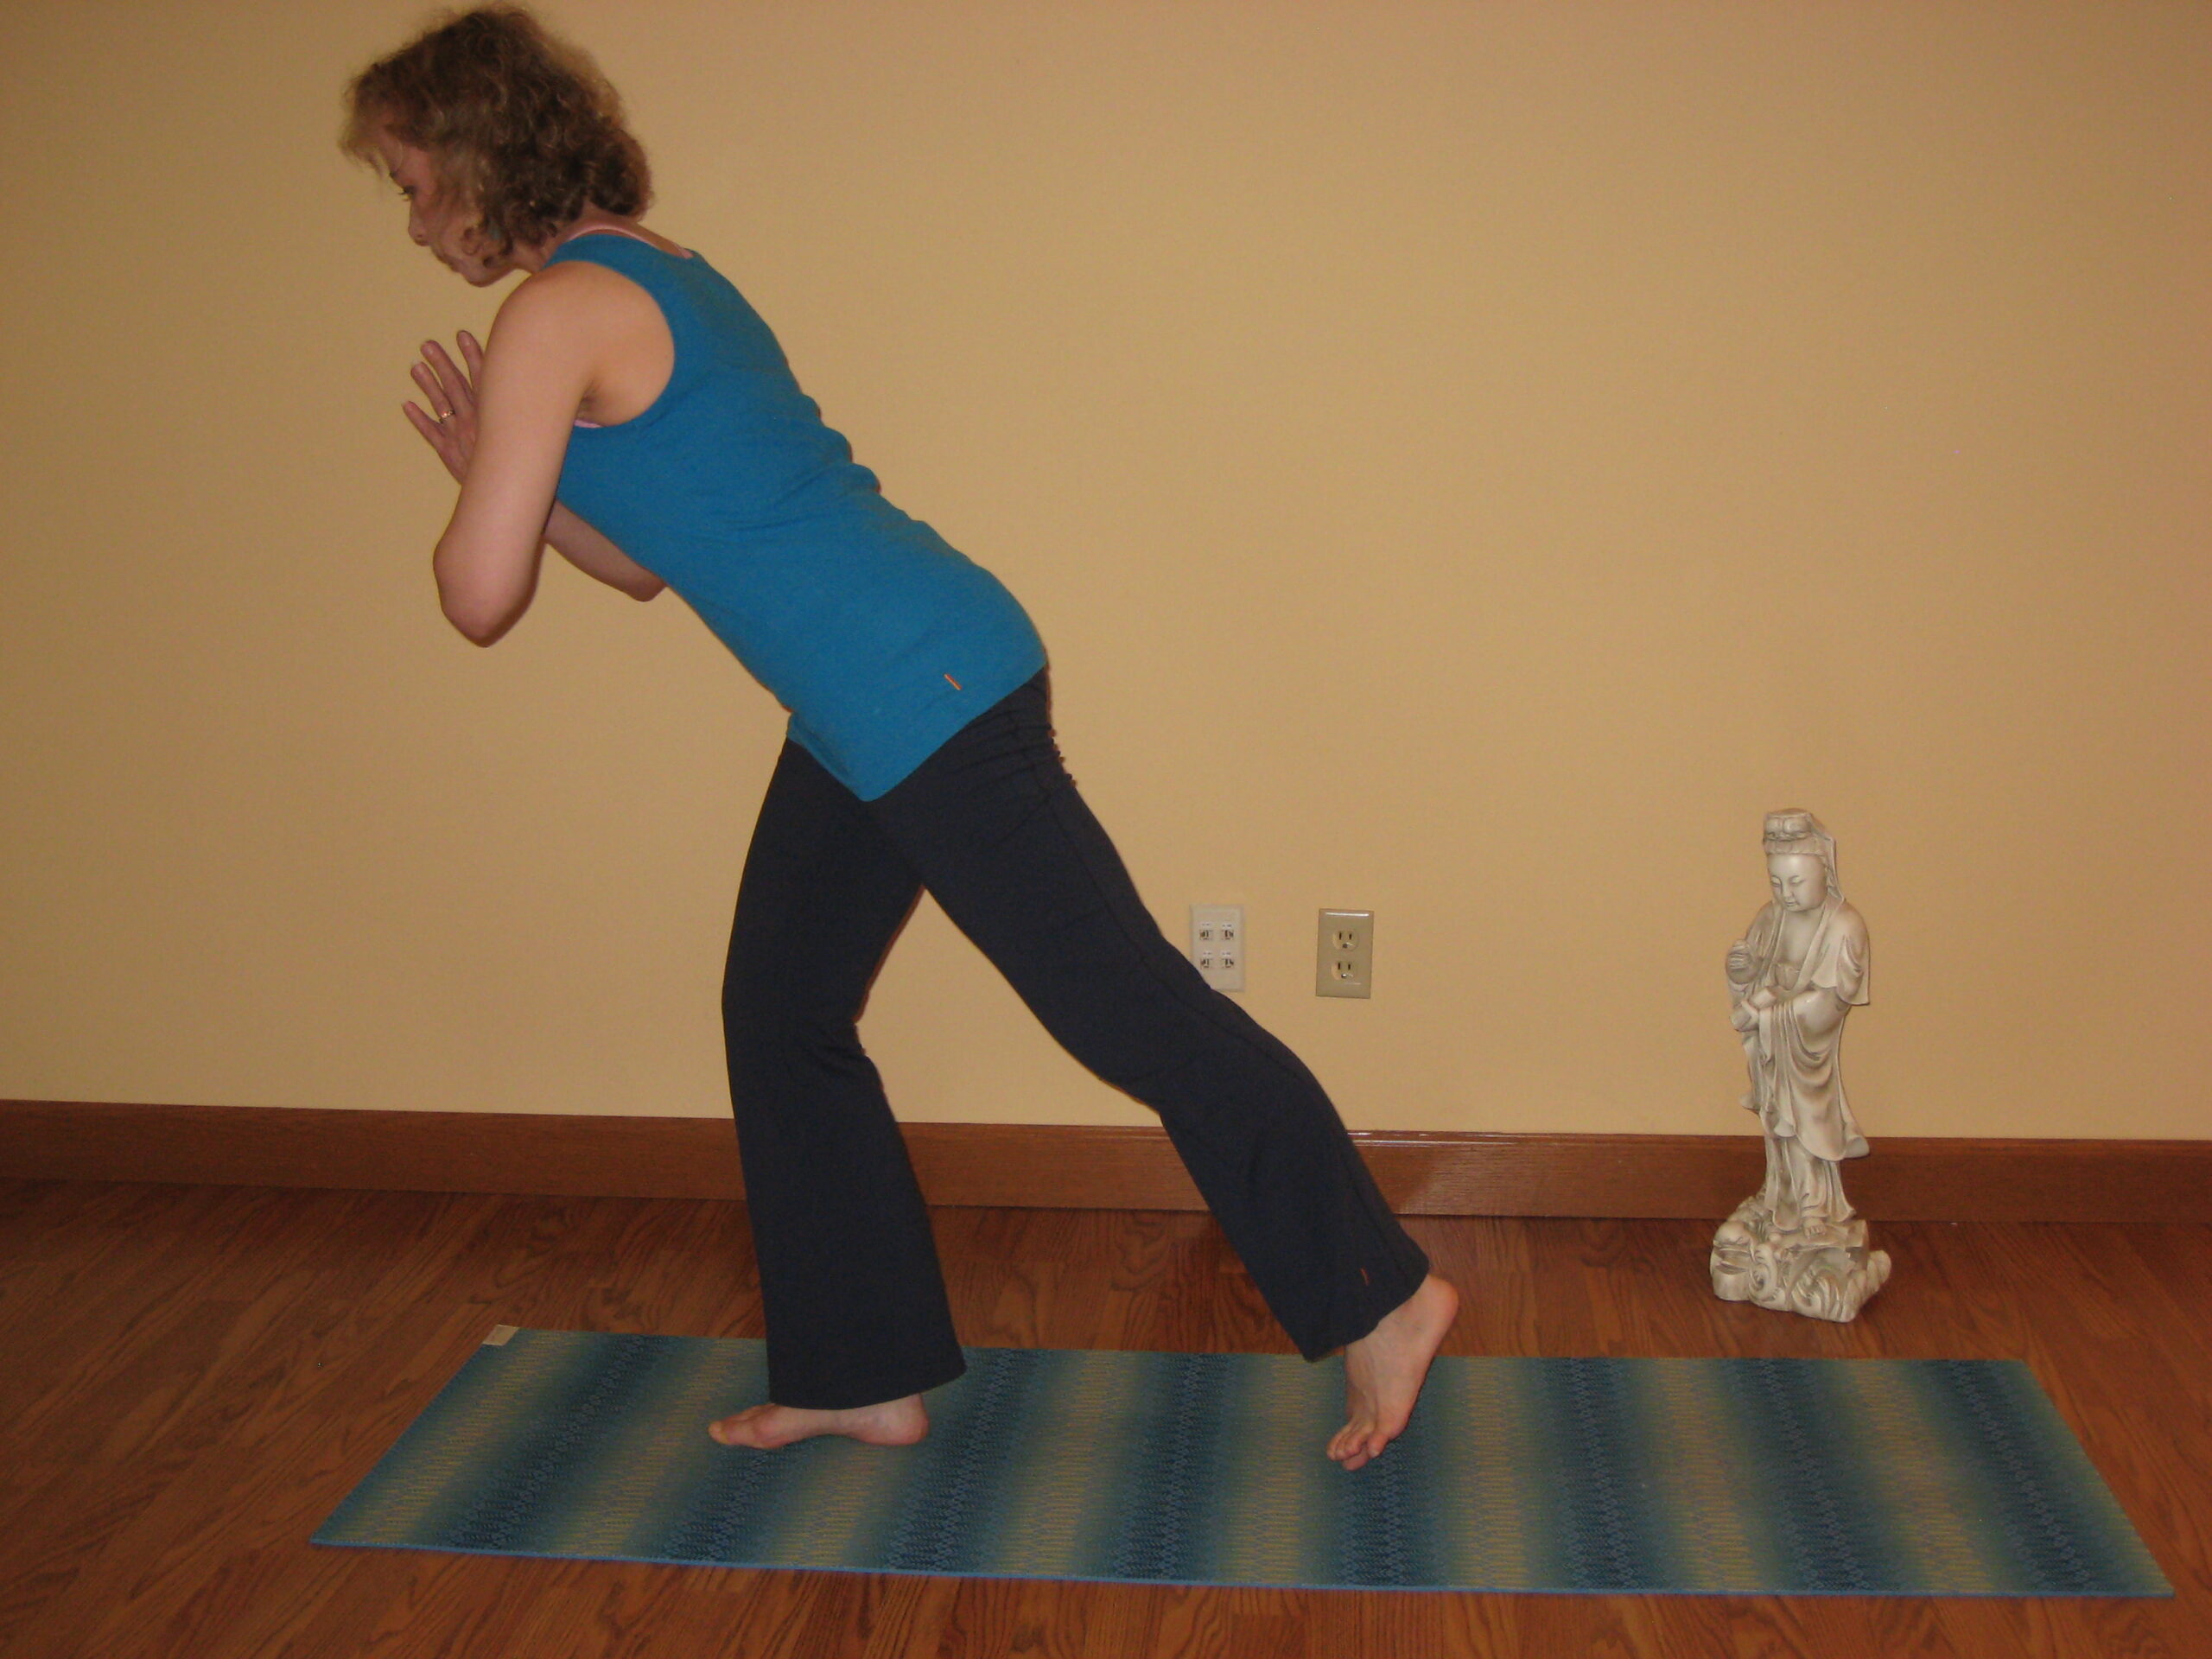
Another option for going into the pose: Stand with right foot forward and left foot back, both legs straight, torso facing forward, and arms raised overhead. Bend your right knee as you go into Warrior I. Keeping the bent knee directly over the heel, extend your torso forward as you straighten the right leg and lift the back leg, shifting your weight onto the forward leg, and keeping a slight bend in the standing leg. Try not to let the momentum of the shift forward swing your weight onto the ball of the front foot, as this will affect balance negatively. Resist this by focusing on slow, controlled movements, on grounding the heel of the standing leg into the floor, and on flexing the back heel toward the wall behind you.
For more challenge, you can come into Warrior III from the bottom up:
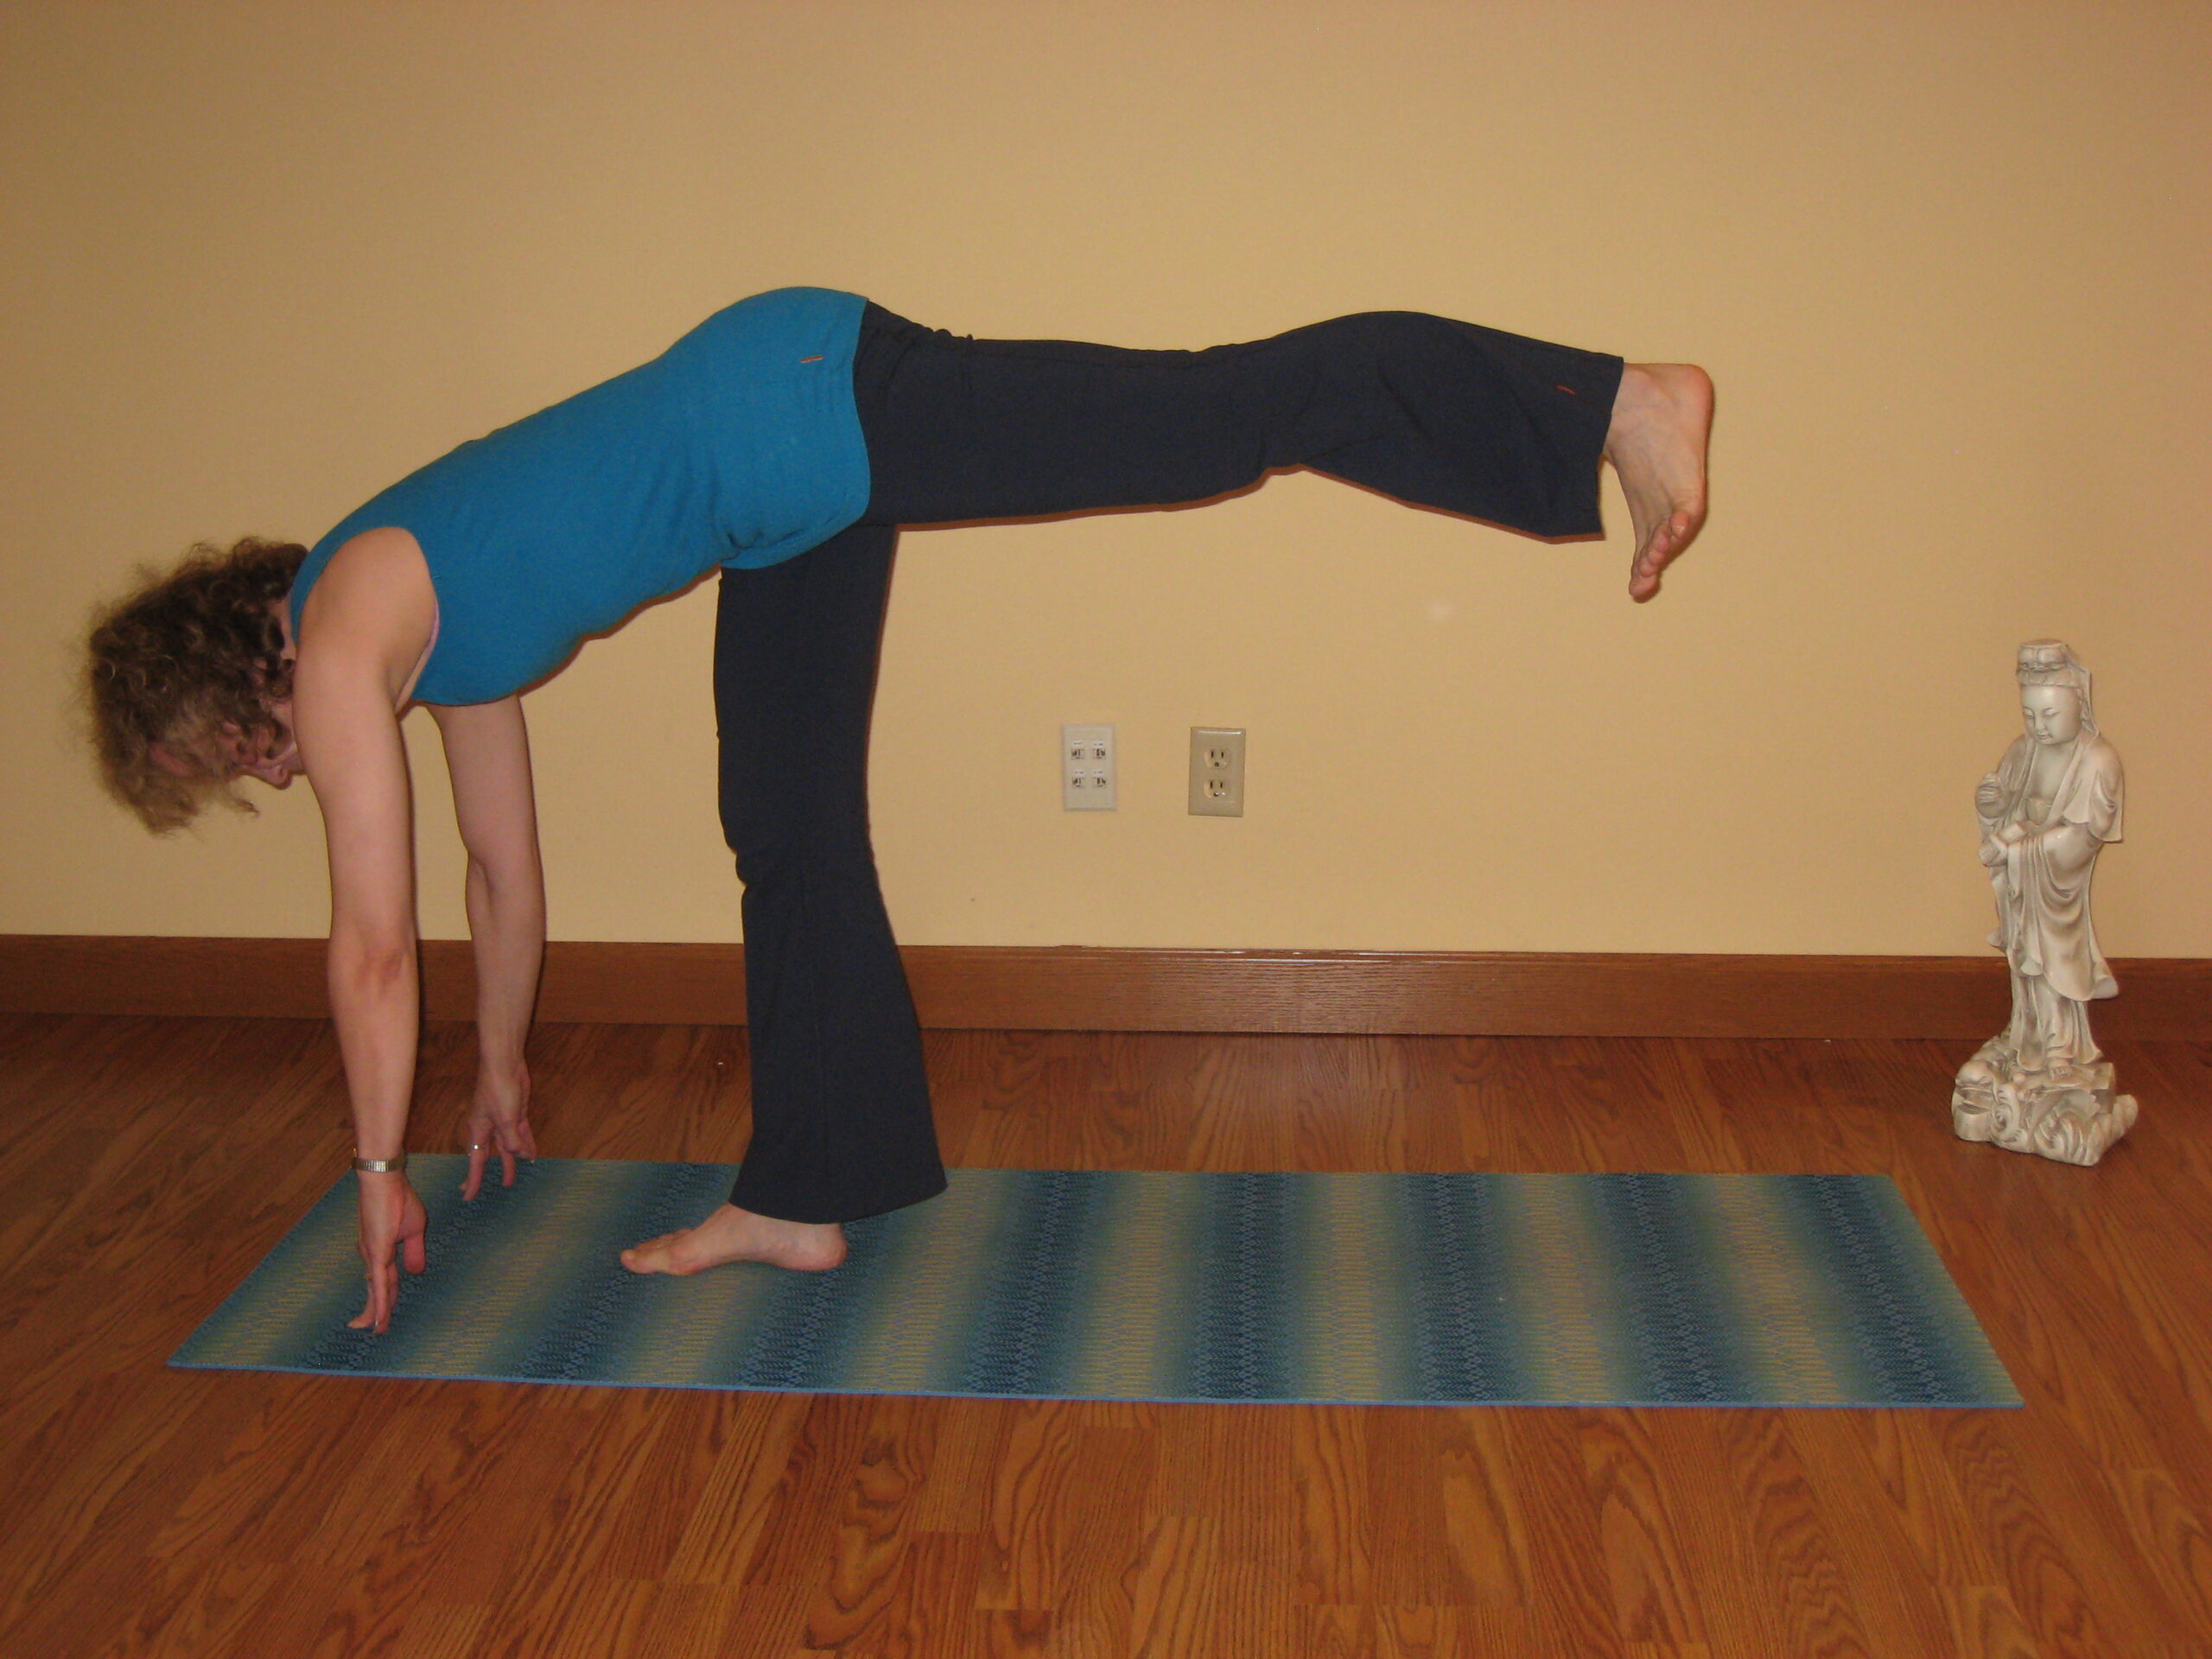
Start from Pyramid Pose—briefly described here as right leg forward and left leg back, toes facing forward, torso folded forward over front leg, head toward shin. Bend the front leg as you shift your weight forward on the front foot and place your hands to the floor in front of the right foot, shoulders stacked directly over wrists. Simultaneously lift the back leg up, parallel to the floor, pausing in three-point pose, “nose and toes to the mat”.
Engage the quadriceps of the standing leg, lifting the kneecap up. Then use your core strength as well as the grounded front leg to lift the torso up to parallel to the floor while straightening the front leg, keeping a slight bend in the standing leg.
Similarly, you could start this pose from a low lunge with hands framing the right foot, simply shift your weight forward on the front foot and follow the instructions above.
Try this flow for added focus on concentration, focus, and stamina development: I learned this flow from my good friend and yogini, Tracey Mortensen, owner/founder Inspiring Actions, LLC in Hudson, WI. From three-point pose (pictured above), engage the front thigh by lifting the kneecap. Using your core-power slowly lift the torso up to parallel—Warrior III. Without stopping, continue flowing the back leg down and the torso up just to where the back toe taps the floor, and then flow back down toward the floor.
Doing this flow a few times up and down, increases the benefits of this pose. I favor the “Namasté” position of the hands when doing this pose.
Contraindicated for:
- Recent or chronic injury to the hips, knees, back, shoulders, or neck.
- Those with high blood pressure or other cardiac condition