Practice yoga pose
Tree Pose (Sanskrit terms: Vrikshahsanna)
Benefits:
- Strengthens the abdominals, legs, ankles, knees, hips and spine
- Stretches the groins and inner thighs, increasing their flexibility
- Stretches and strengthens chest and shoulders when reaching arms overhead
- Improves flexibility in your knees (classical pose)
- Improves your posture and sense of balance
- Relieves sciatica and reduces flat feet
- Cultivates balance, focus and concentration both on and off the mat
- Calms the nerves
- Stabilizes the pelvis
- Elongates the spine
- Increases confidence each time you succeed in balancing!
I’ll never forget the first yoga class I was in when the teacher cued a balance pose. I thought for sure she was just showing off. I could think of no other reason to practice balance. I had not yet fallen in love with yoga, so didn’t know that balance is an important part of the health of the whole body. When you are younger you tend to take things like balance for granted. Balance will always be there, right? Uh, no. My mother-in-law knows this first hand after having fallen in the bathroom trying to get into the bath tub.
Tree pose is one of the first balance poses I teach. A useful tip for all balance poses: Find a spot in the room that doesn’t move to focus on. It really helps! The Sanskrit word for this focus point is “dristhi”. Regularly practicing balance poses will help you focus both on and off the mat cultivating concentration skills.
Preferably, balance poses are best done on a firm, hard surface. If your yoga floor is carpeted or cushioned, it will make your balance poses that much harder. Sometimes even the thickness of your mat can be too unstable. So proceed with caution.
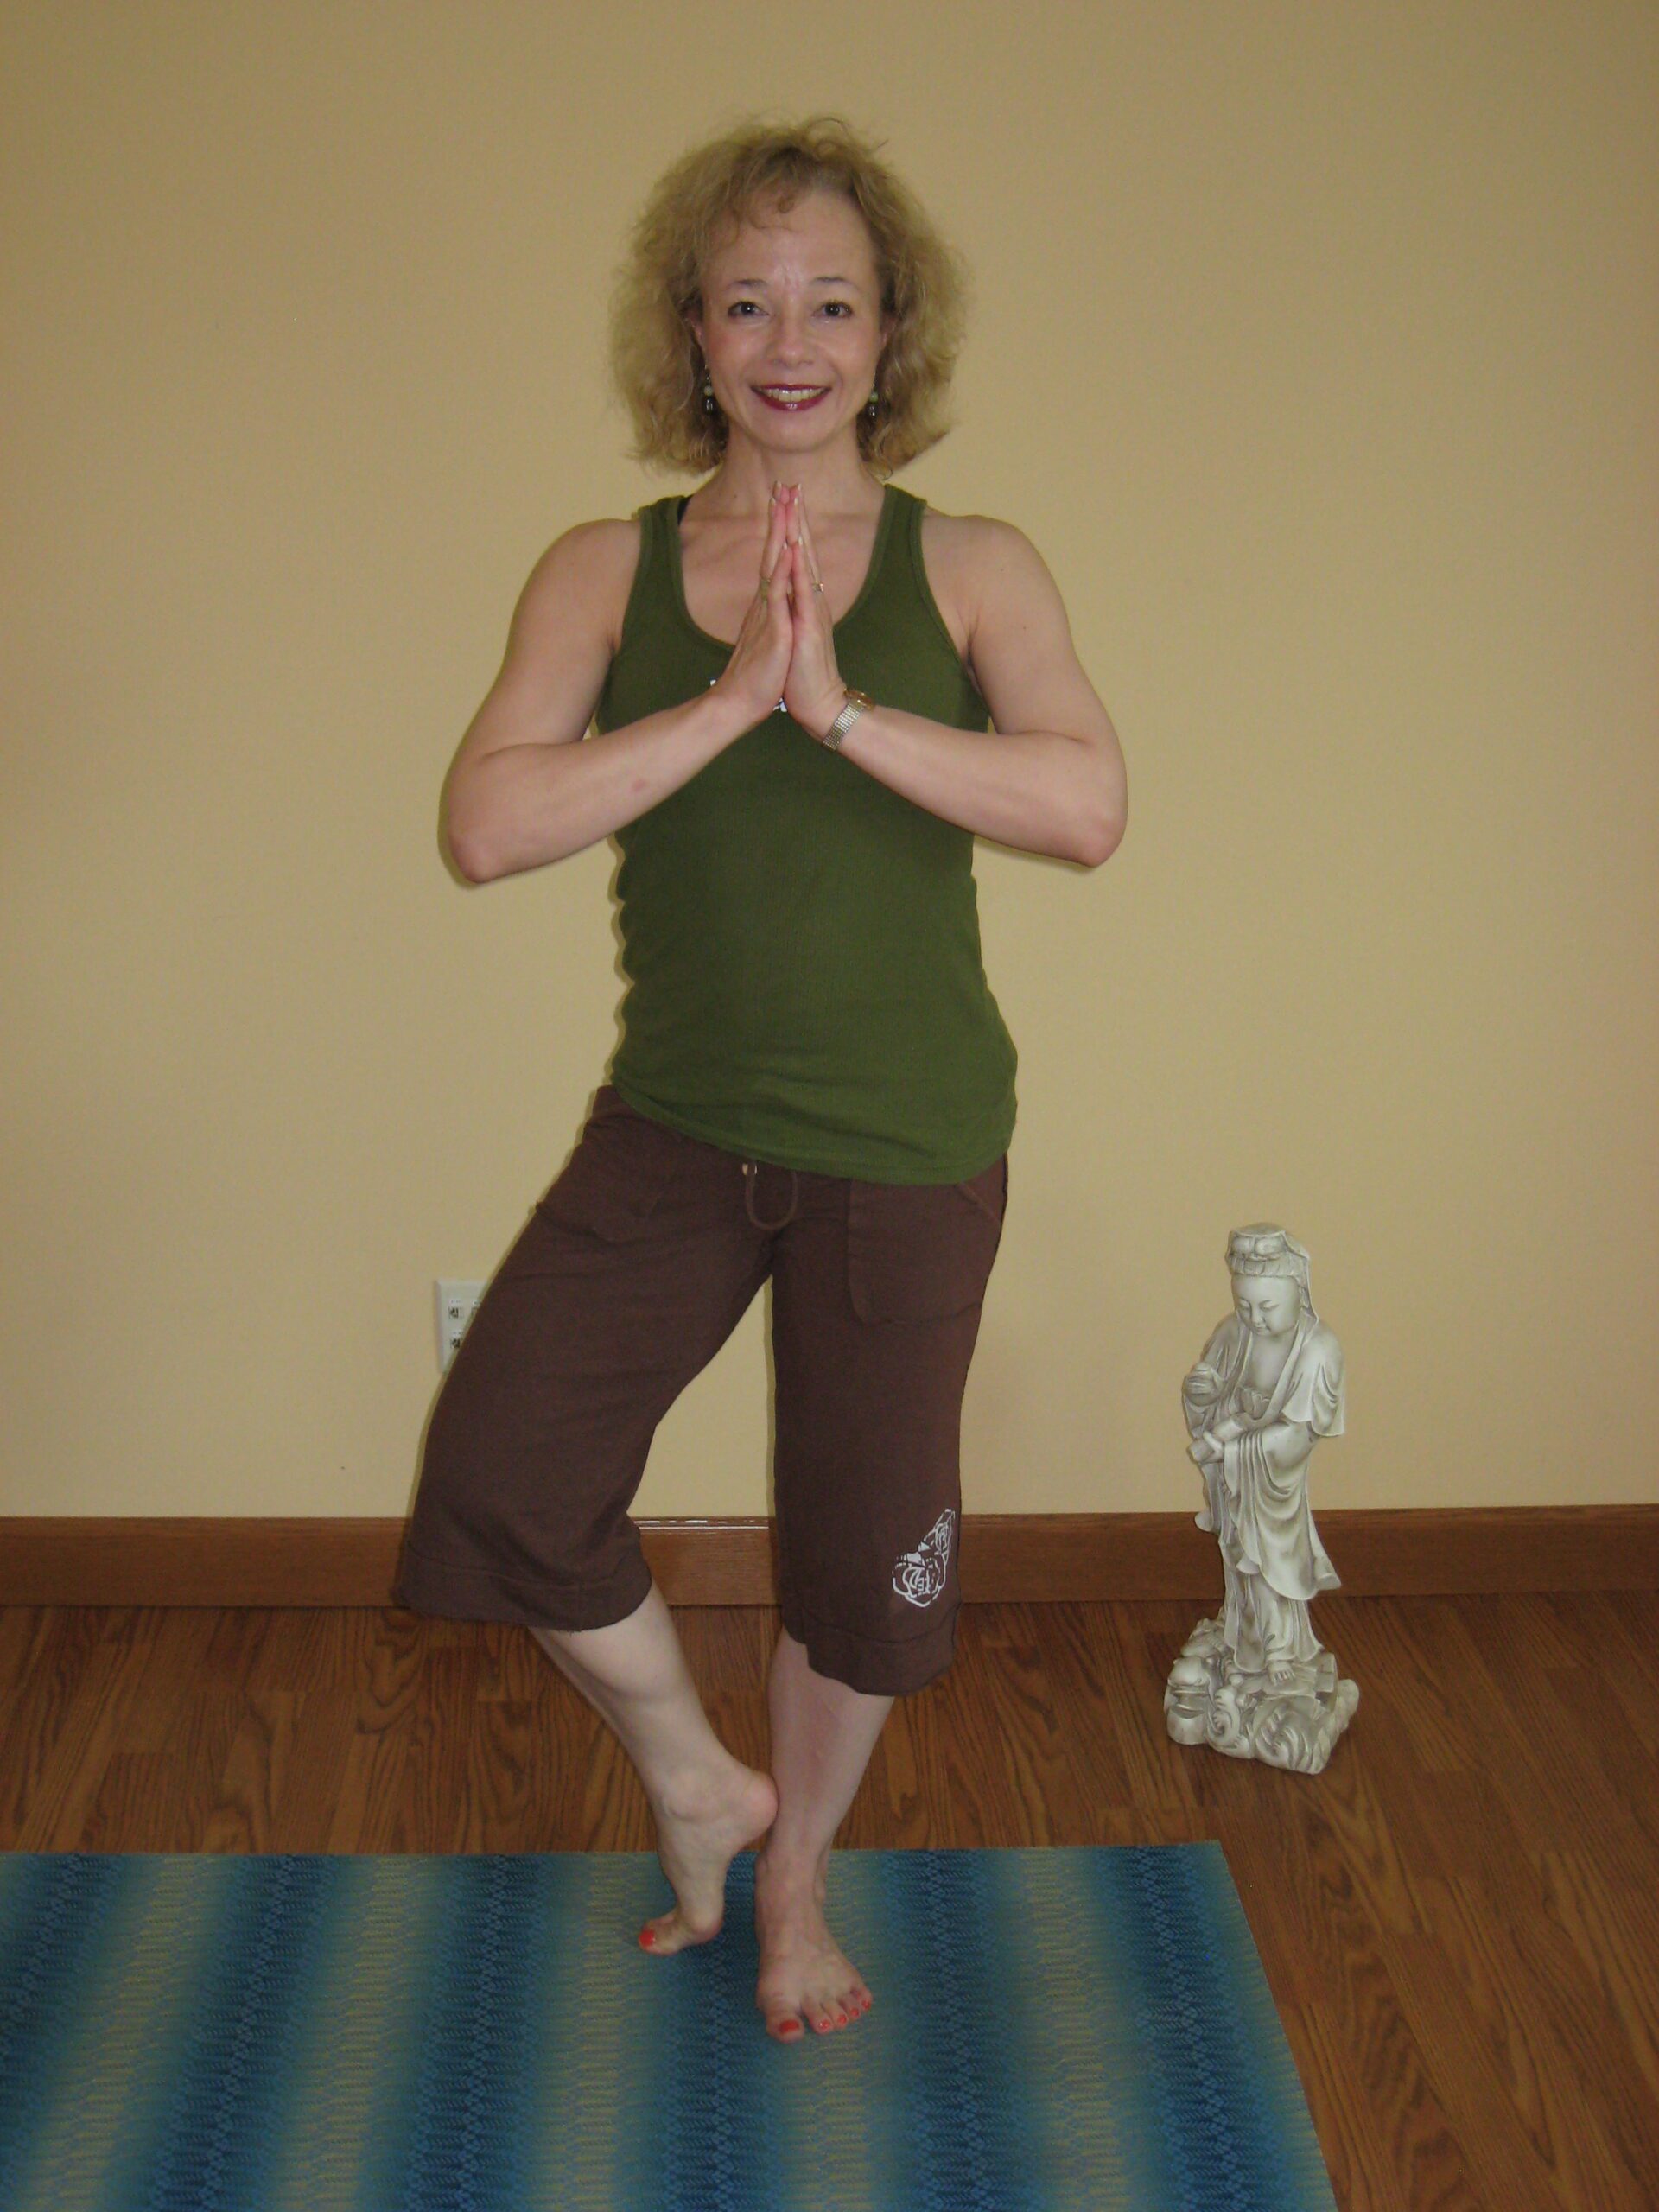
So we start from Mountain Pose with feet hip distance apart. I like to keep my hands at heart center in prayer or “Namasté” position. Next you’ll want to have contact with the floor with all four corners of the feet (big toe mound, little toe mound, and both sides of the heel) with the weight on the feet evenly distributed between the inner and outer foot and the heel and ball of the foot. You’ll want a wide base, as in all yoga poses. So lift the toes, spread them wide, and plop them down. This really activates those arches, which is also important.
As you focus on your spot in the room and start to lift your foot notice the toes of the grounded foot and concentrate on keeping them relaxed vs. gripping the floor. Just as you don’t want gripping, in a balance pose, you also don’t want the toes lifted. You want even, relaxed weight distribution across the whole foot. Likewise, you want to keep your pelvis balanced—not tipping forward or backward or twisting in any one direction.
I also like to tell my students as they’re balancing that each day is different. Each side is different. Depending on how flustered your life has been, or if you have a cold—any disturbance mentally, emotionally, or physically—all elements can affect balance.
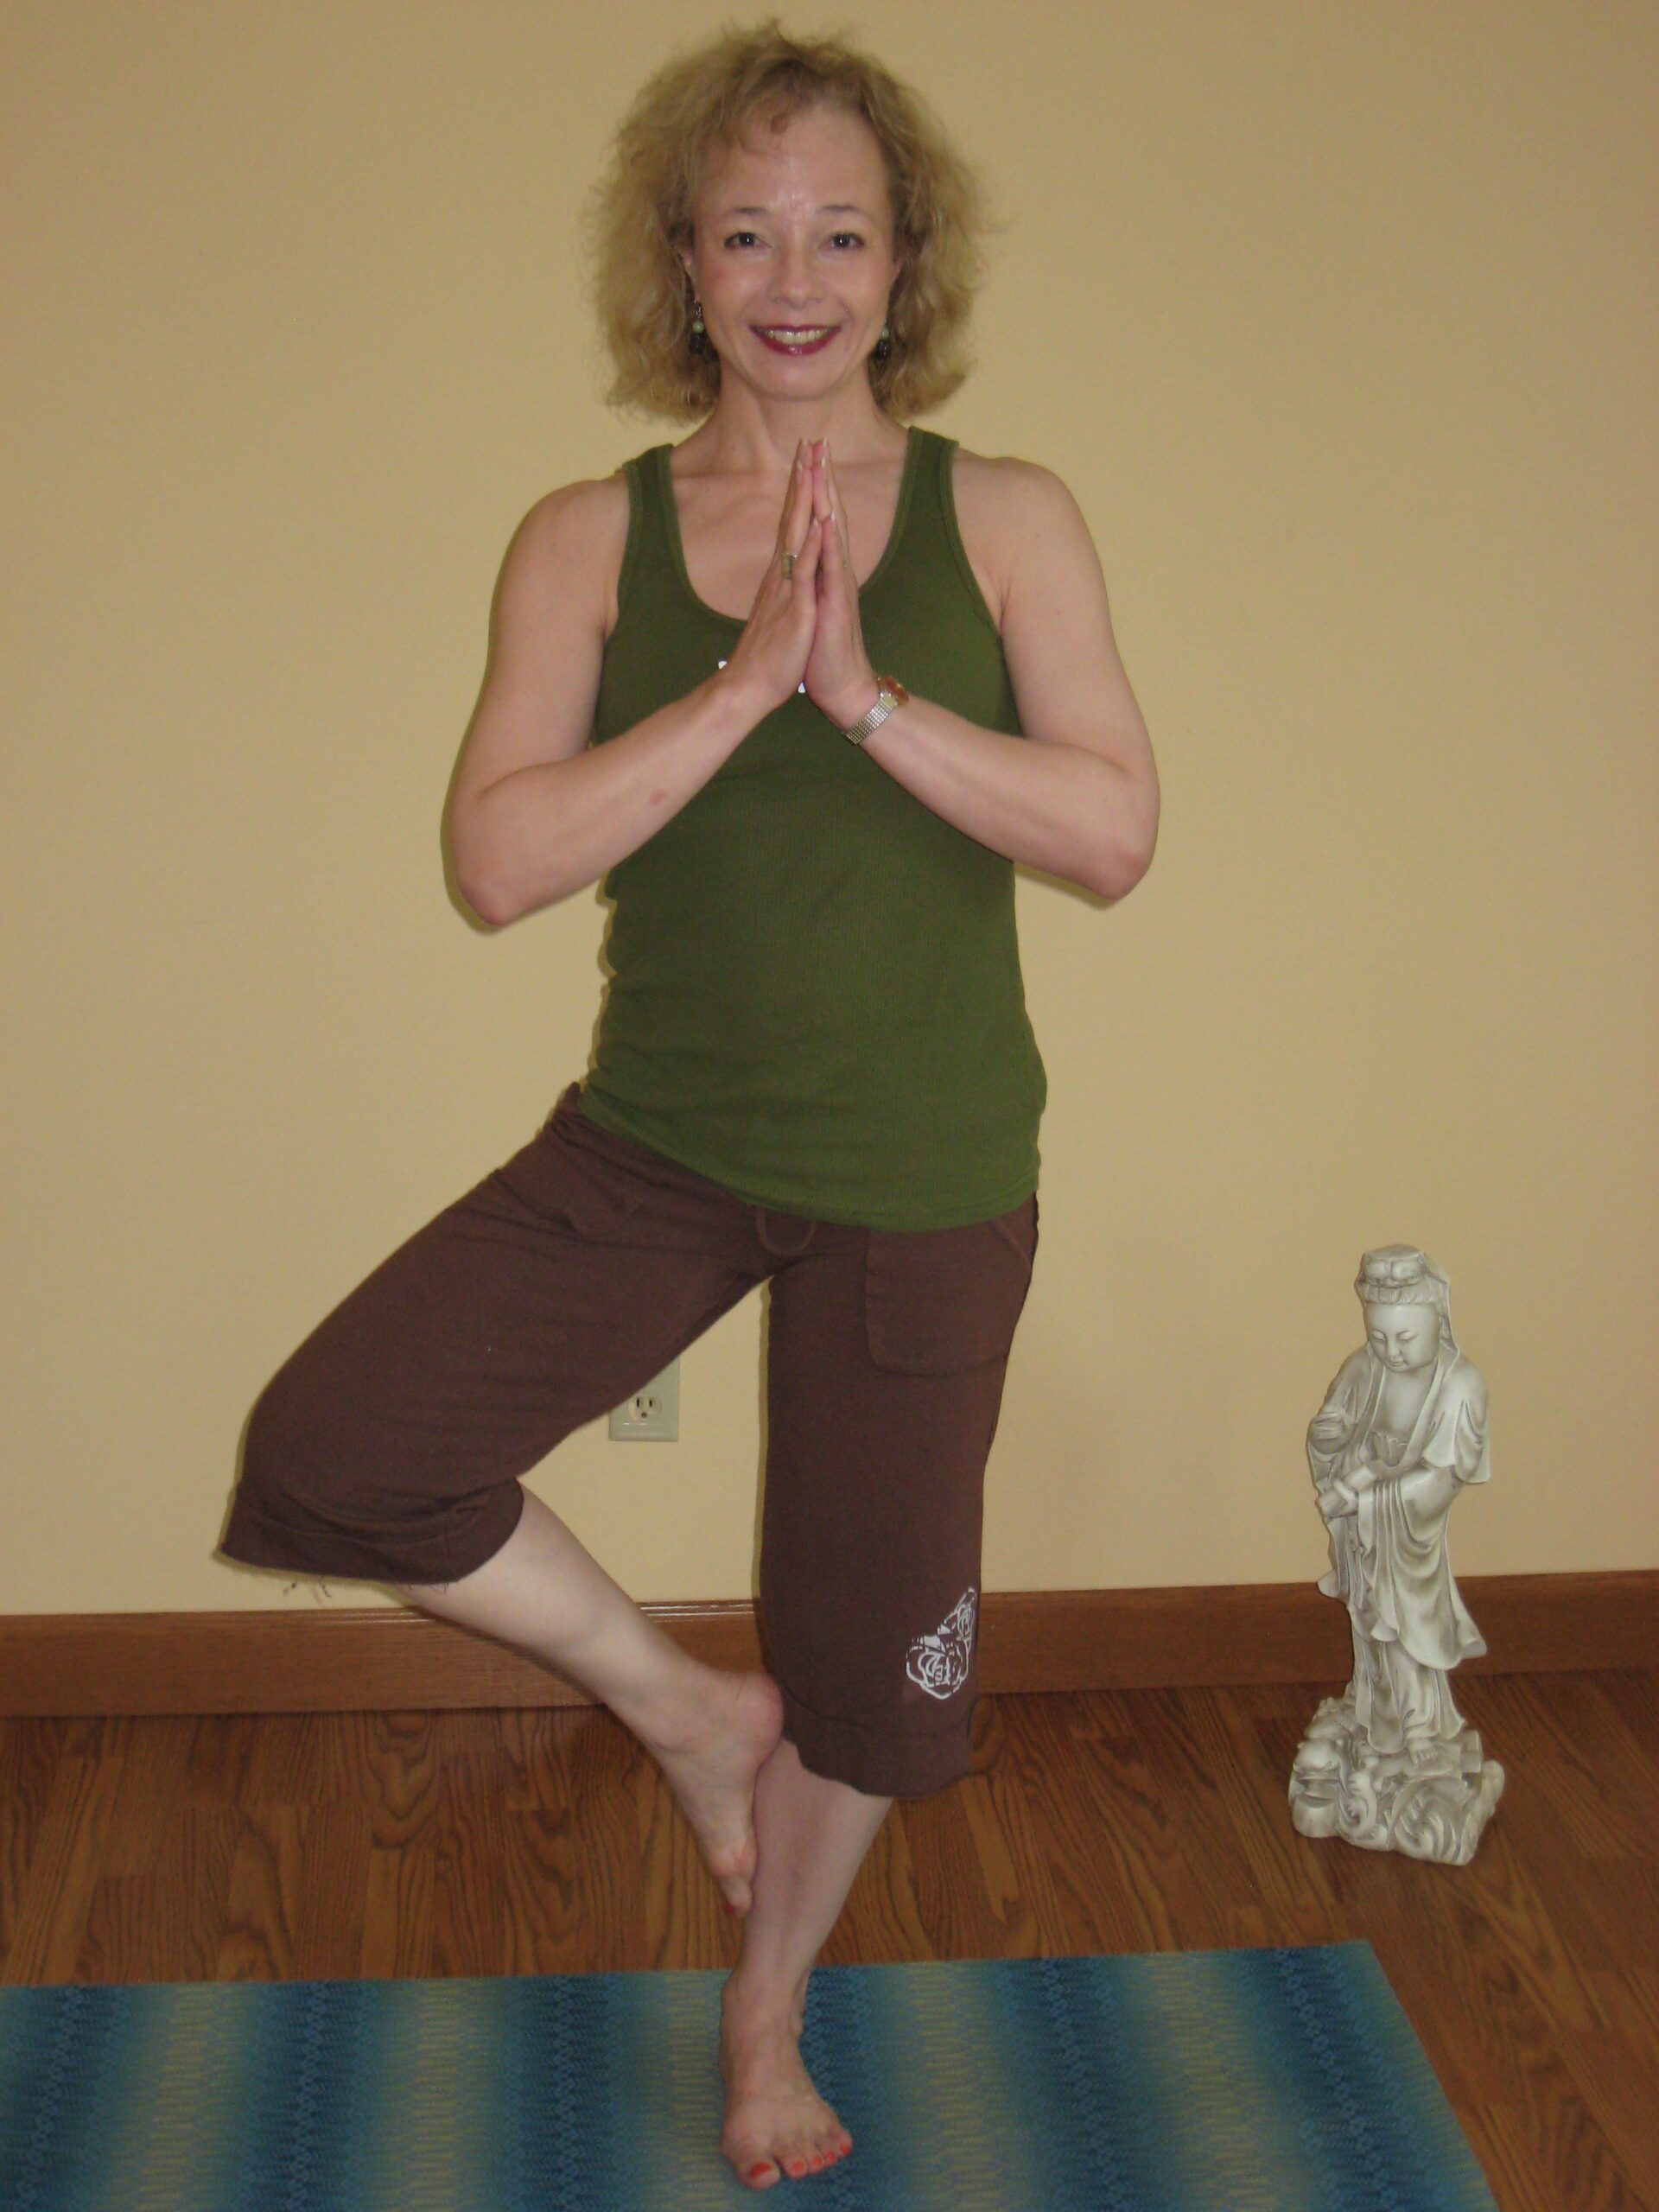
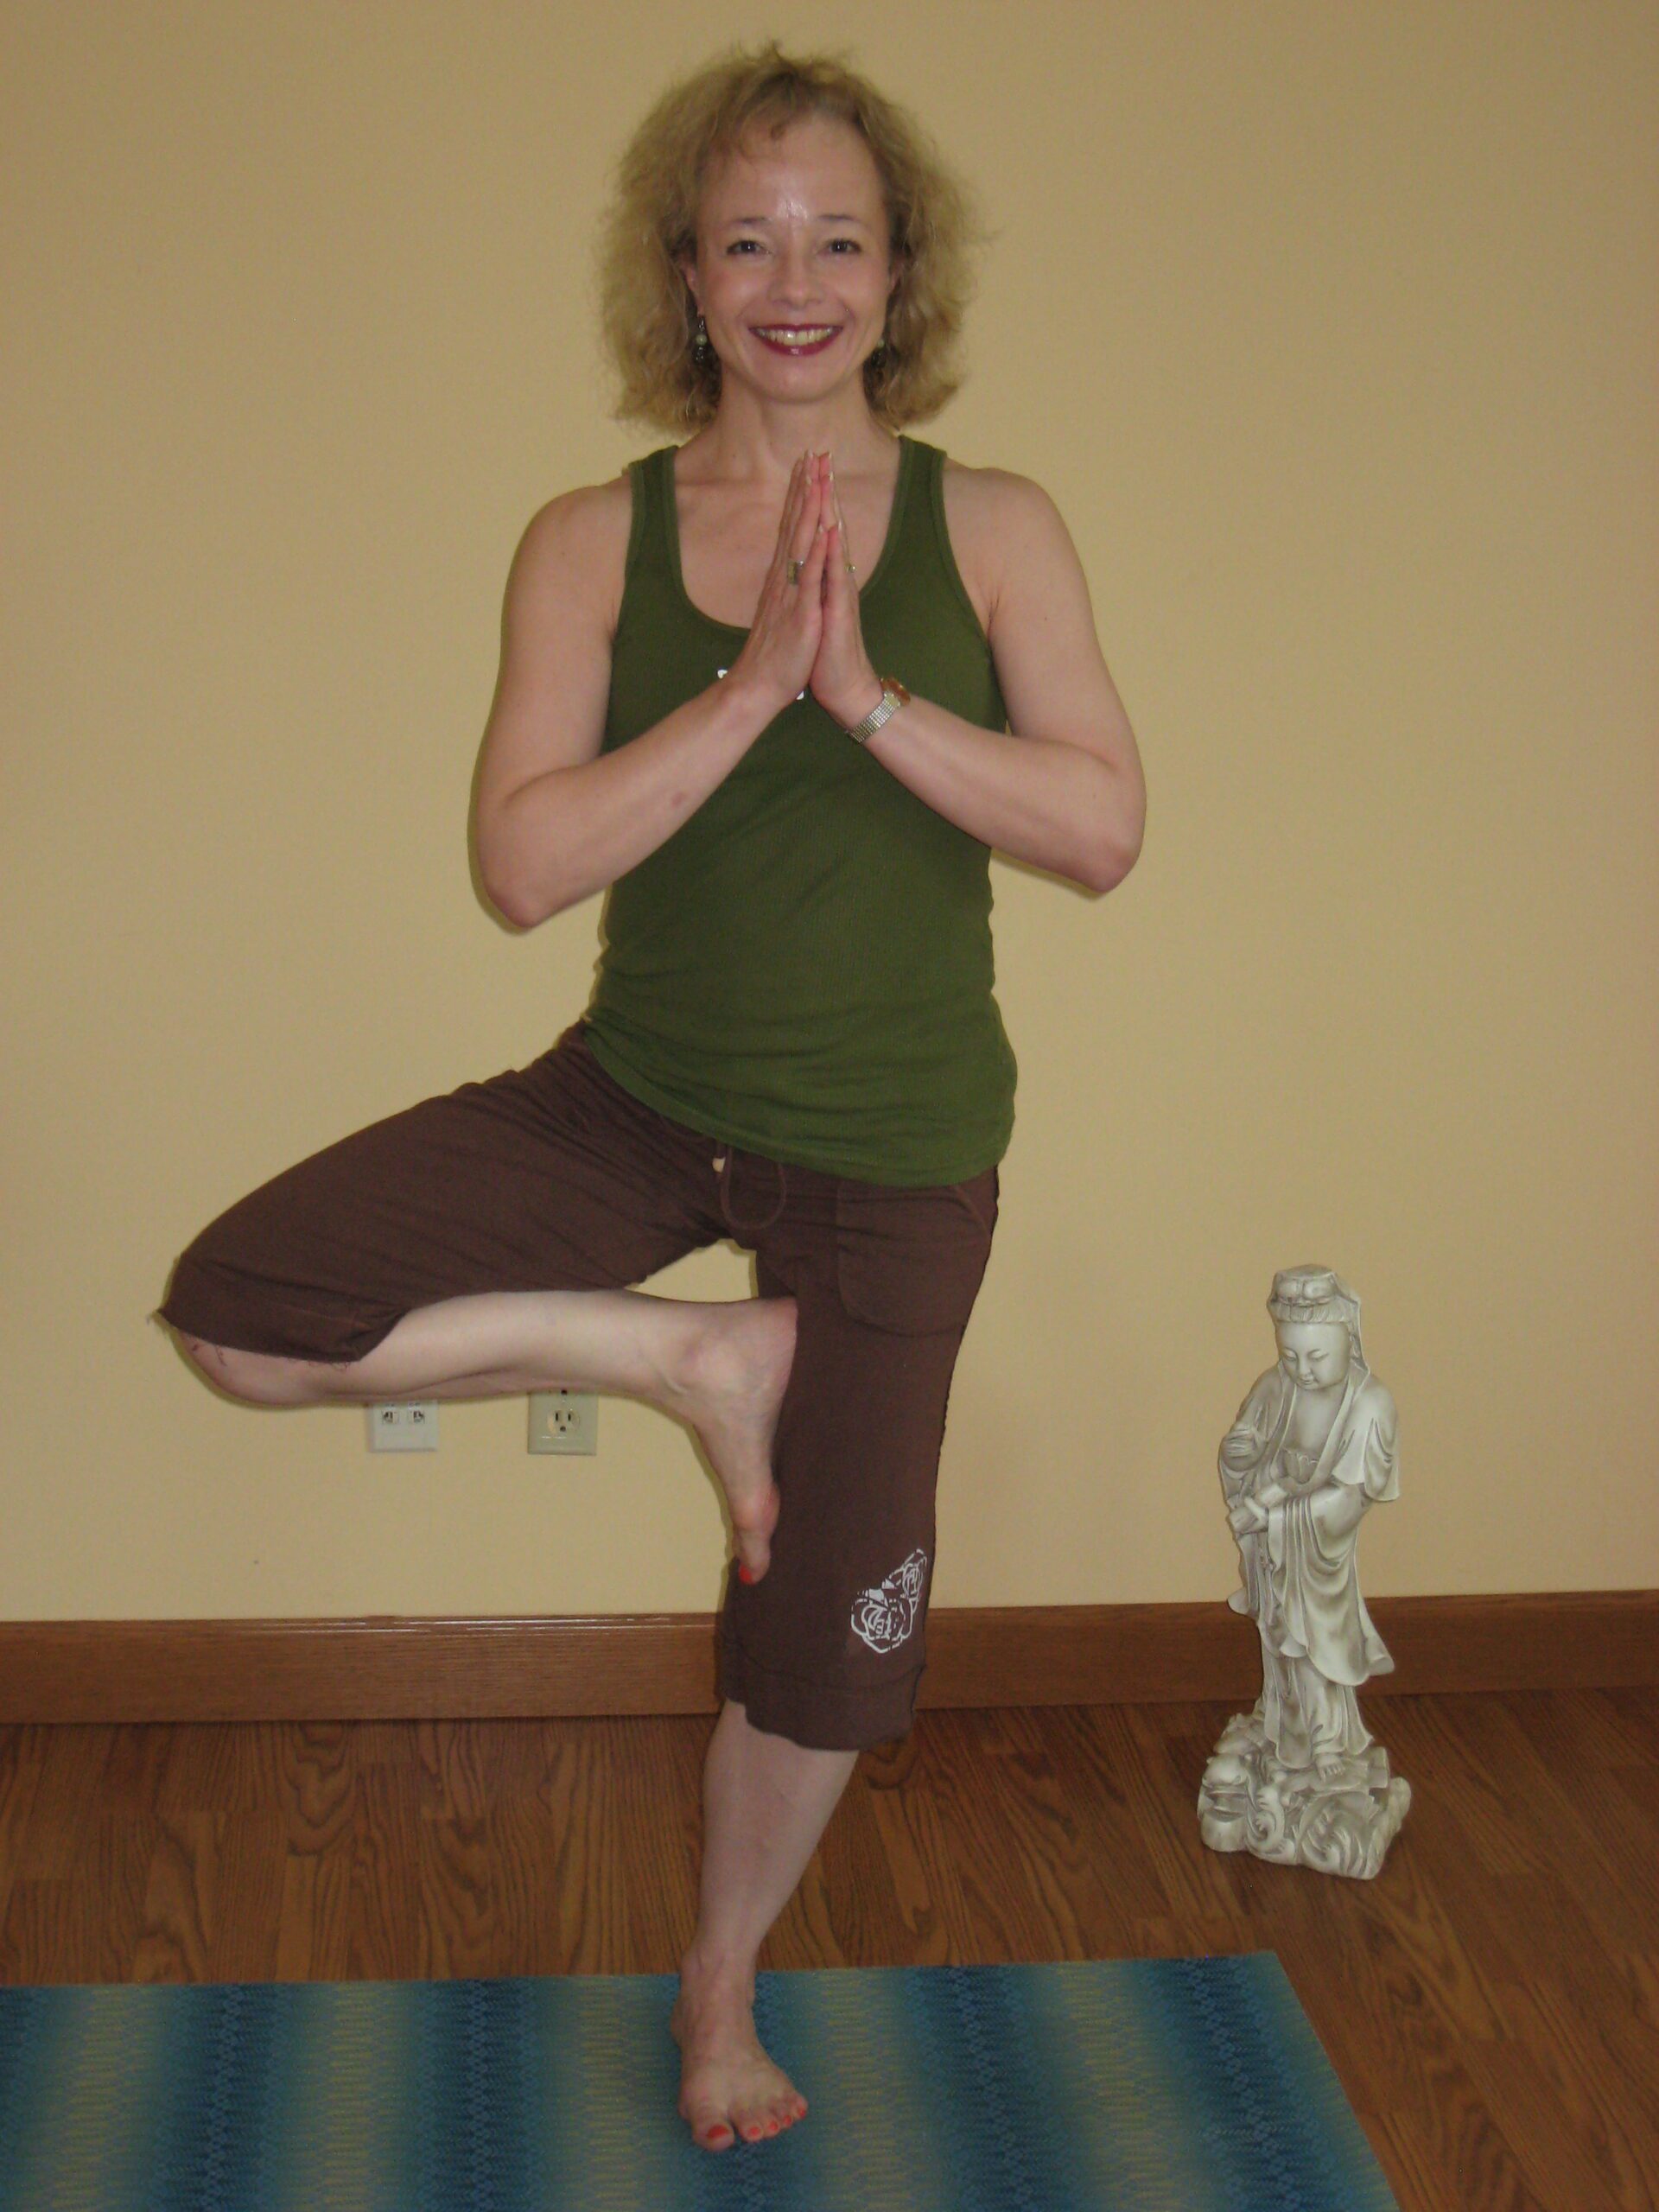
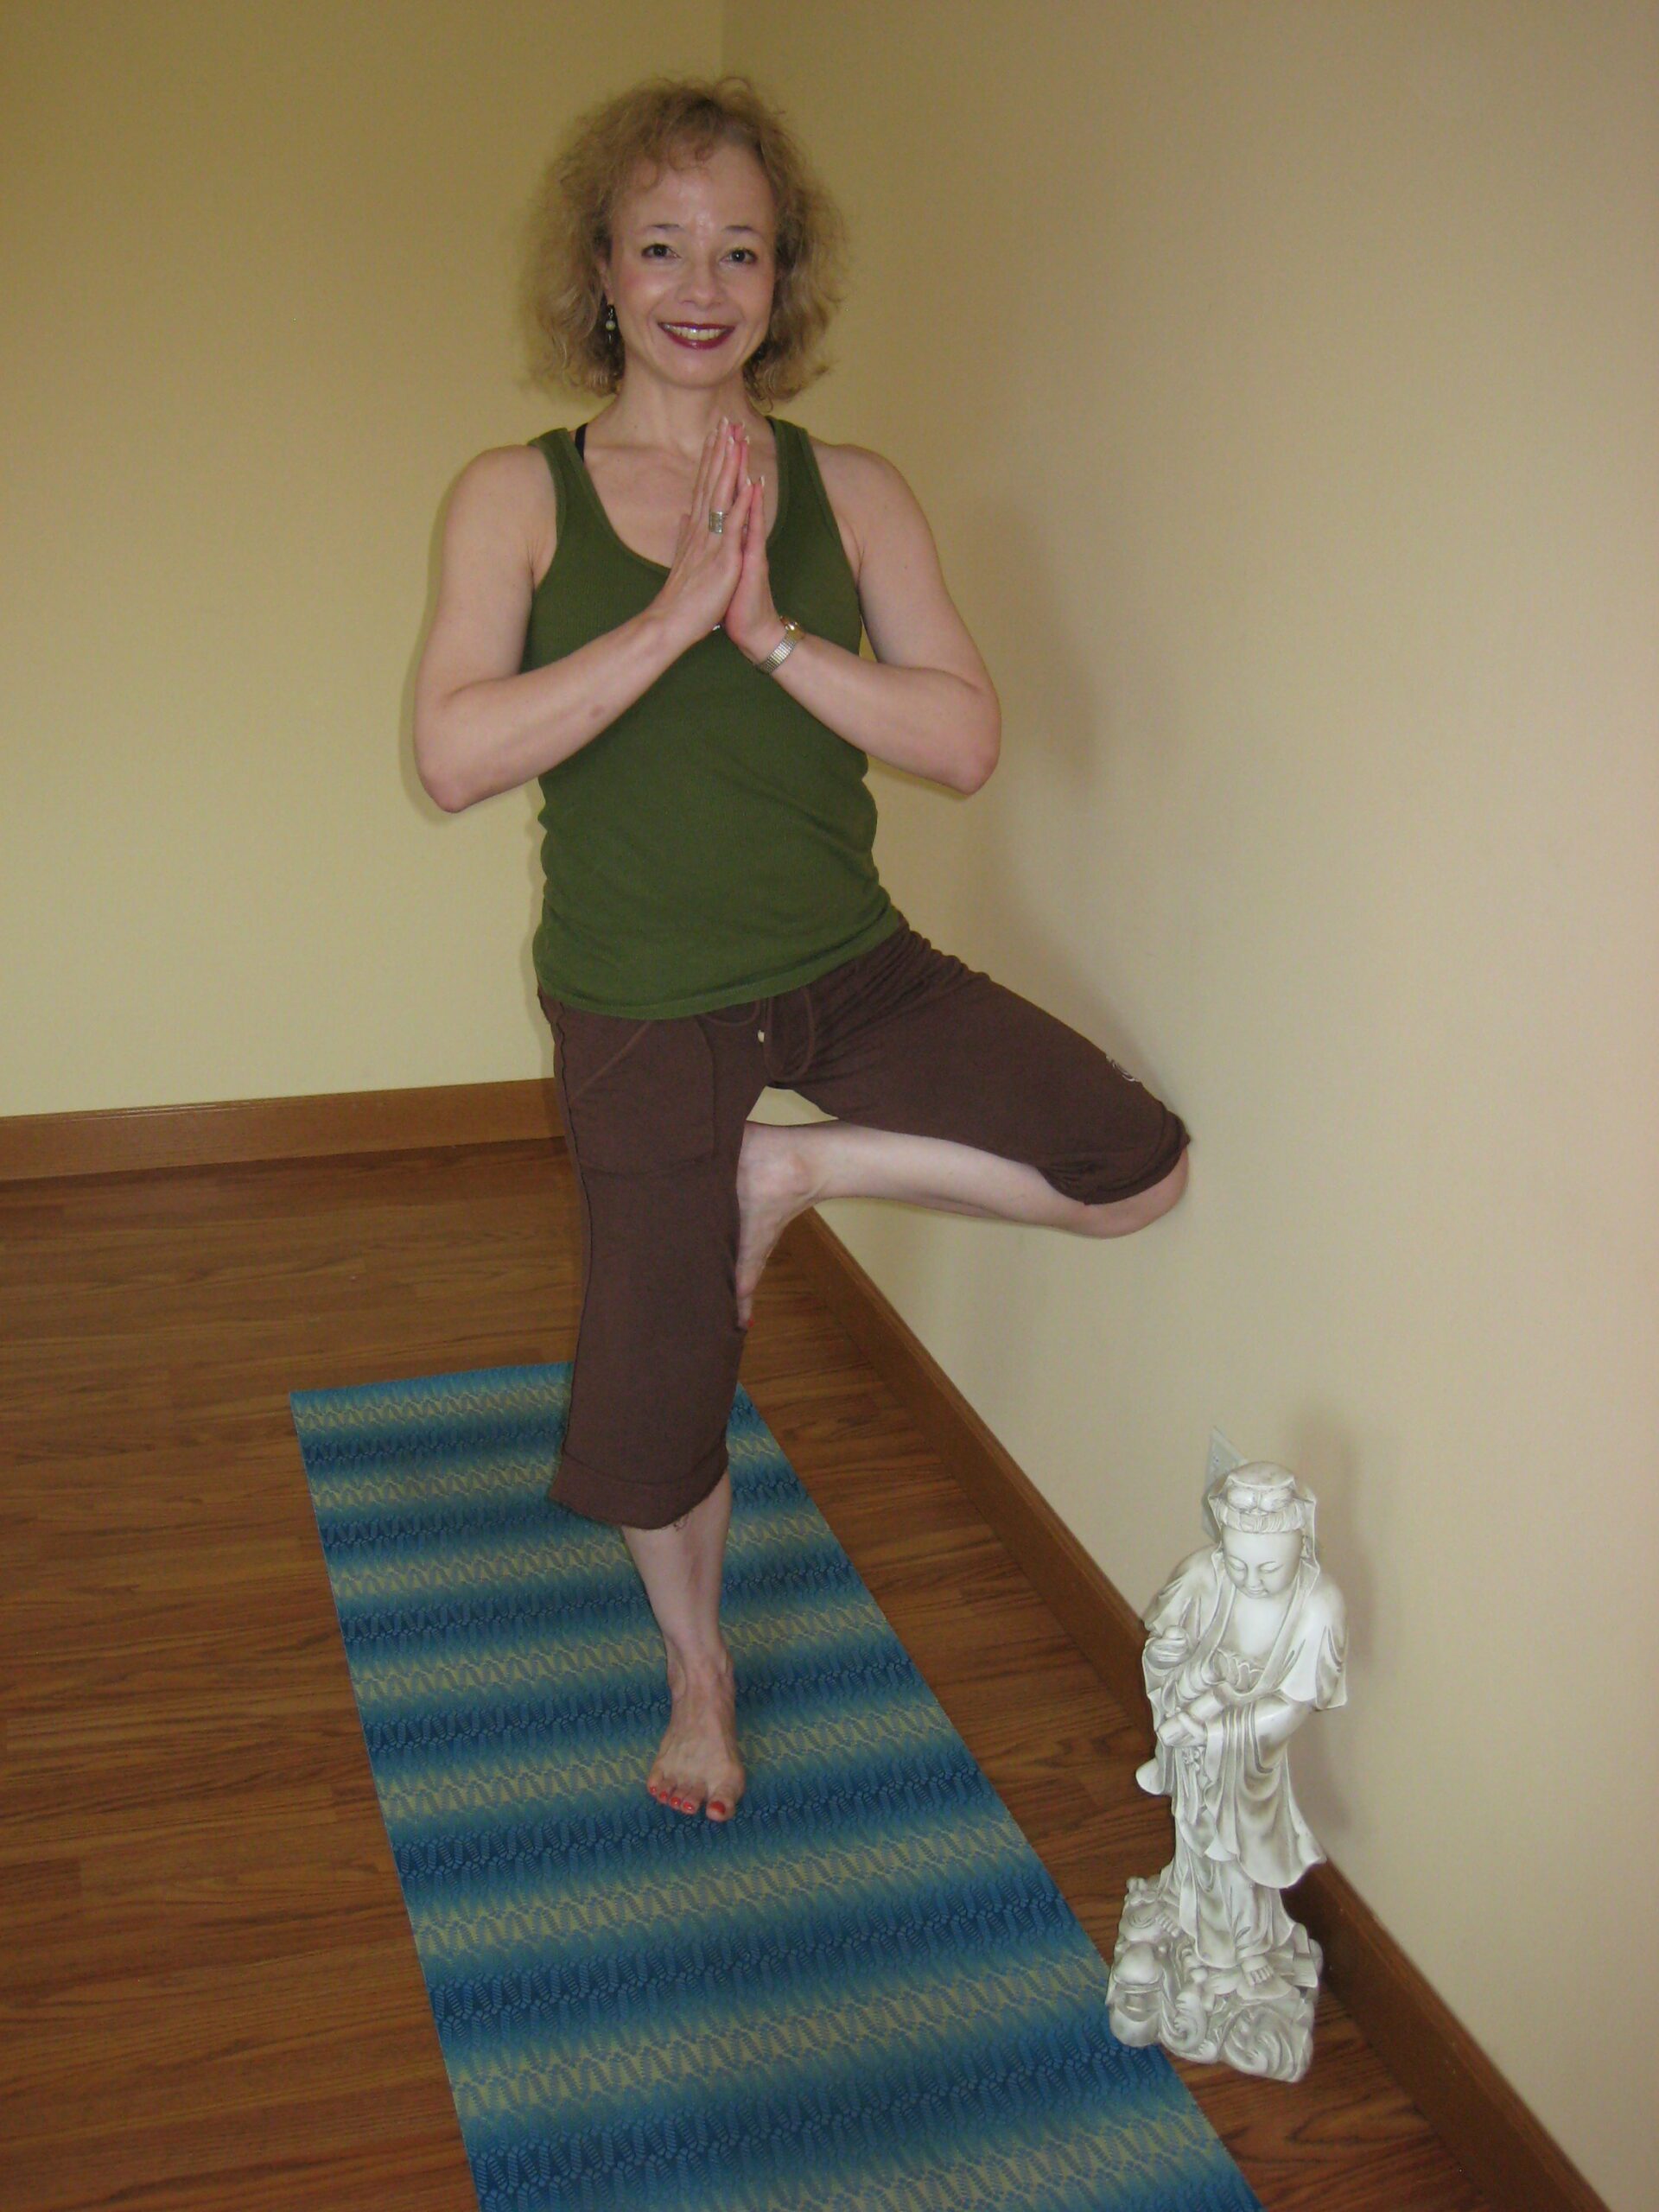
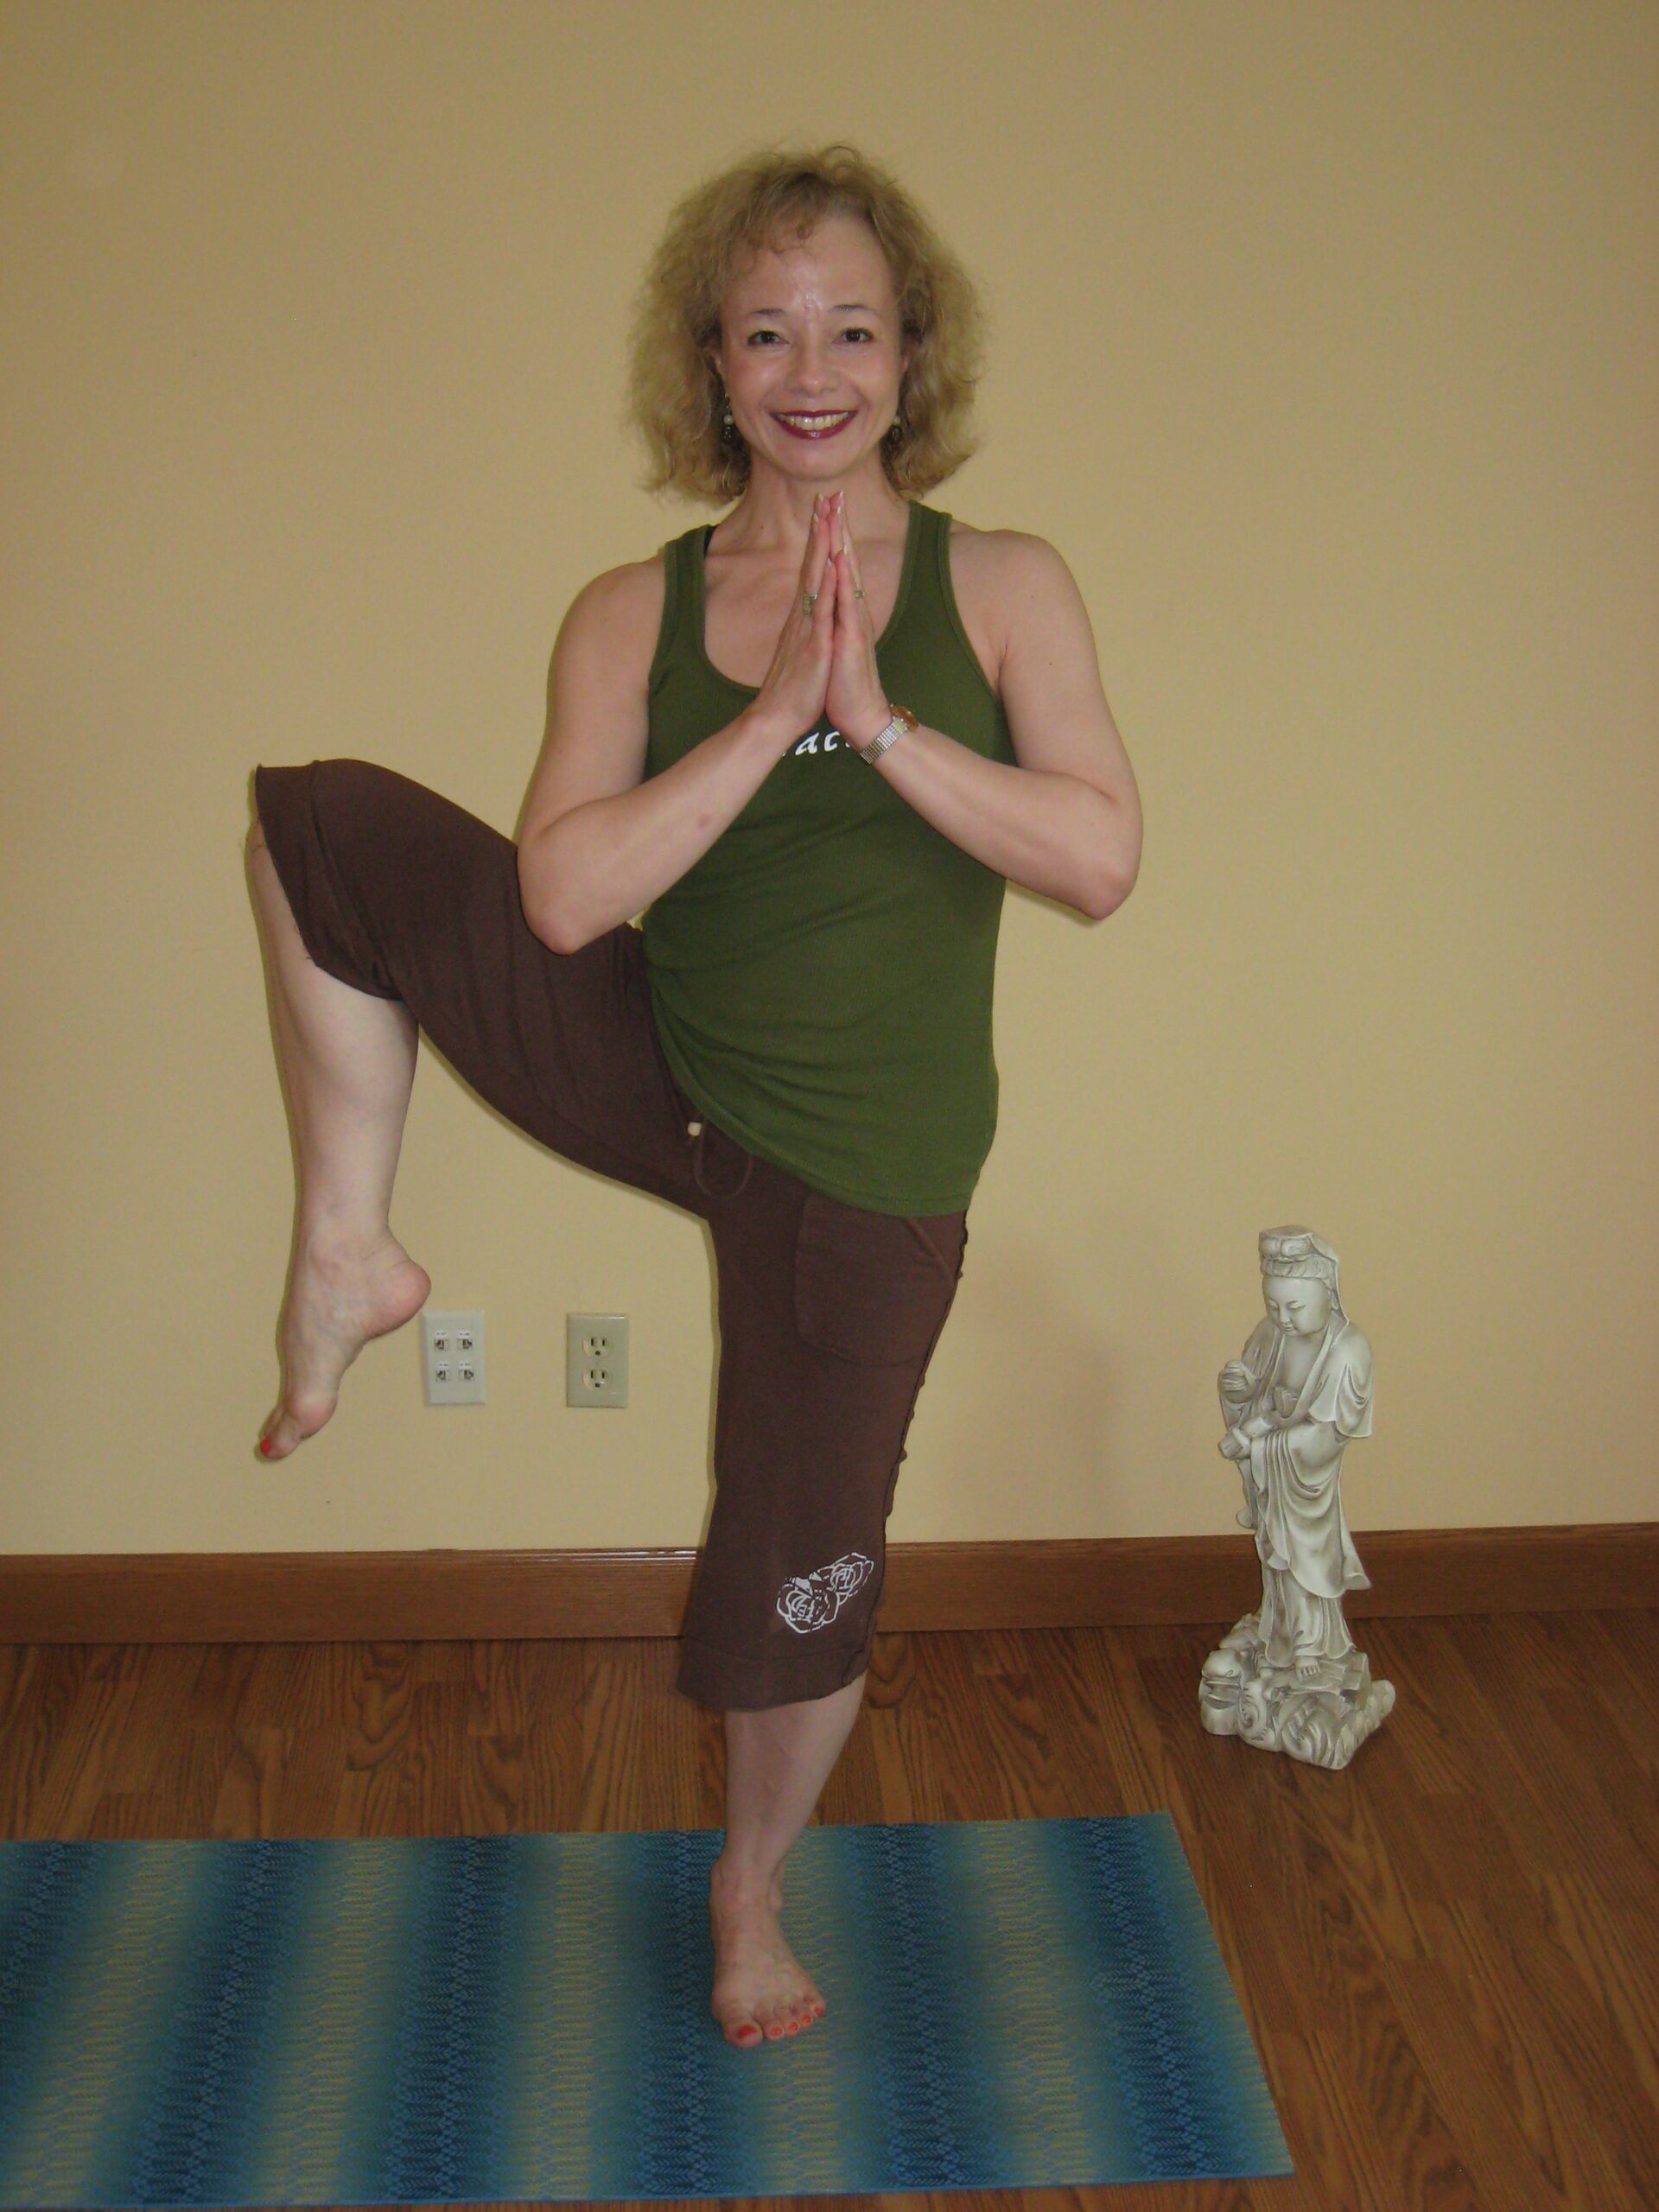
Next we place the sole of the lifted foot on the inside of the opposite leg, avoiding the knee, toes pointing down and keeping the external rotation of the hip:
- Placement on the calf, just below the knee: (Photo #1). Pressing the sole of the foot into the calf of the standing leg, maintain balance while keeping the front hip bones even left to right.
- Placement on the inside of the thigh, above the knee: (Photo #2) Pressing the sole of the foot into the inner thigh of the standing leg, maintain balance while keeping the front hip bones even left to right. (You may use your hand to grab hold of your ankle to place the foot at the top of the thigh. One of my favorite YogaFit trainers, Beth Marik, cued us to only place the foot up high on the inner thigh if we could do so without the aid of the hand to pull it up there as a way to build strength in the abdominals and legs. If you help the leg up, remember not to bring the spine out of balance.)

Notice how balance is an act of your body making constant adjustments firing up first this muscle then that muscle. The micro-movements you are feeling are a part of the process. Popping in and out of the pose by simply touching down with the toe of the lifted foot is fine. It, too, is part of the process on ANY given day. Quoting someone cleverer than I: “That’s why they call it a yoga practice and not a yoga perfect.”
Once the foot is placed, continue engaging your lower abdominals as you elongate the spine through the crown of the head and draw the tailbone down toward the floor. Don’t let your ego dictate how high you place your foot on the opposite leg. If you have to arch your back in, you probably have tight groins and/or inner thighs. So place the foot where the front hip bones will stay even left to right. Keep a hyper-bend in the standing leg’s knee. Imagine rooting down through the standing foot just like the roots of a tree as you lift up through the center of the torso.
Advanced options:
- “Classic” Tree Pose: Rotate one knee out to open the thigh, and bring the foot to the top of the groin with the sole of the foot facing the ceiling. (Photo #3) (Caution! Those with knee issues should not try this pose. Make sure there is no pain in the knee as you do this pose.) Press the bent knee back. Option to hold onto the big toe of the raised foot and raise the other hand up to the sky (not pictured) or keep hands at the heart center as shown.
- Practice any of these options with your eyes closed: (Not pictured) Another gem from RealAge.com (as I update my site in 2023, RealAge.com is not an active website but there are several studies on balance and age): Stand on one leg and close your eyes. The longer you can stand without losing your balance, the younger your brain is – 15 seconds is very good if you are 45 or older. Have someone spot you if there’s any chance you might not recover your equilibrium in time to avoid a spill.
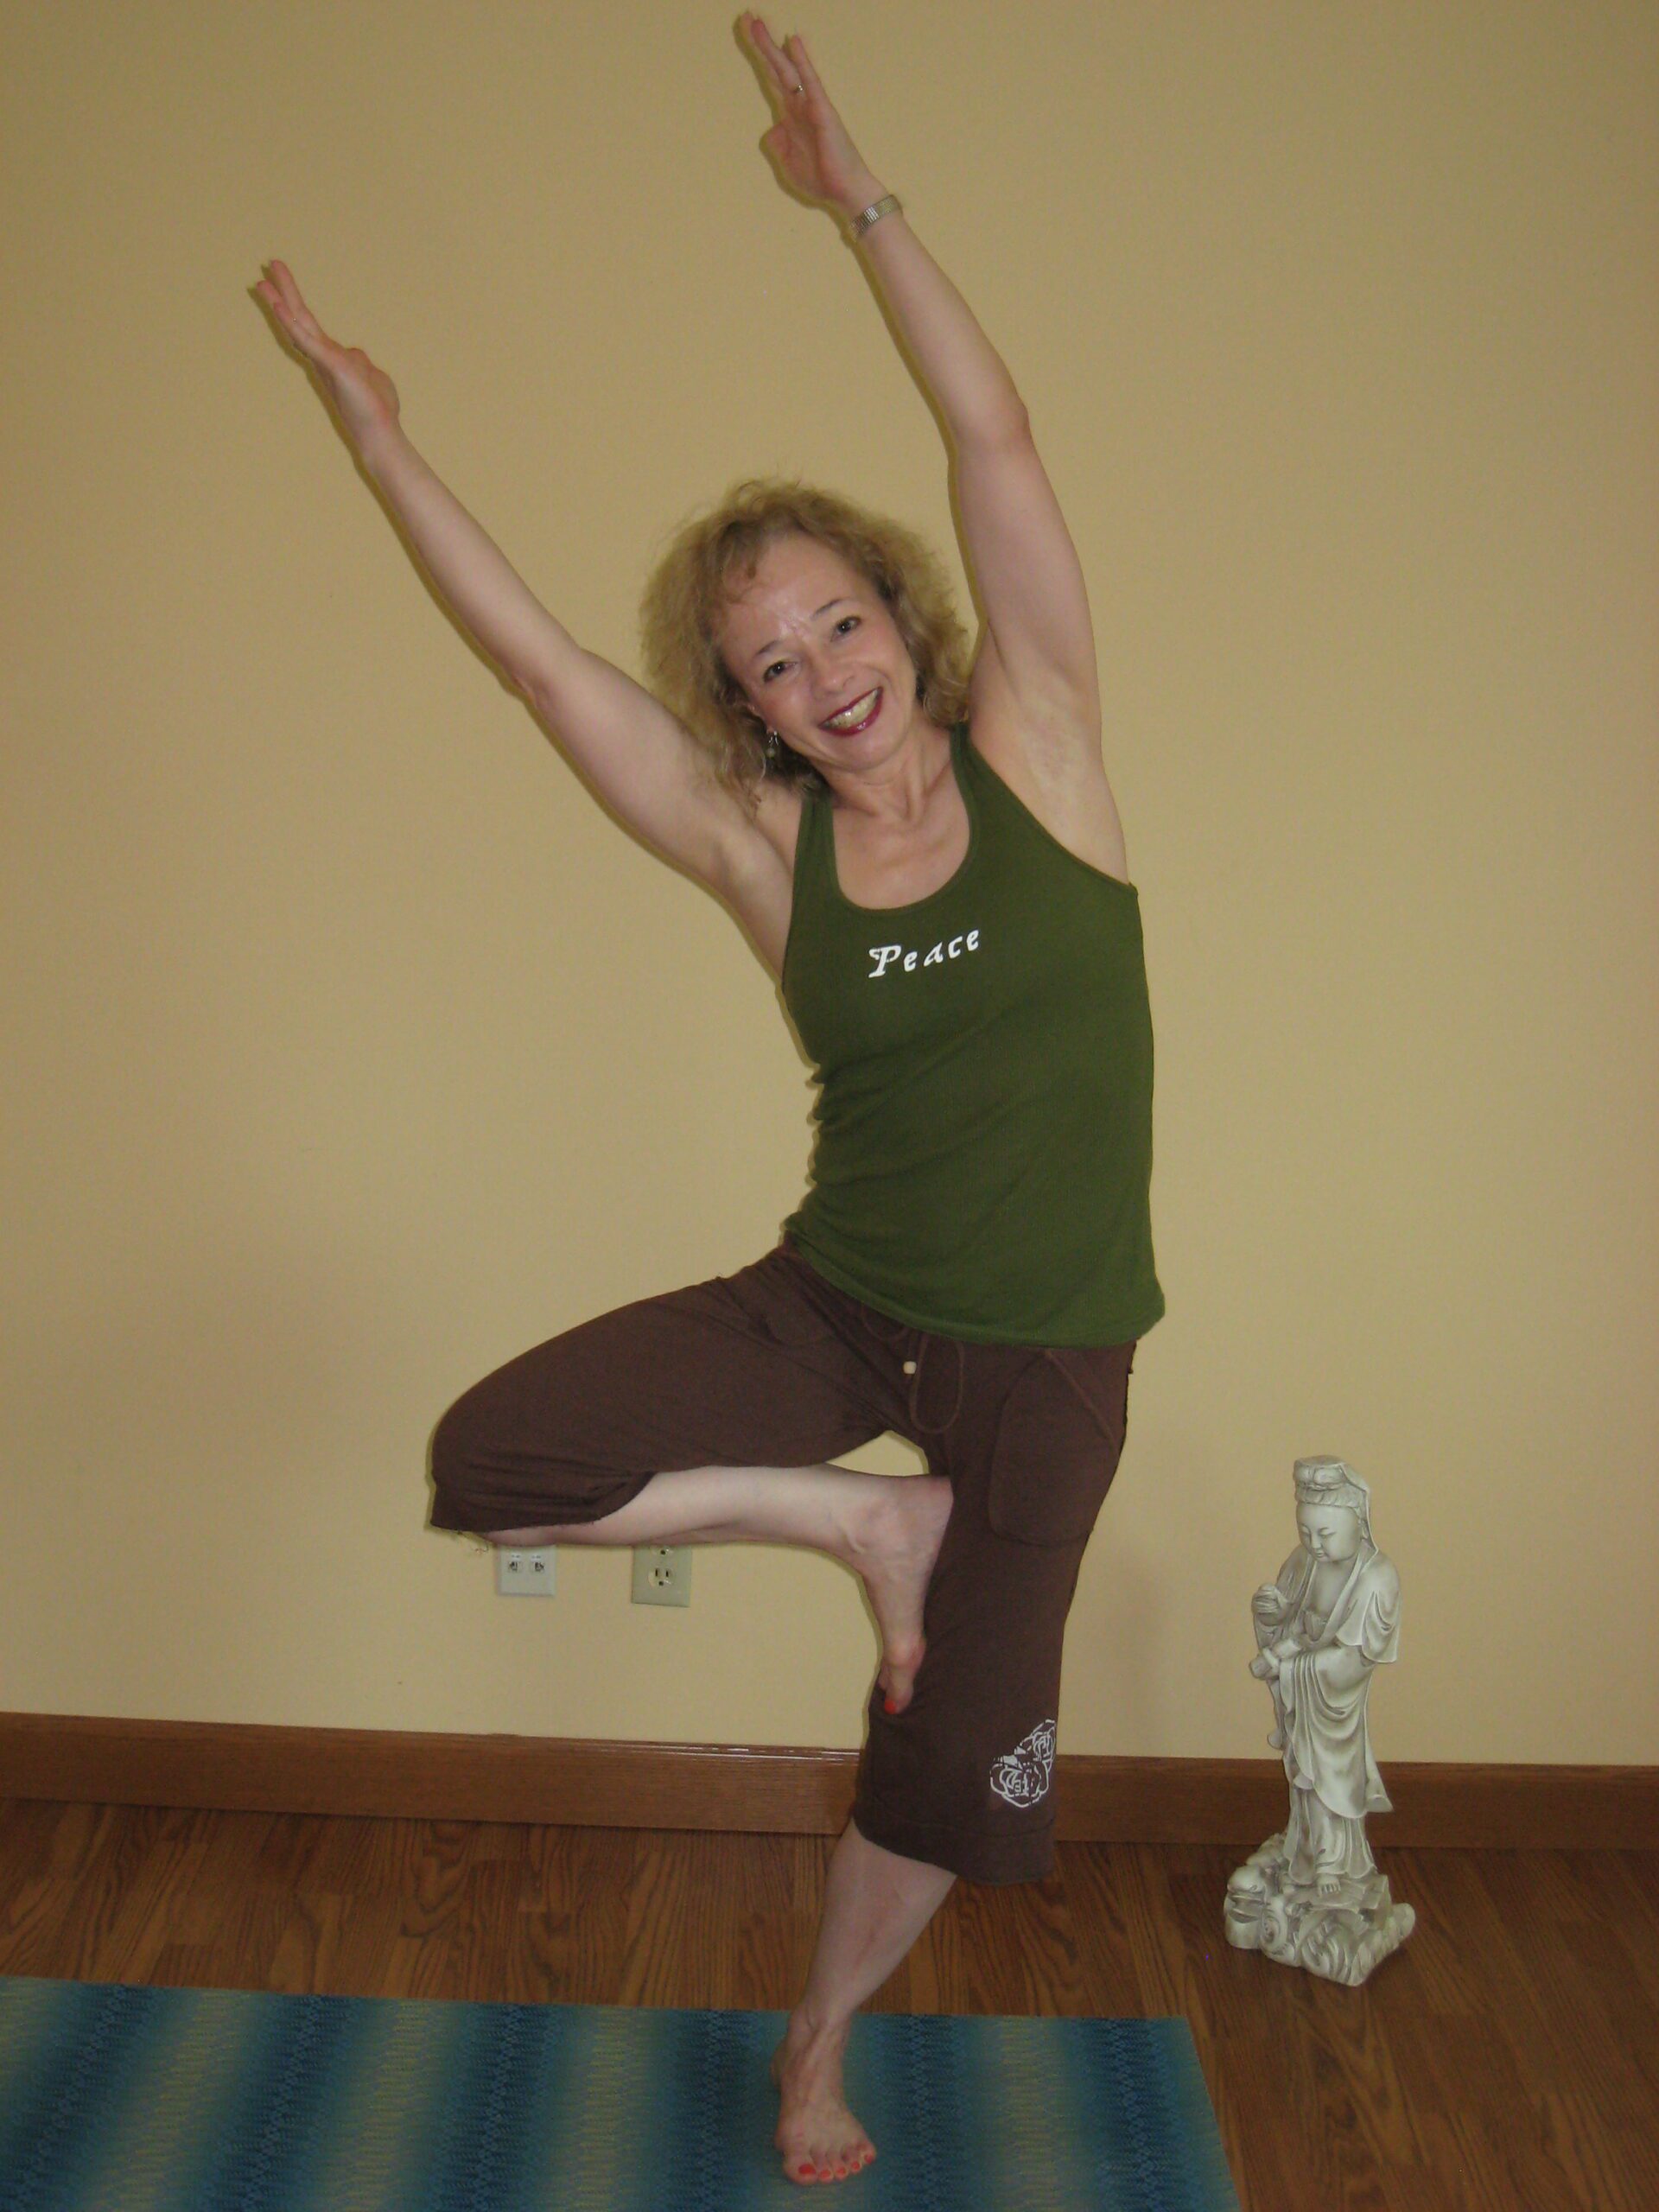
- Raised arms to make your tree “grow” with the option to change your gaze from the focus point to your moving hands which adds challenge to your balancing effort. Watch out for the tendency to increase the arch in your back as you reach your arms overhead. Concentrate on elongating the spine. (Photo #4)
- Tip Toe variation: Try lifting your heel up and down a couple of times while maintaining balance and keeping your standing foot pointing straight ahead. This pose will increase the ankle strength even more! (Not pictured).


Beginner’s tip: Still unsure on your form or new to yoga? You can try a practice pose.
- Heel to shin placement: (Photo #5) I usually start here and progress to the calf or knee. Don’t let the apparent ease of the pose pictured here fool you! Heel to shin placement is, in and of itself, a balance pose. So don’t feel like you’re a “slacker” here! Whenever you aren’t flat-footed on both feet, you are recruiting extra muscles to balance with. So there are plenty of benefits to be had here both in muscle building and improved concentration ability.
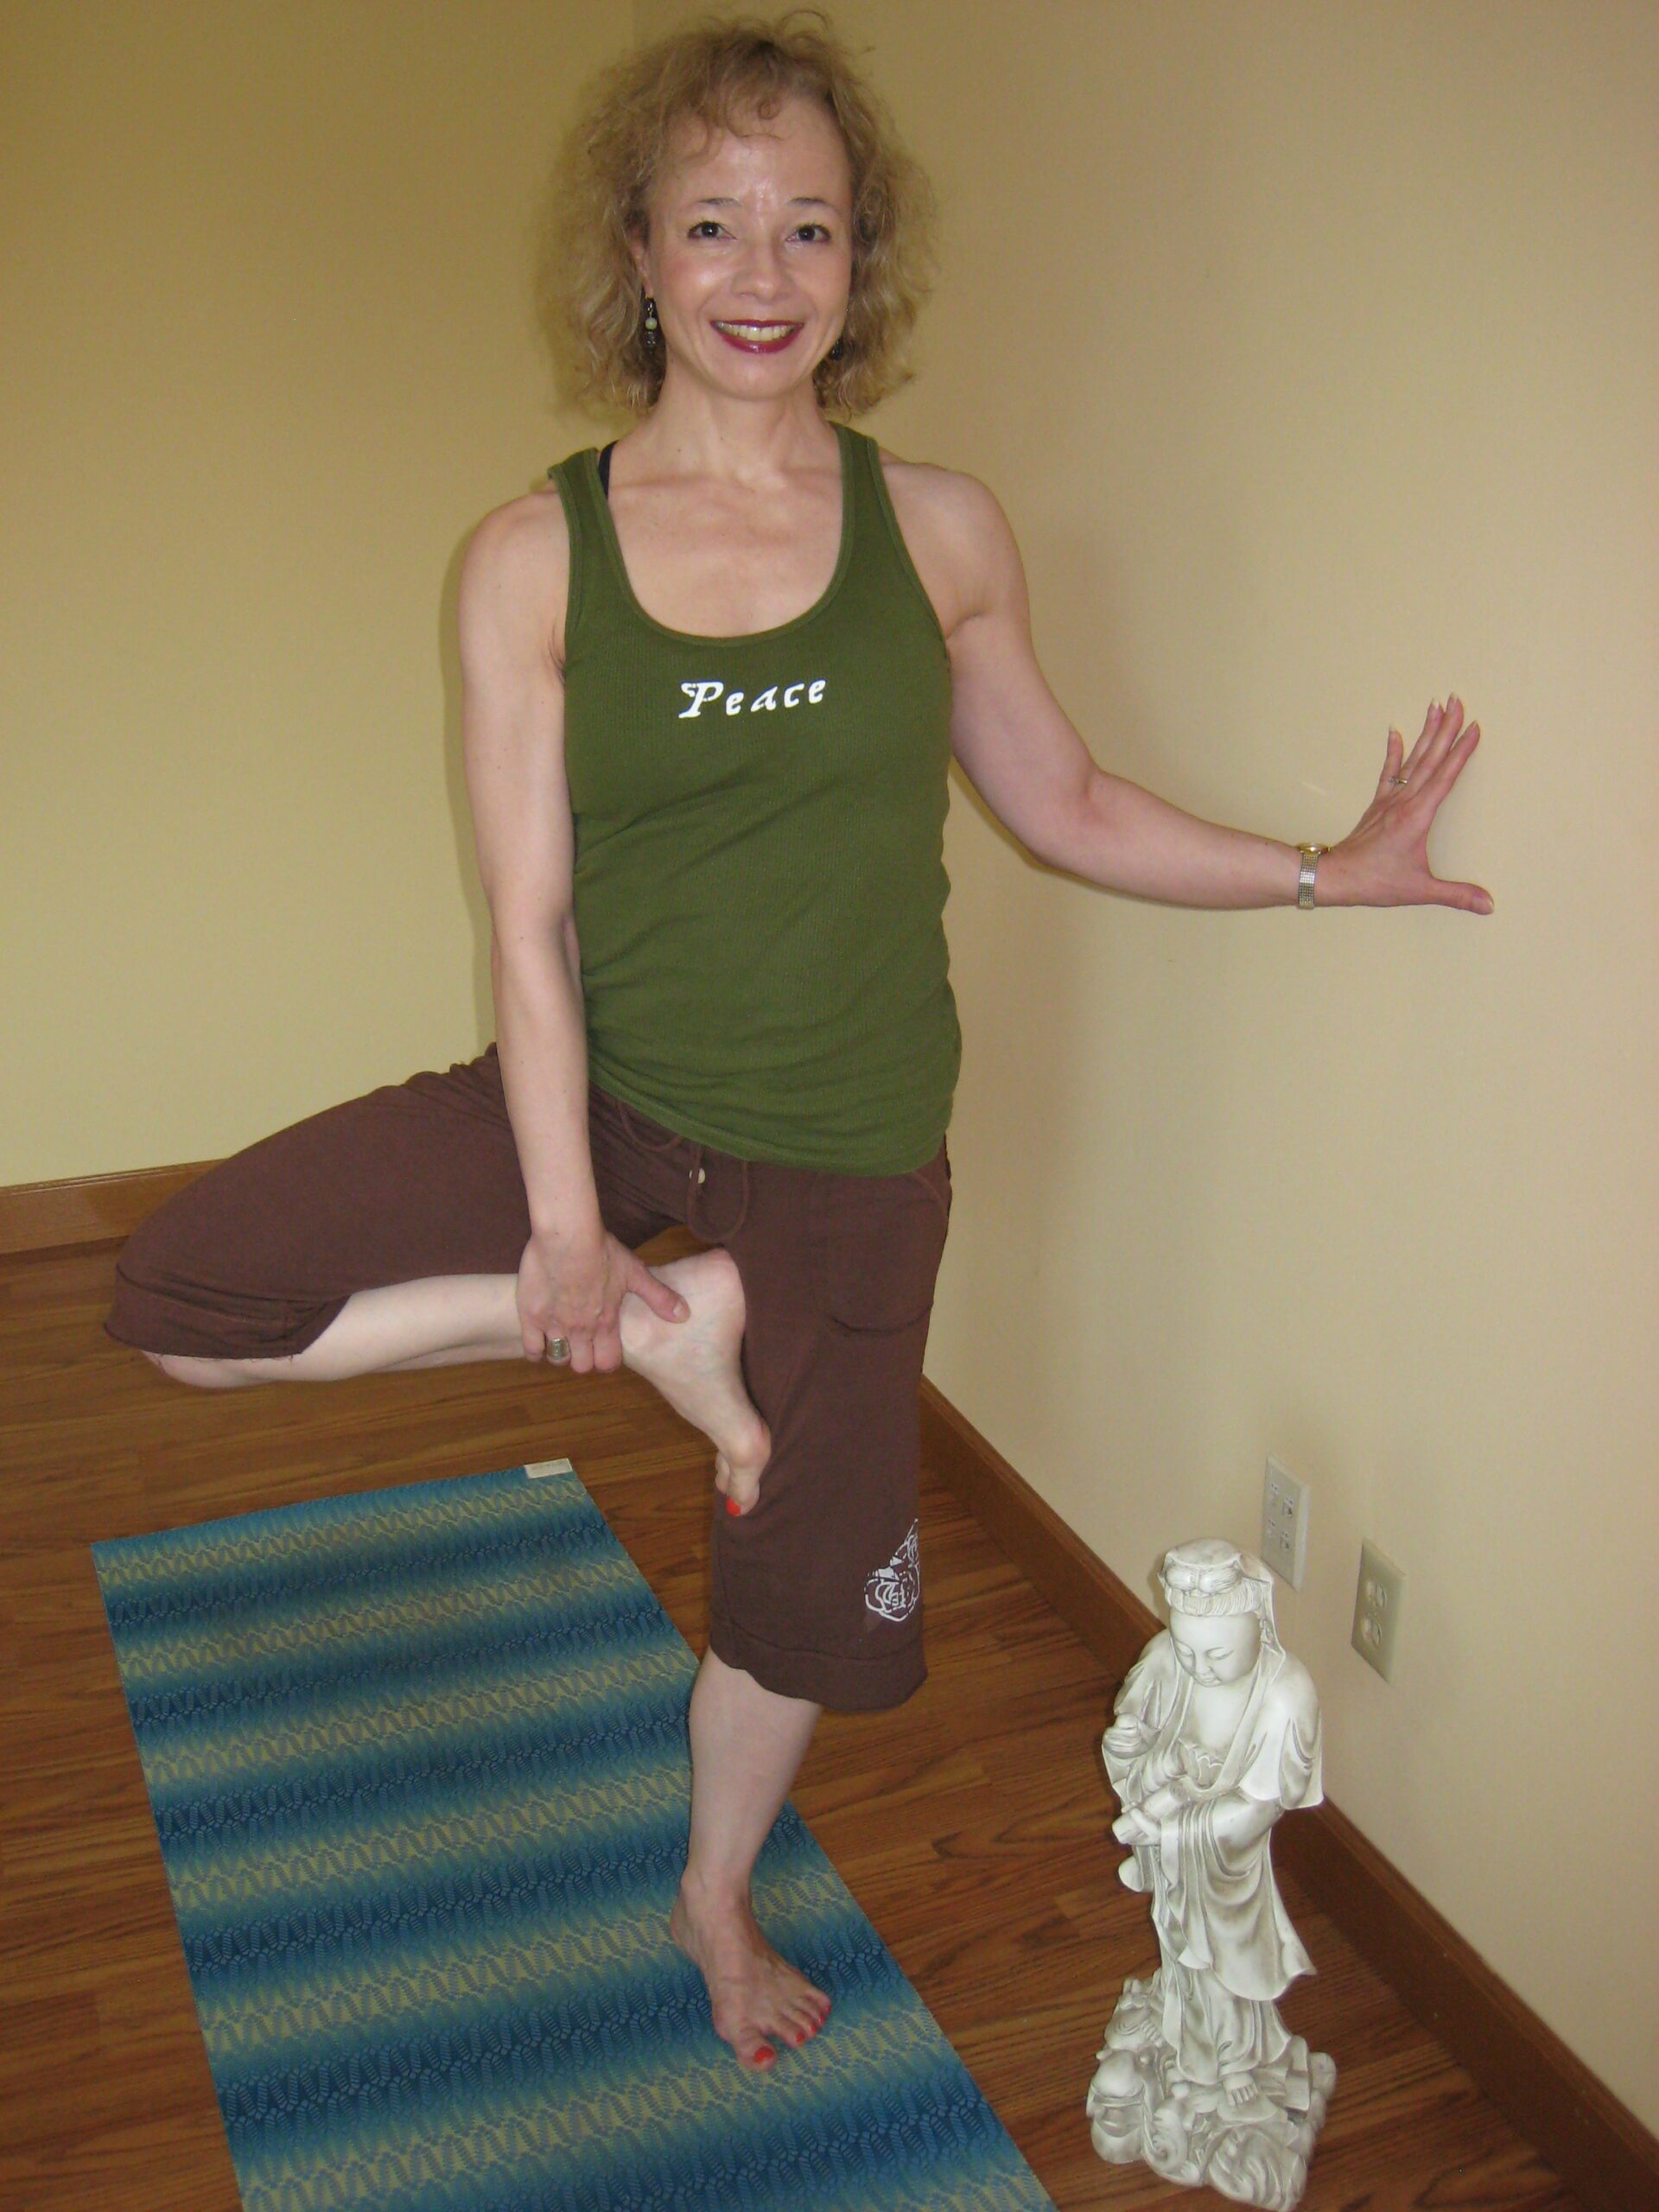
- Use a wall (pictured) or chair as a prop and hold the ankle with the other hand: (Photo #6) You can practice holding on and letting go of the prop, if you like.
- Second way to use a wall. (Photo #7) Situate the bent knee to rest against the wall to feel the support of the wall there.
- Try the pose on the floor to work on the flexibility aspects of the pose as well as to get comfortable with what may be a new position for you. (Not pictured)
Other modifications:
- Willow tree pose: (Photo #8). I found this wonderful new addition in Prevention’s YogaLife: Total Body Makeover. This particular pose is from Desi Bartlett. Again, your foot placement high or low on the opposite leg is your choice, as explained earlier:
Inhale, extending arms up, fingertips toward the ceiling, palms facing each other. Then exhale, and on the inhale, bend torso to the same side as the bent, raised knee. Straighten on an inhale.
- Knee raised higher than normal to the side: (Photo #9). As a way to build the muscles that lift that knee into tree pose, you can try this “higher lift” version, holding the knee higher and out to the side of the body while balancing. I like to joke as we do this version, that it will make their “regular” tree pose feel like a cinch! Remember to keep your hips even!
- “Sliding foot syndrome”: Yoga Journal suggests placing a folded sticky mat between the sole of the raised foot and the standing inner thigh (Not Pictured). You can also hold your ankle with one hand if you’ve lifted your foot high enough up the leg, or try a minor adjustment on your toes spread of the raised foot (Not pictured). Using shorts vs. long-legged yoga pants so you can make contact with the skin also helps with the traction.
Remember to practice changing from side to side— mental note to self: this is something I need to remember to add into my classes—as this really helps to develop your concentration and focus abilities.
Contraindicated for:
- Low Blood Pressure
- Insomnia
- Headache
- High Blood Pressure: Don’t raise the arms overhead
- Those with knee issues should use caution