
This newsletter focuses on change—both the kind we invite, like new year’s resolutions and goals; and the kind we don’t necessarily like, like unexpected snow storms. Since this is the time of year we invite change into our lives, I thought an inversion, like legs up the wall pose, would be appropriate. This is my favorite inversion, and has fast become a favorite among my students once I introduced the bolster to class!
“Psychologically, inverted yogic practices …make us feel that the world is turned upside down. If we could get used to that feeling, we could adapt to change when it happens without warning.” Guiding Yoga’s Light, by Nancy Gerstein.
Now for the pose:
Just like it sounds, simply scoot yourself next to the wall placing one hip against the wall
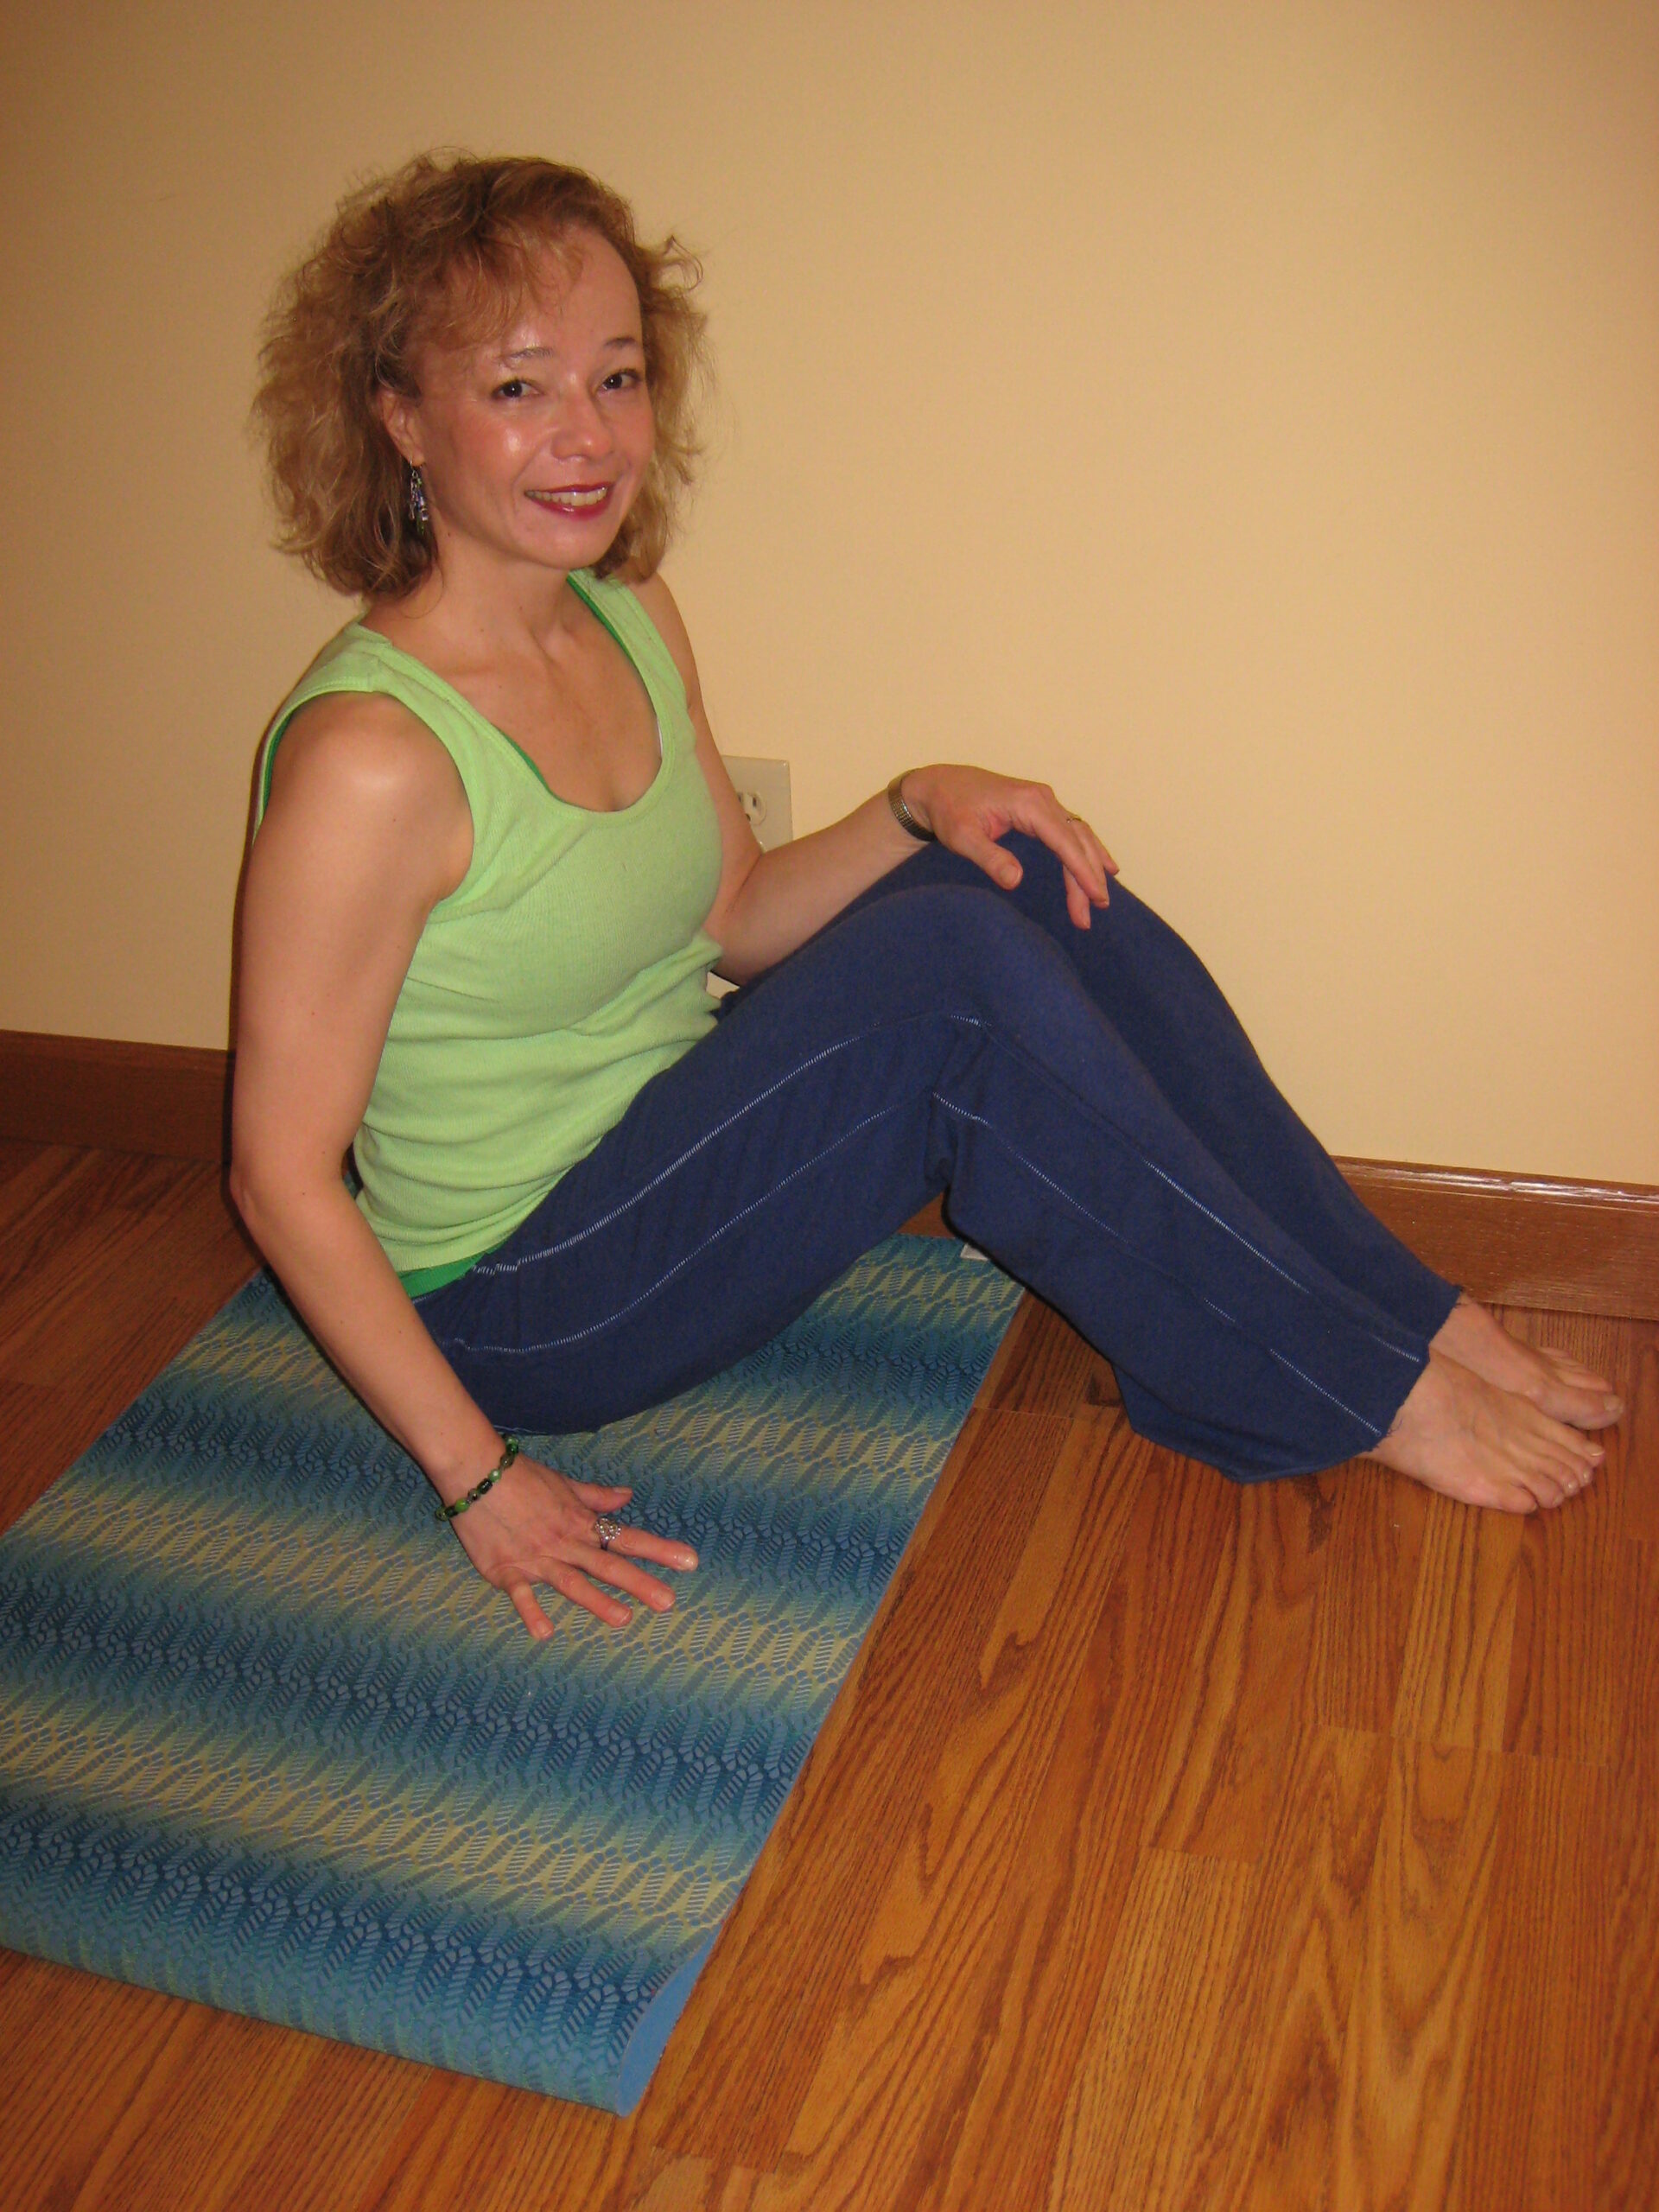
Then roll back and simultaneously swing your legs around, keeping your thighs together, and up against the wall
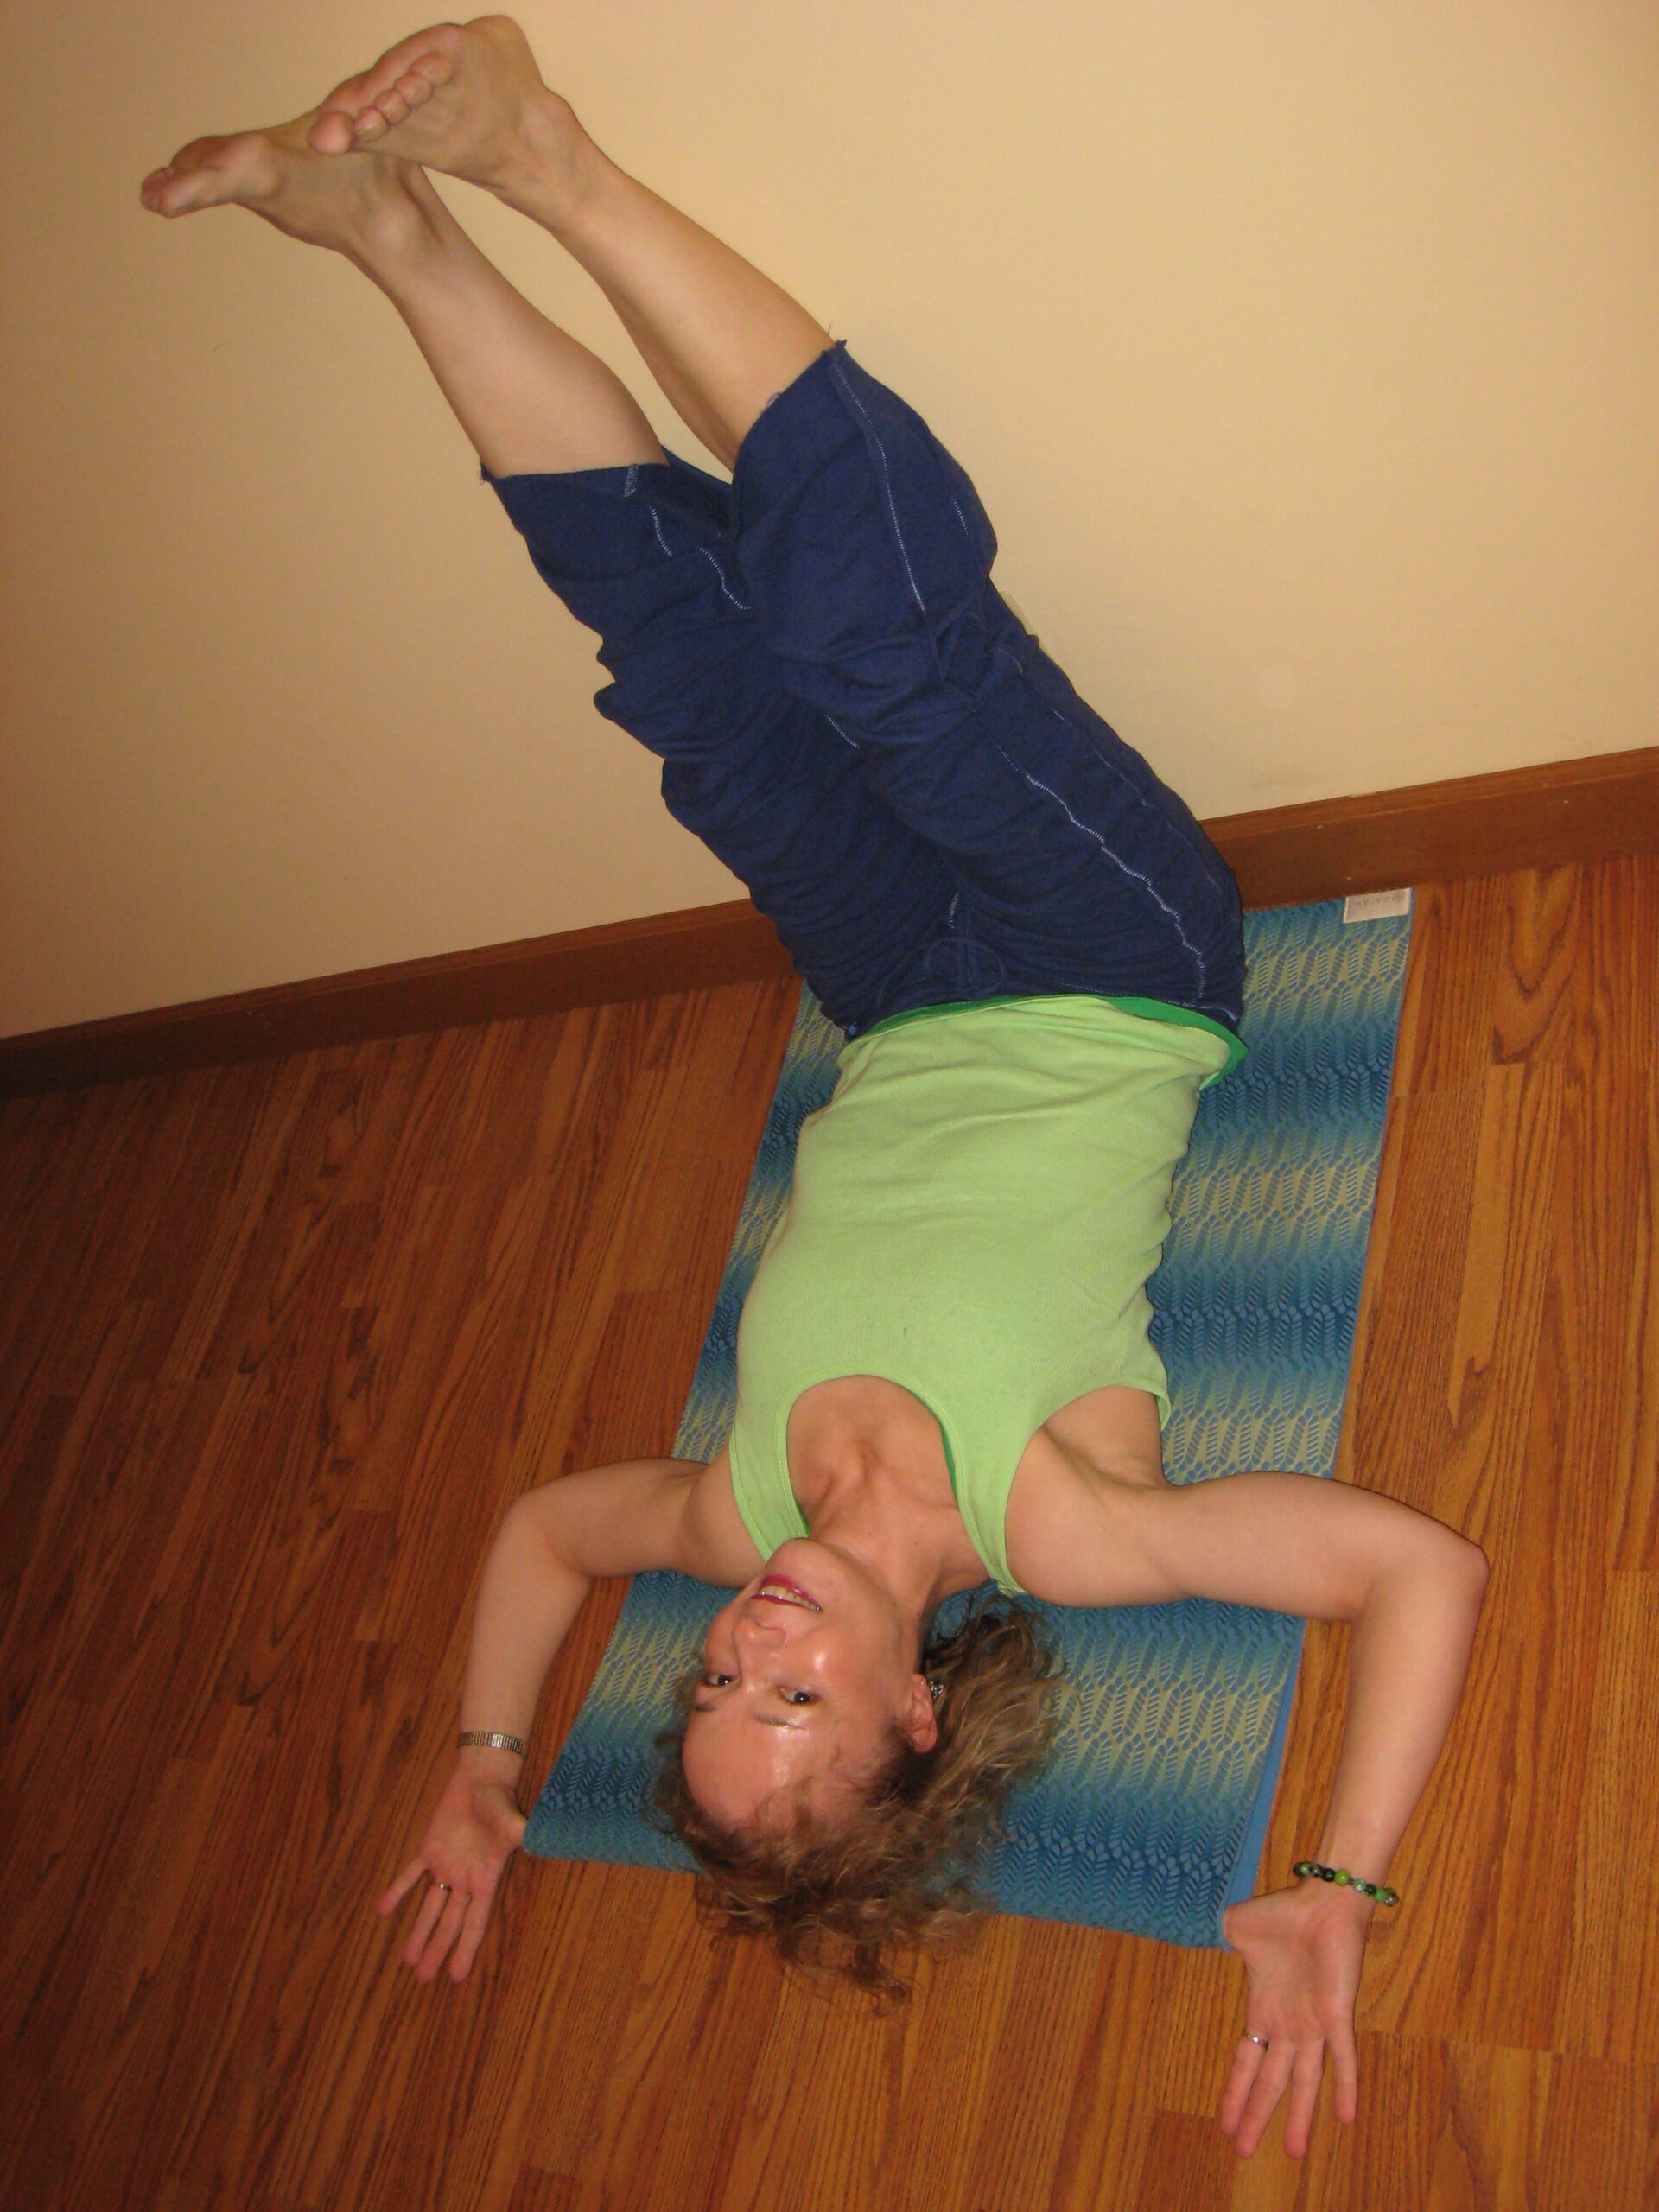
You can also start in “knees to chest pose” and roll over onto your side with your glutes touching the wall (Not shown). You’d then use yourhands to roll over onto your back, swinging the legs up against the wall. Wherever your legs are comfortably straight is your ideal distance from the wall.
Beginner’s tip: Still unsure on your form or new to yoga? You can try a practice pose or suggestion.
If you have a yoga mat, you can lay on the mat folded in half with the loop at the end where your head will be. Then after you swing your legs up the wall, you have that loop to use as leverage to reposition your body using your fingers inside the looped edge of the mat. (See Photo #2). Your ideal distance from the wall can be attained easier with this little trick. (You can remove your hands from the mat once you are placed where you want to be and let them rest on the floor either at your side or over head.)
If your neck feels like it needs some support, you can always add a rolled blanket under the neck (not shown). Be careful not to jam your chin into your chest. You want to preserve the natural curve of the neck.
A simpler, at-home version of this pose would be to lie on the floor in front of your couch and swing your legs up over the seat. Rest here for as long as you like (5-15 minutes is ideal) enjoying the passive effects of this healthy inversion. Adding an eye pillow adds to the relaxation effect.
When coming out of the pose, slide the feet down the wall and slowly roll to the side. Stay on your side a few minutes before getting up. Aside from lowering your blood pressure while you are in the pose, this pose also reduces anxiety, eases digestive problems, helps prevent varicose veins, and brings fresh blood to the face, brain, thyroid, etc. It’s better to experience it than read about it. It is said by some to “cure all that ails you”. You decide. Try it for five minutes and notice the effect.
Leg options: There are several stretches to try while in the pose. I’ve pictured a couple, and mentioned others:
Straddle splits—Allow the heels to slowly slide out toward the ground into a “V”, allowing gravity to do its work
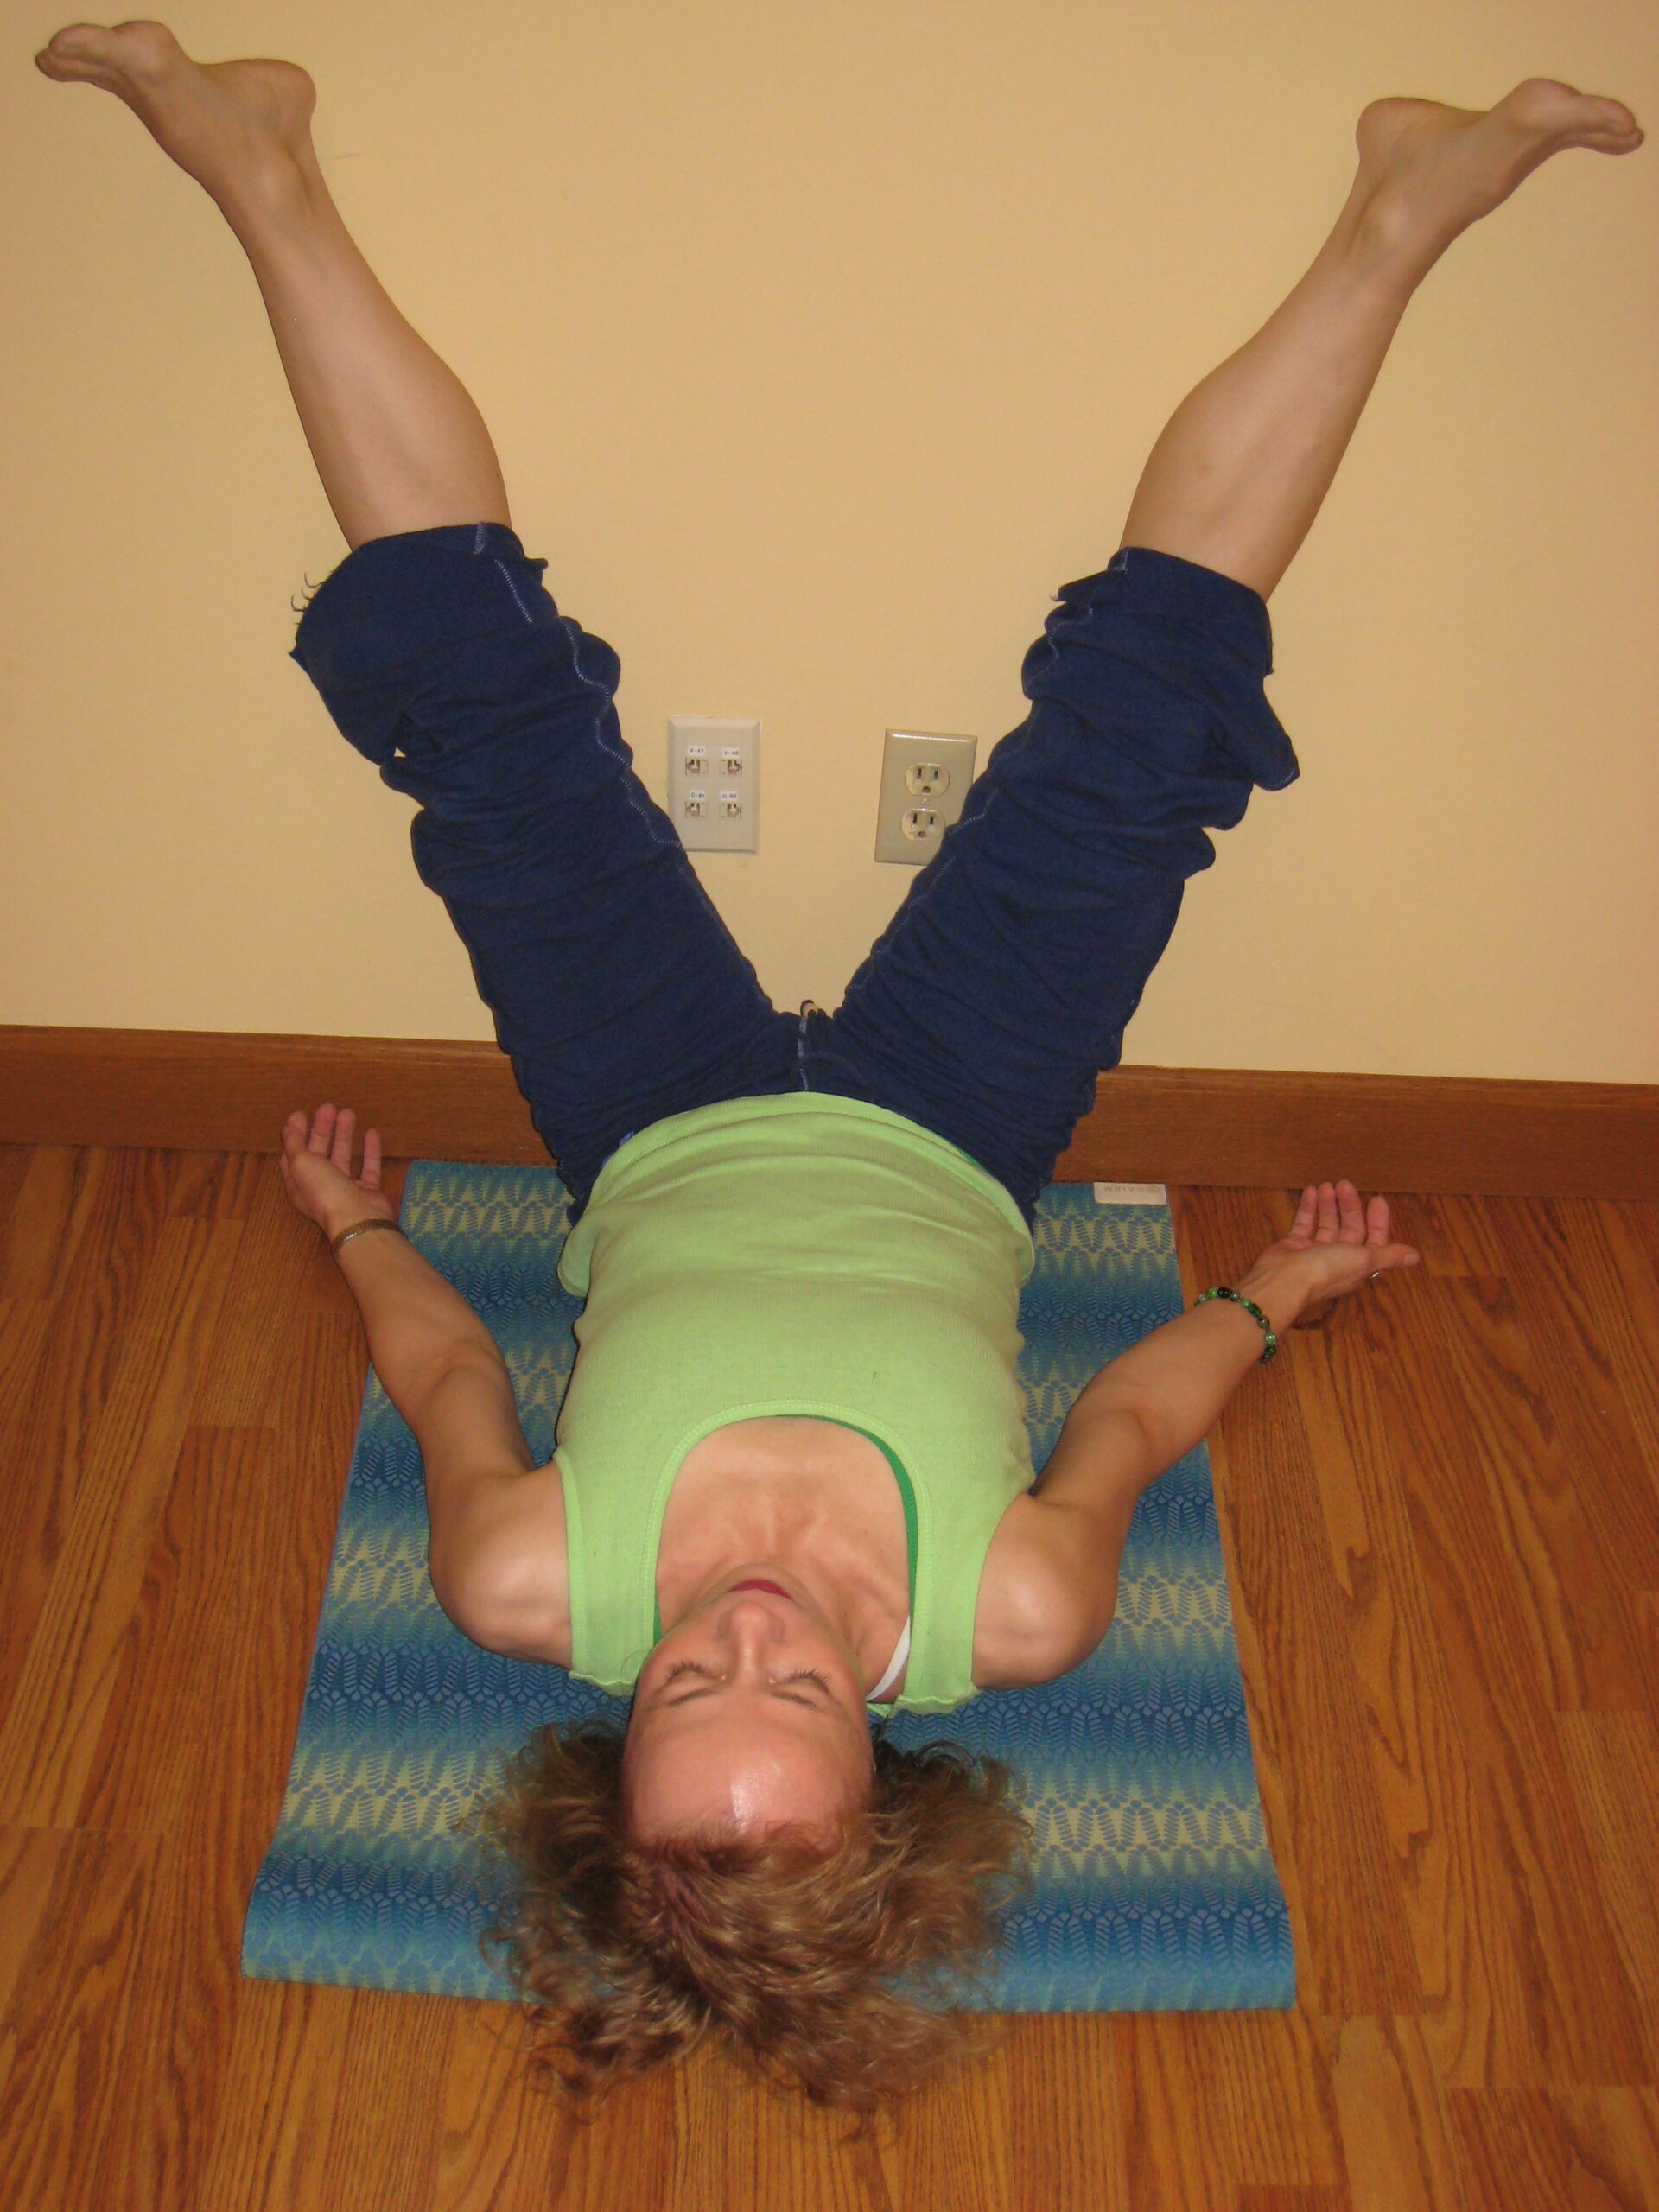
If you are hyper-flexible, you may want to press your heels into the wall, or you can also bind your feet together—not too tight—with a strap, (not shown) so that the legs don’t fall too far out and rest into the strap. Remember to keep the buckle in a position that’s not irritating. You could also try pressing the soles of your feet into the wall as though you are in a “happy baby/dead bug” variation (not shown).
Butterfly—Bring the soles of the feet together and let gravity bring your knees down bringing the heels toward the pelvis,
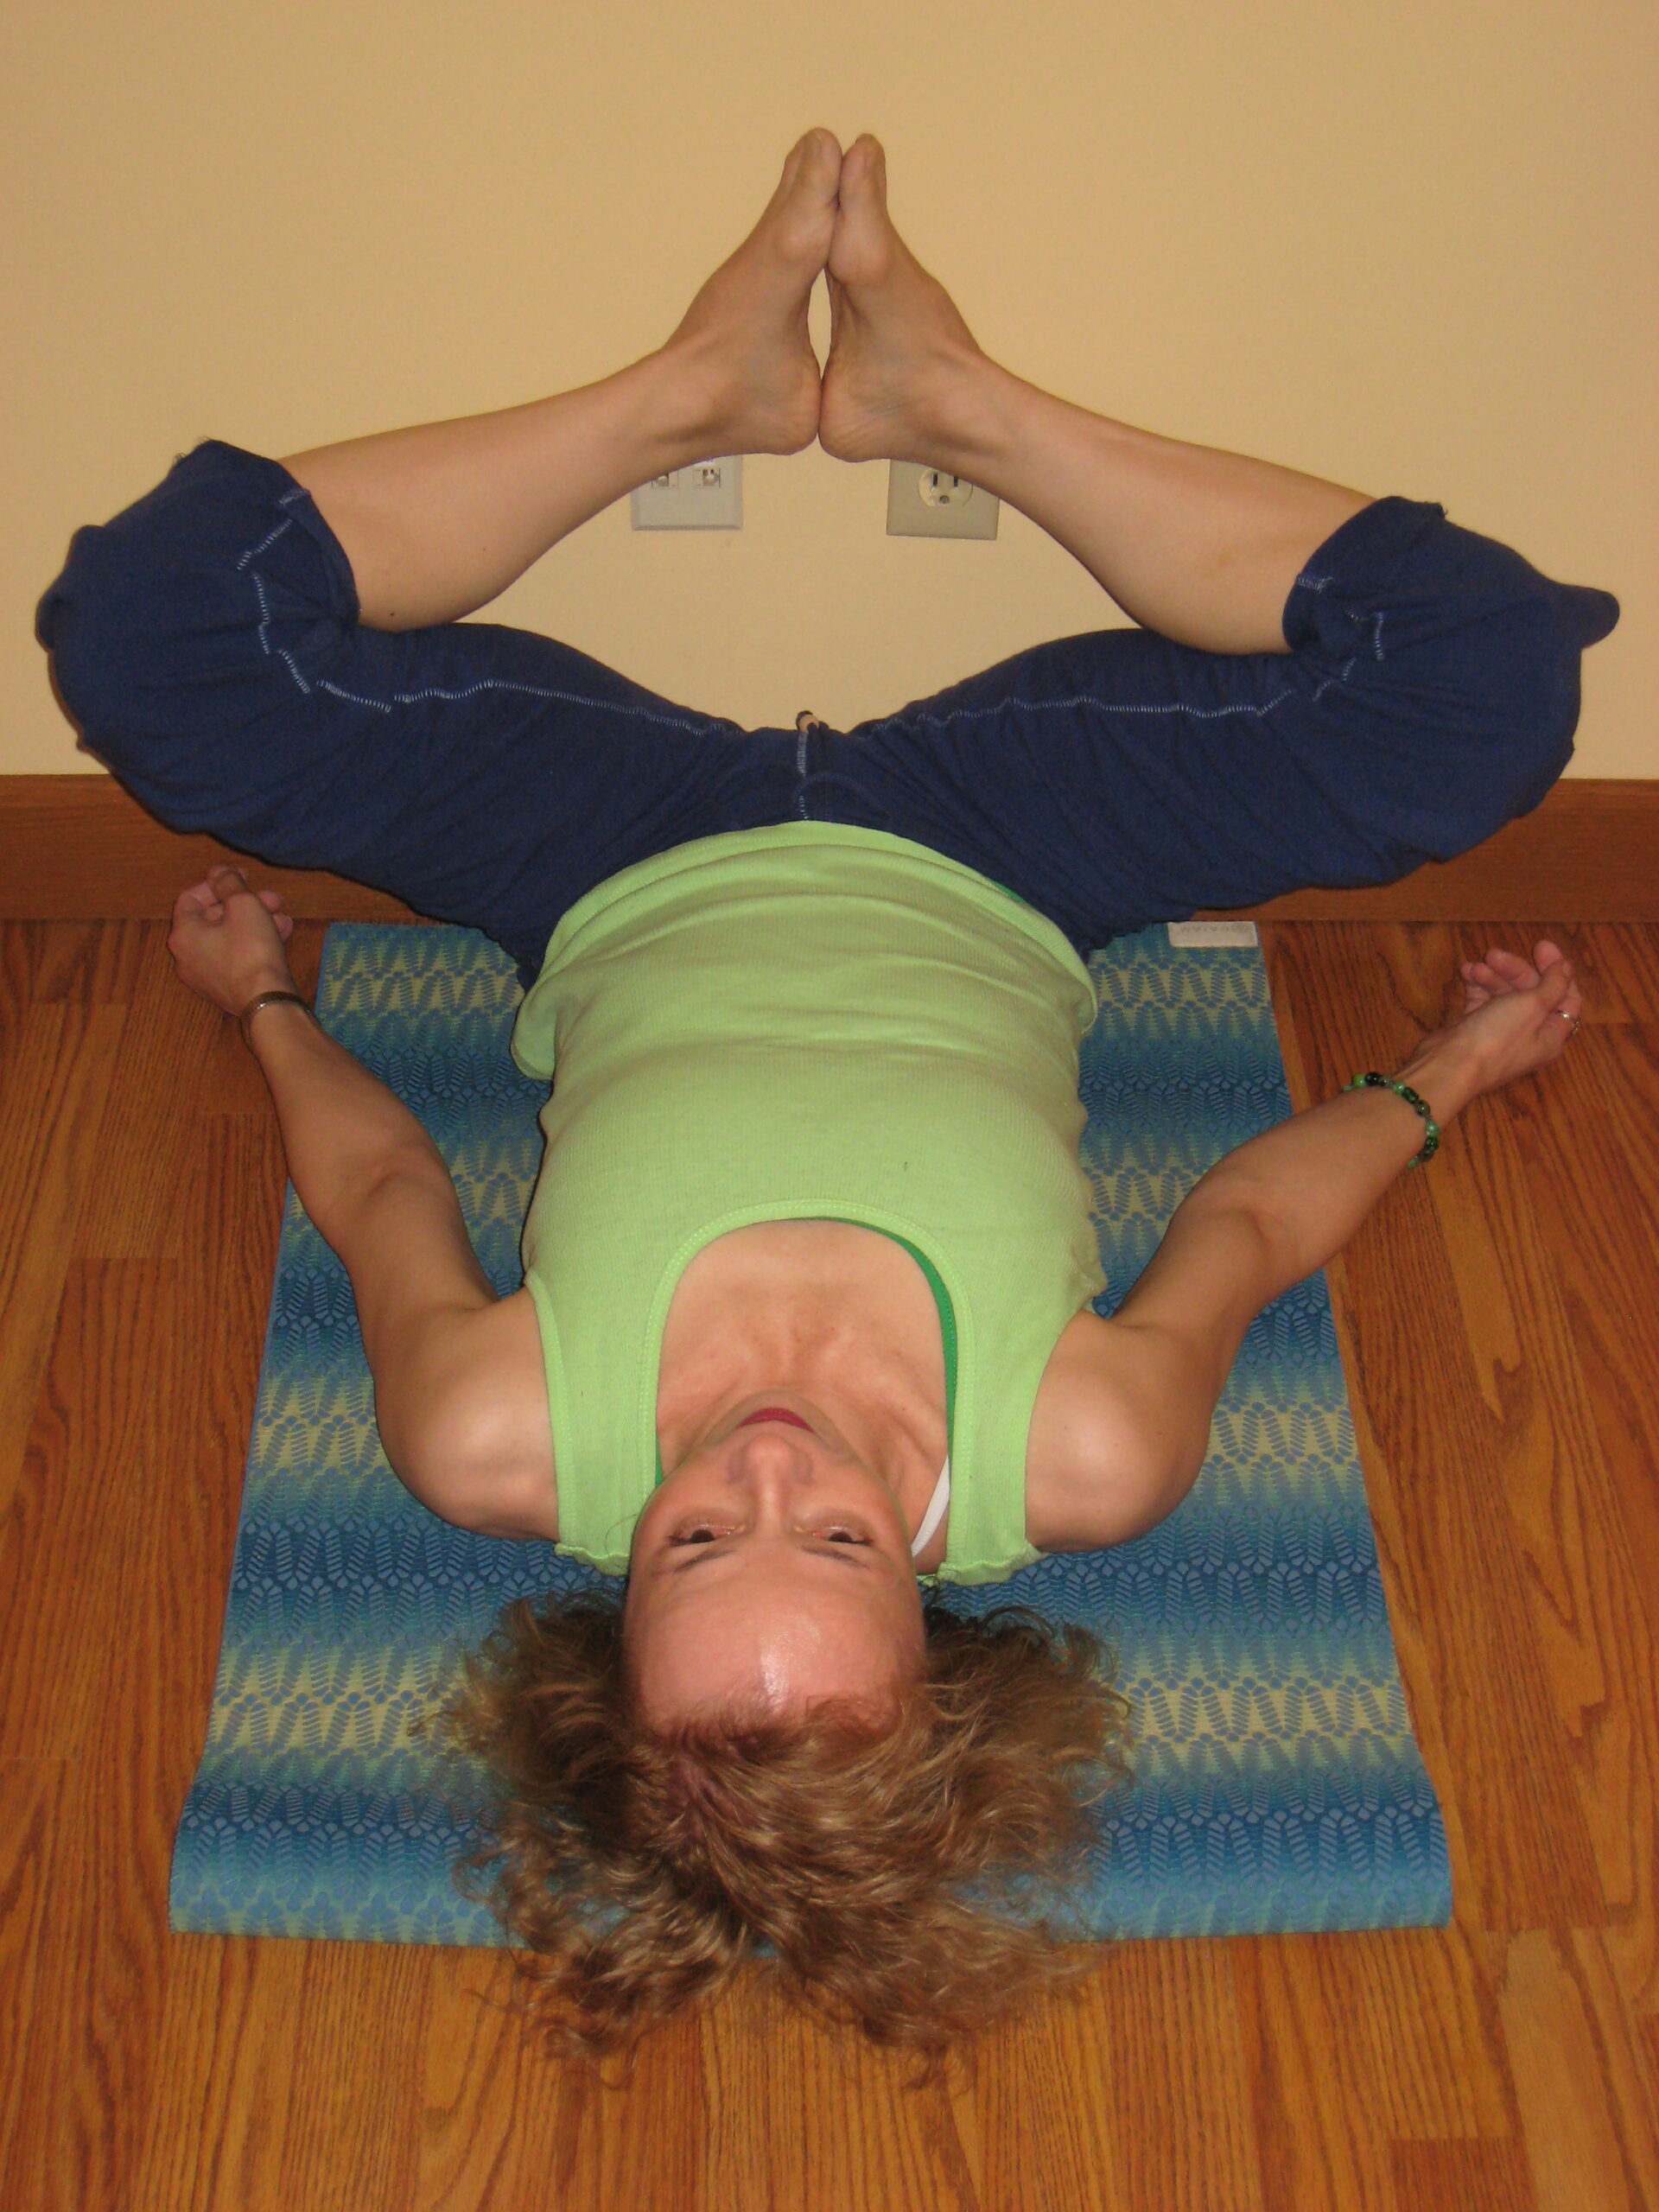
or you can add props under the feet and knees so the hamstrings can relax (not shown). Another variations would be “Half a butterfly”, which is basically tree pose (not shown). If your feet begin to tingle during this pose, the butterfly version is recommended.
A deeper hip opener would be to do “Figure 4” or “Pigeon” on the wall. I’ll cover that in another newsletter!
Benefits:
- Lowers blood pressure while in the pose
- Reduces anxiety, calms nerves, quiets the mind
- Soothes the central nervous system
- Eases digestive problems
- Helps prevent varicose veins as well as beneficial for those who do have them
- Brings fresh blood to the face, brain, thyroid, and pelvic organs
- Relieves cramped legs as well as water retention in the legs
- Stretches glutes, hamstrings, and if legs are apart—hip adductors.
- Eases physical and mental fatigue
- Balances endocrine system
Advanced options / Add a bolster or blanket: I’ve used a bolster as my prop here. You can also use a firm blanket or two (or more depending on the size of your blankets). I have my bolster tighter to the wall than you might.
The distance from the wall is personal and dependent upon the tightness of the back of your legs. As mentioned above, you want to be where your legs are comfortably straight. The tighter the backs of your legs are, the further from the wall your props will be and the lower the support should be. Likewise if you are shorter, you’ll obviously be closer to the wall and vice versa. Doing the pose without the bolster a few times helps you figure out the distance from the wall that’s right for you.
Likewise the height of the bolster or blankets is going to be personal as well. Rarely is the prop too low. It’s usually too high. You can always remove a blanket from a blanket-only prop, or add a blanket to the bolster if you need to adjust the height. Make sure your lower back is supported. Also, most people also feel best when the ribs closest to the waist are also supported by the bolster.
Similar to starting without the bolster, you would sit on the end of the bolster with one hip against the wall as in Photo #1. Roll back and simultaneously swing your legs up the wall, keeping the thighs together.
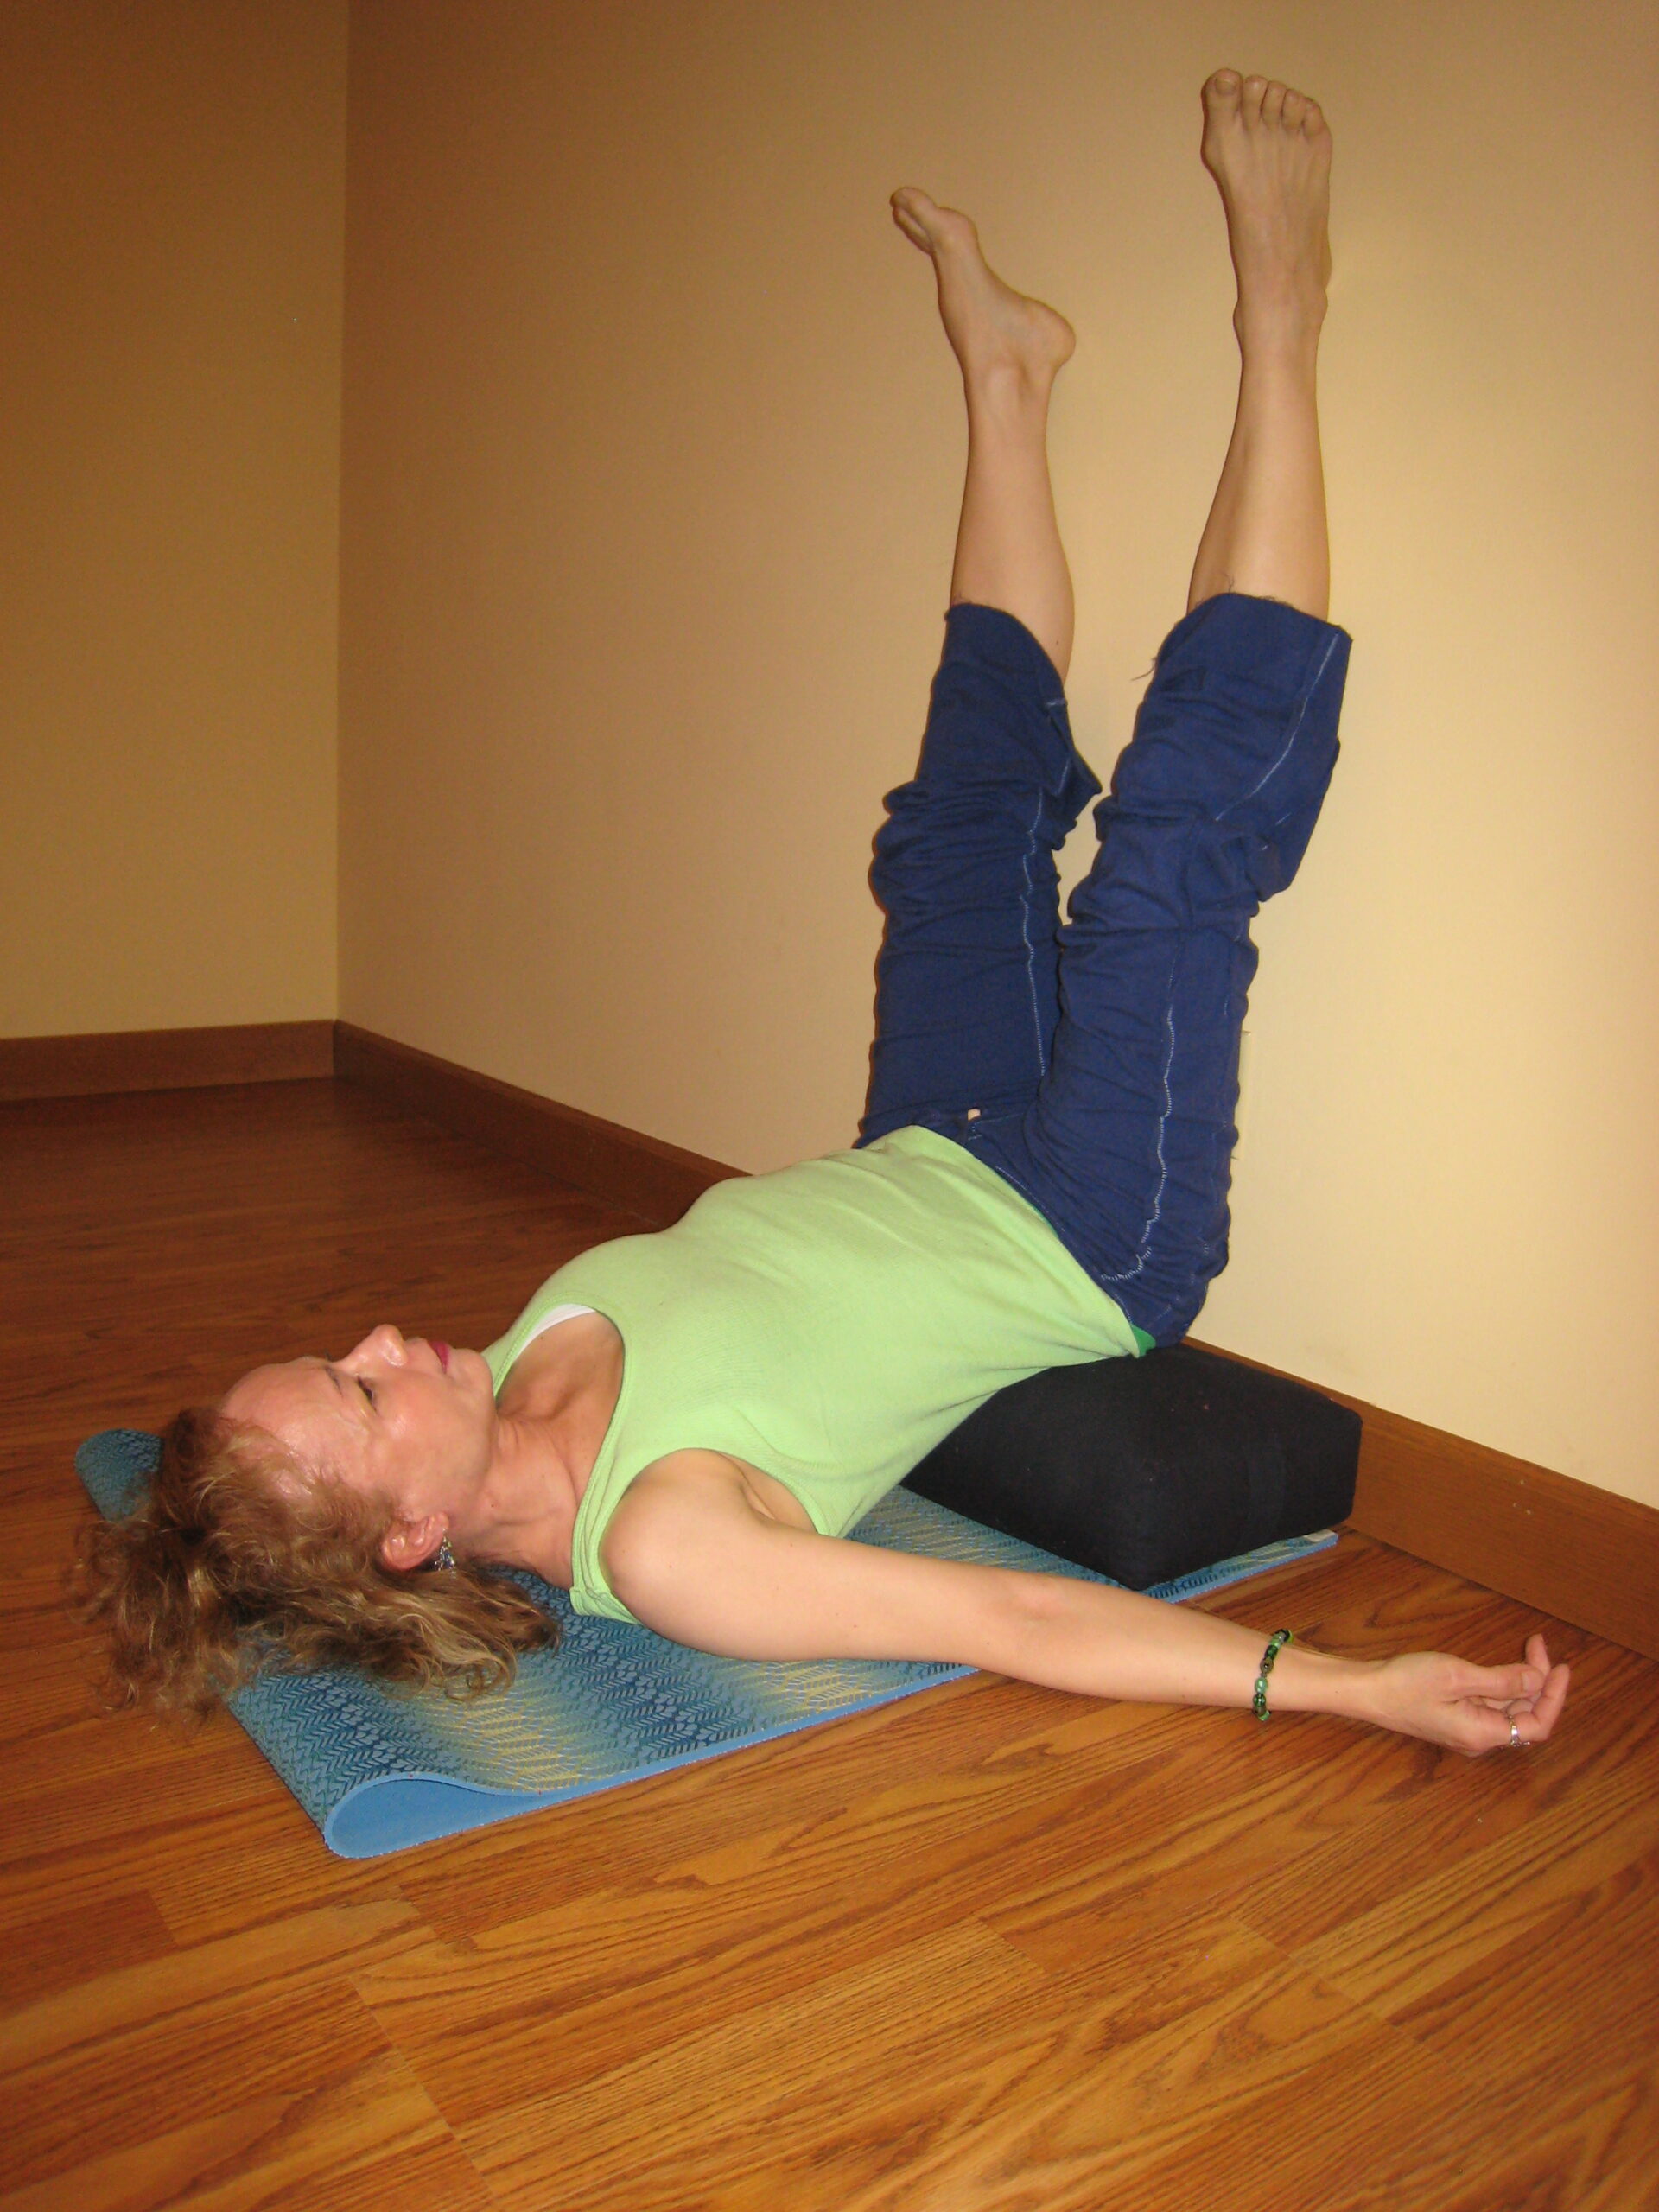
Your hips should still be level
Your legs are “almost” vertical in the pose. To come out of the bolstered pose, bend your knees, press your feet onto the wall, and lift your pelvis slightly. Slide yourself away from the wall while simultaneously pushing the bolster toward the wall. Using the bolster as support for your legs, lie on the floor for a few moments before you roll to your side and get up slowly. Be sure not to twist off the support when coming out of the pose.
In the version without the wall, you can experiment with the angle of your legs to find the most comfortable position for you.
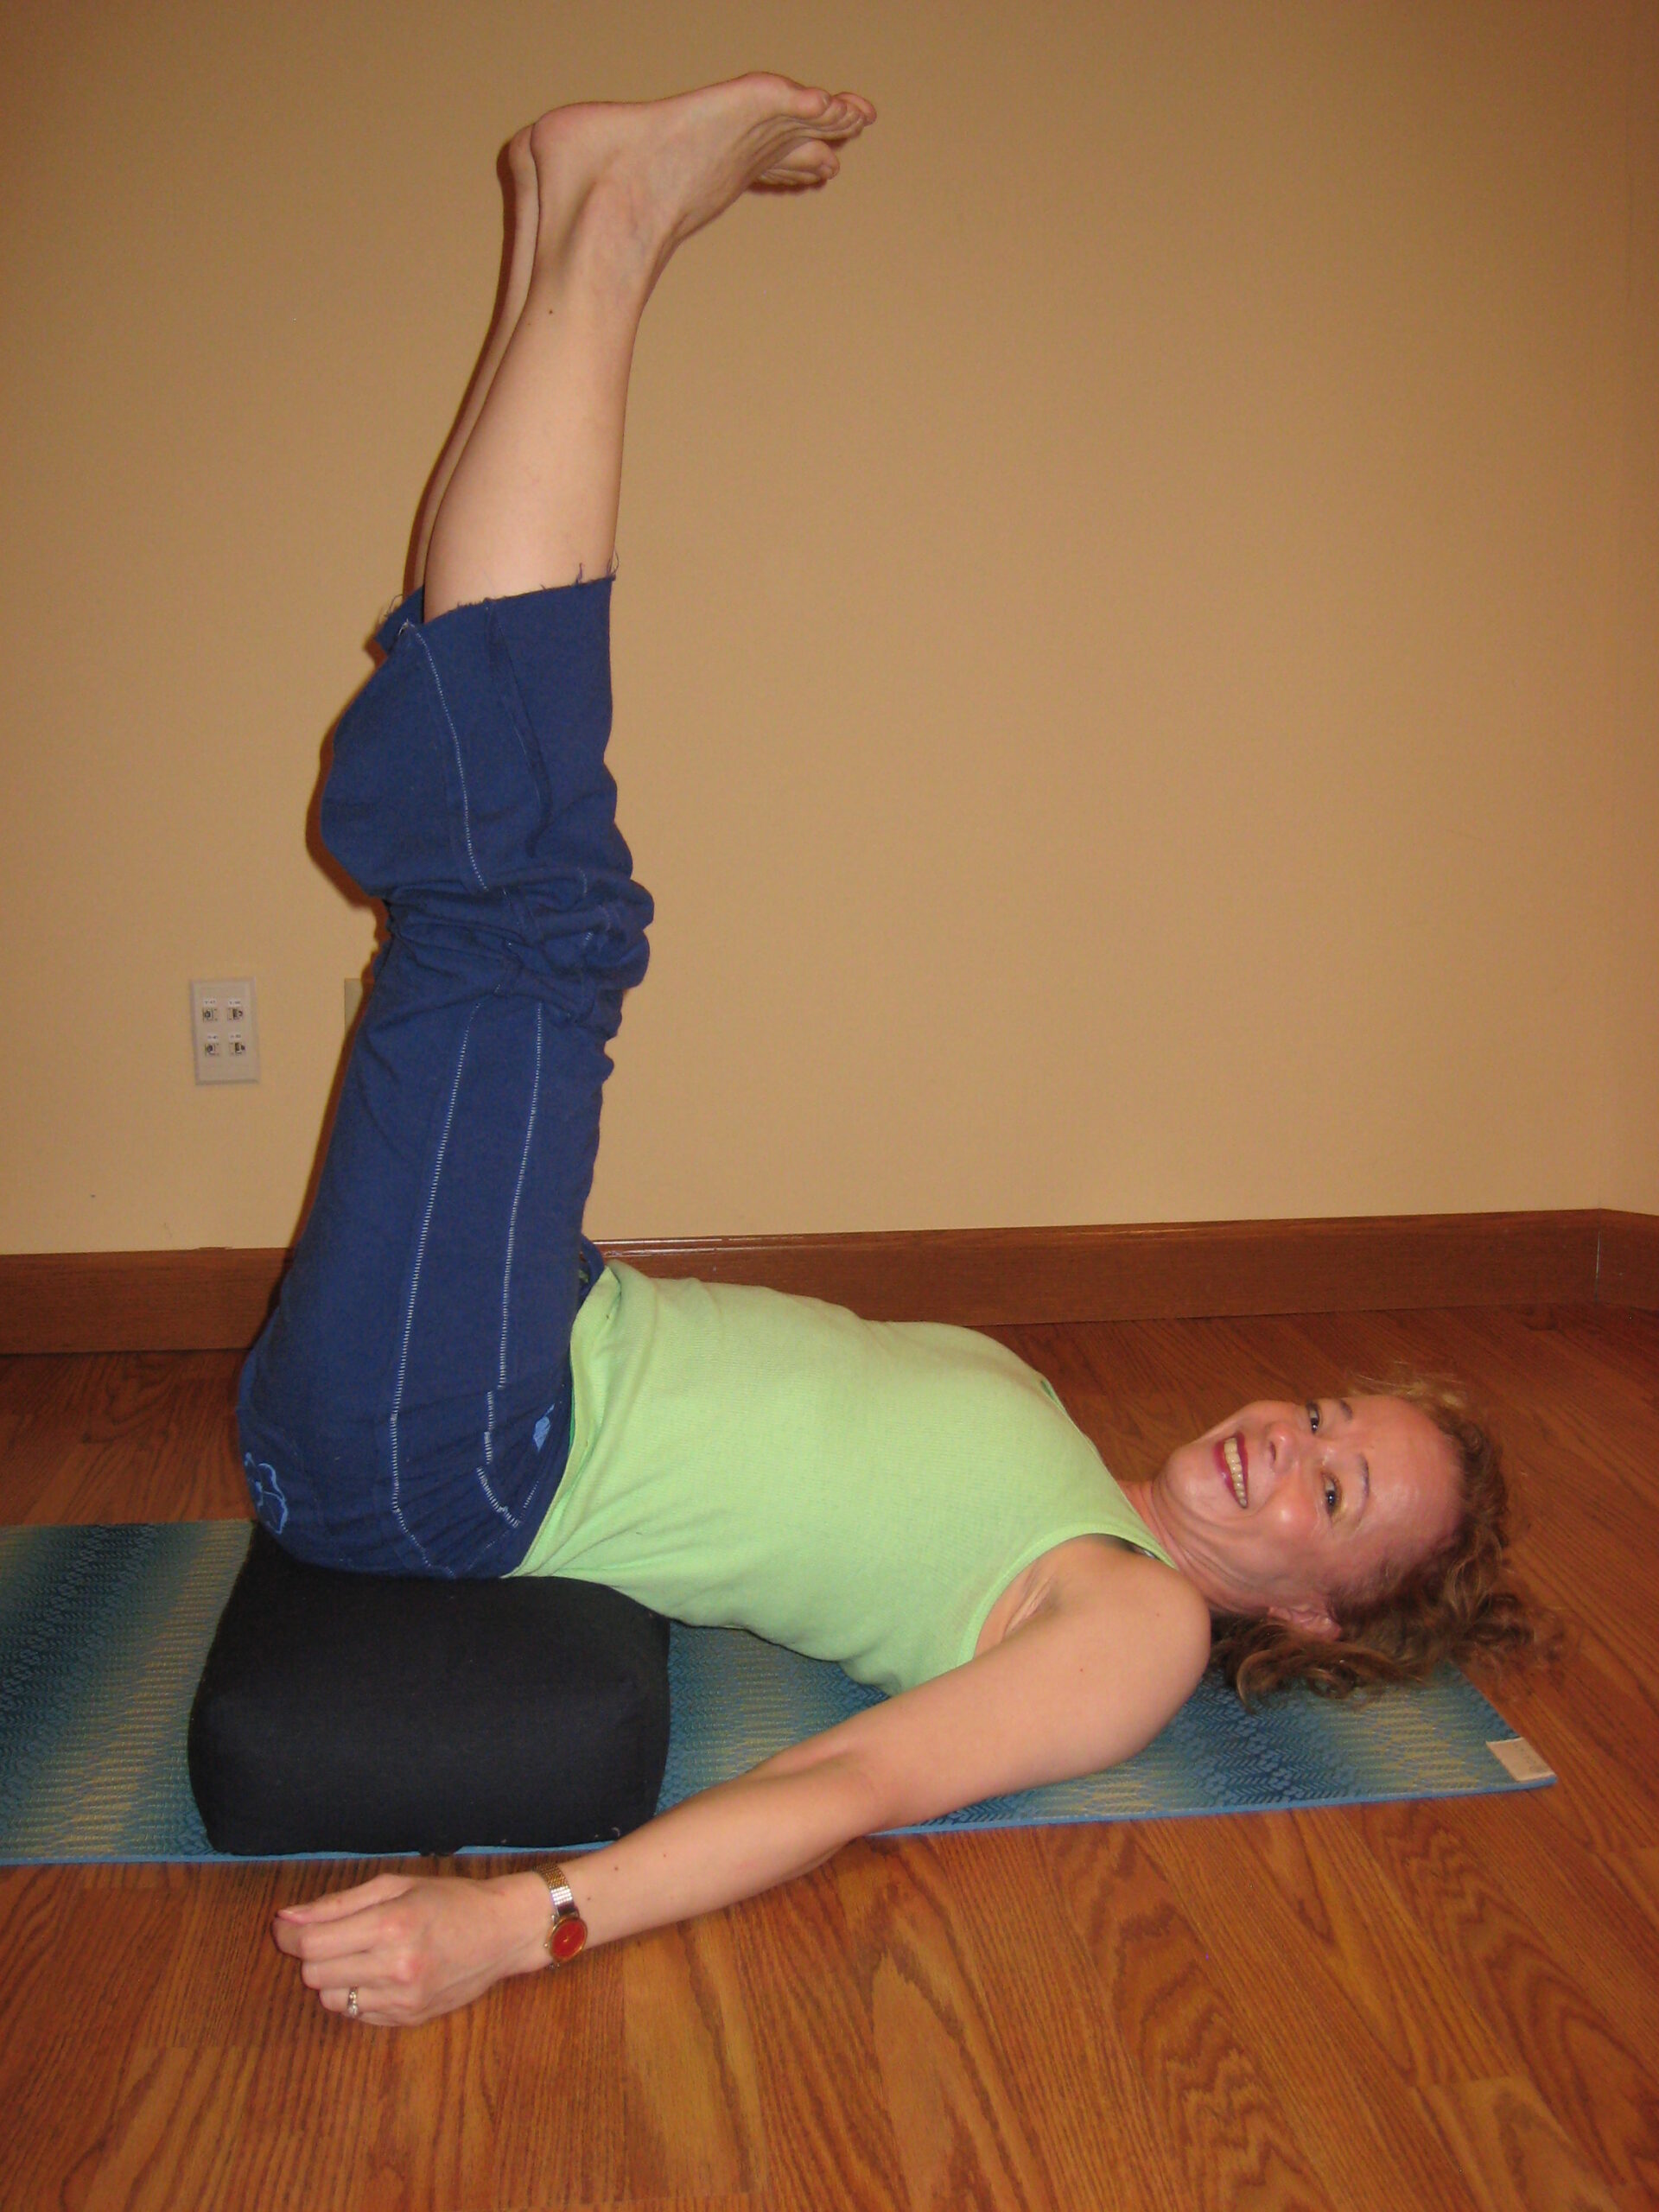
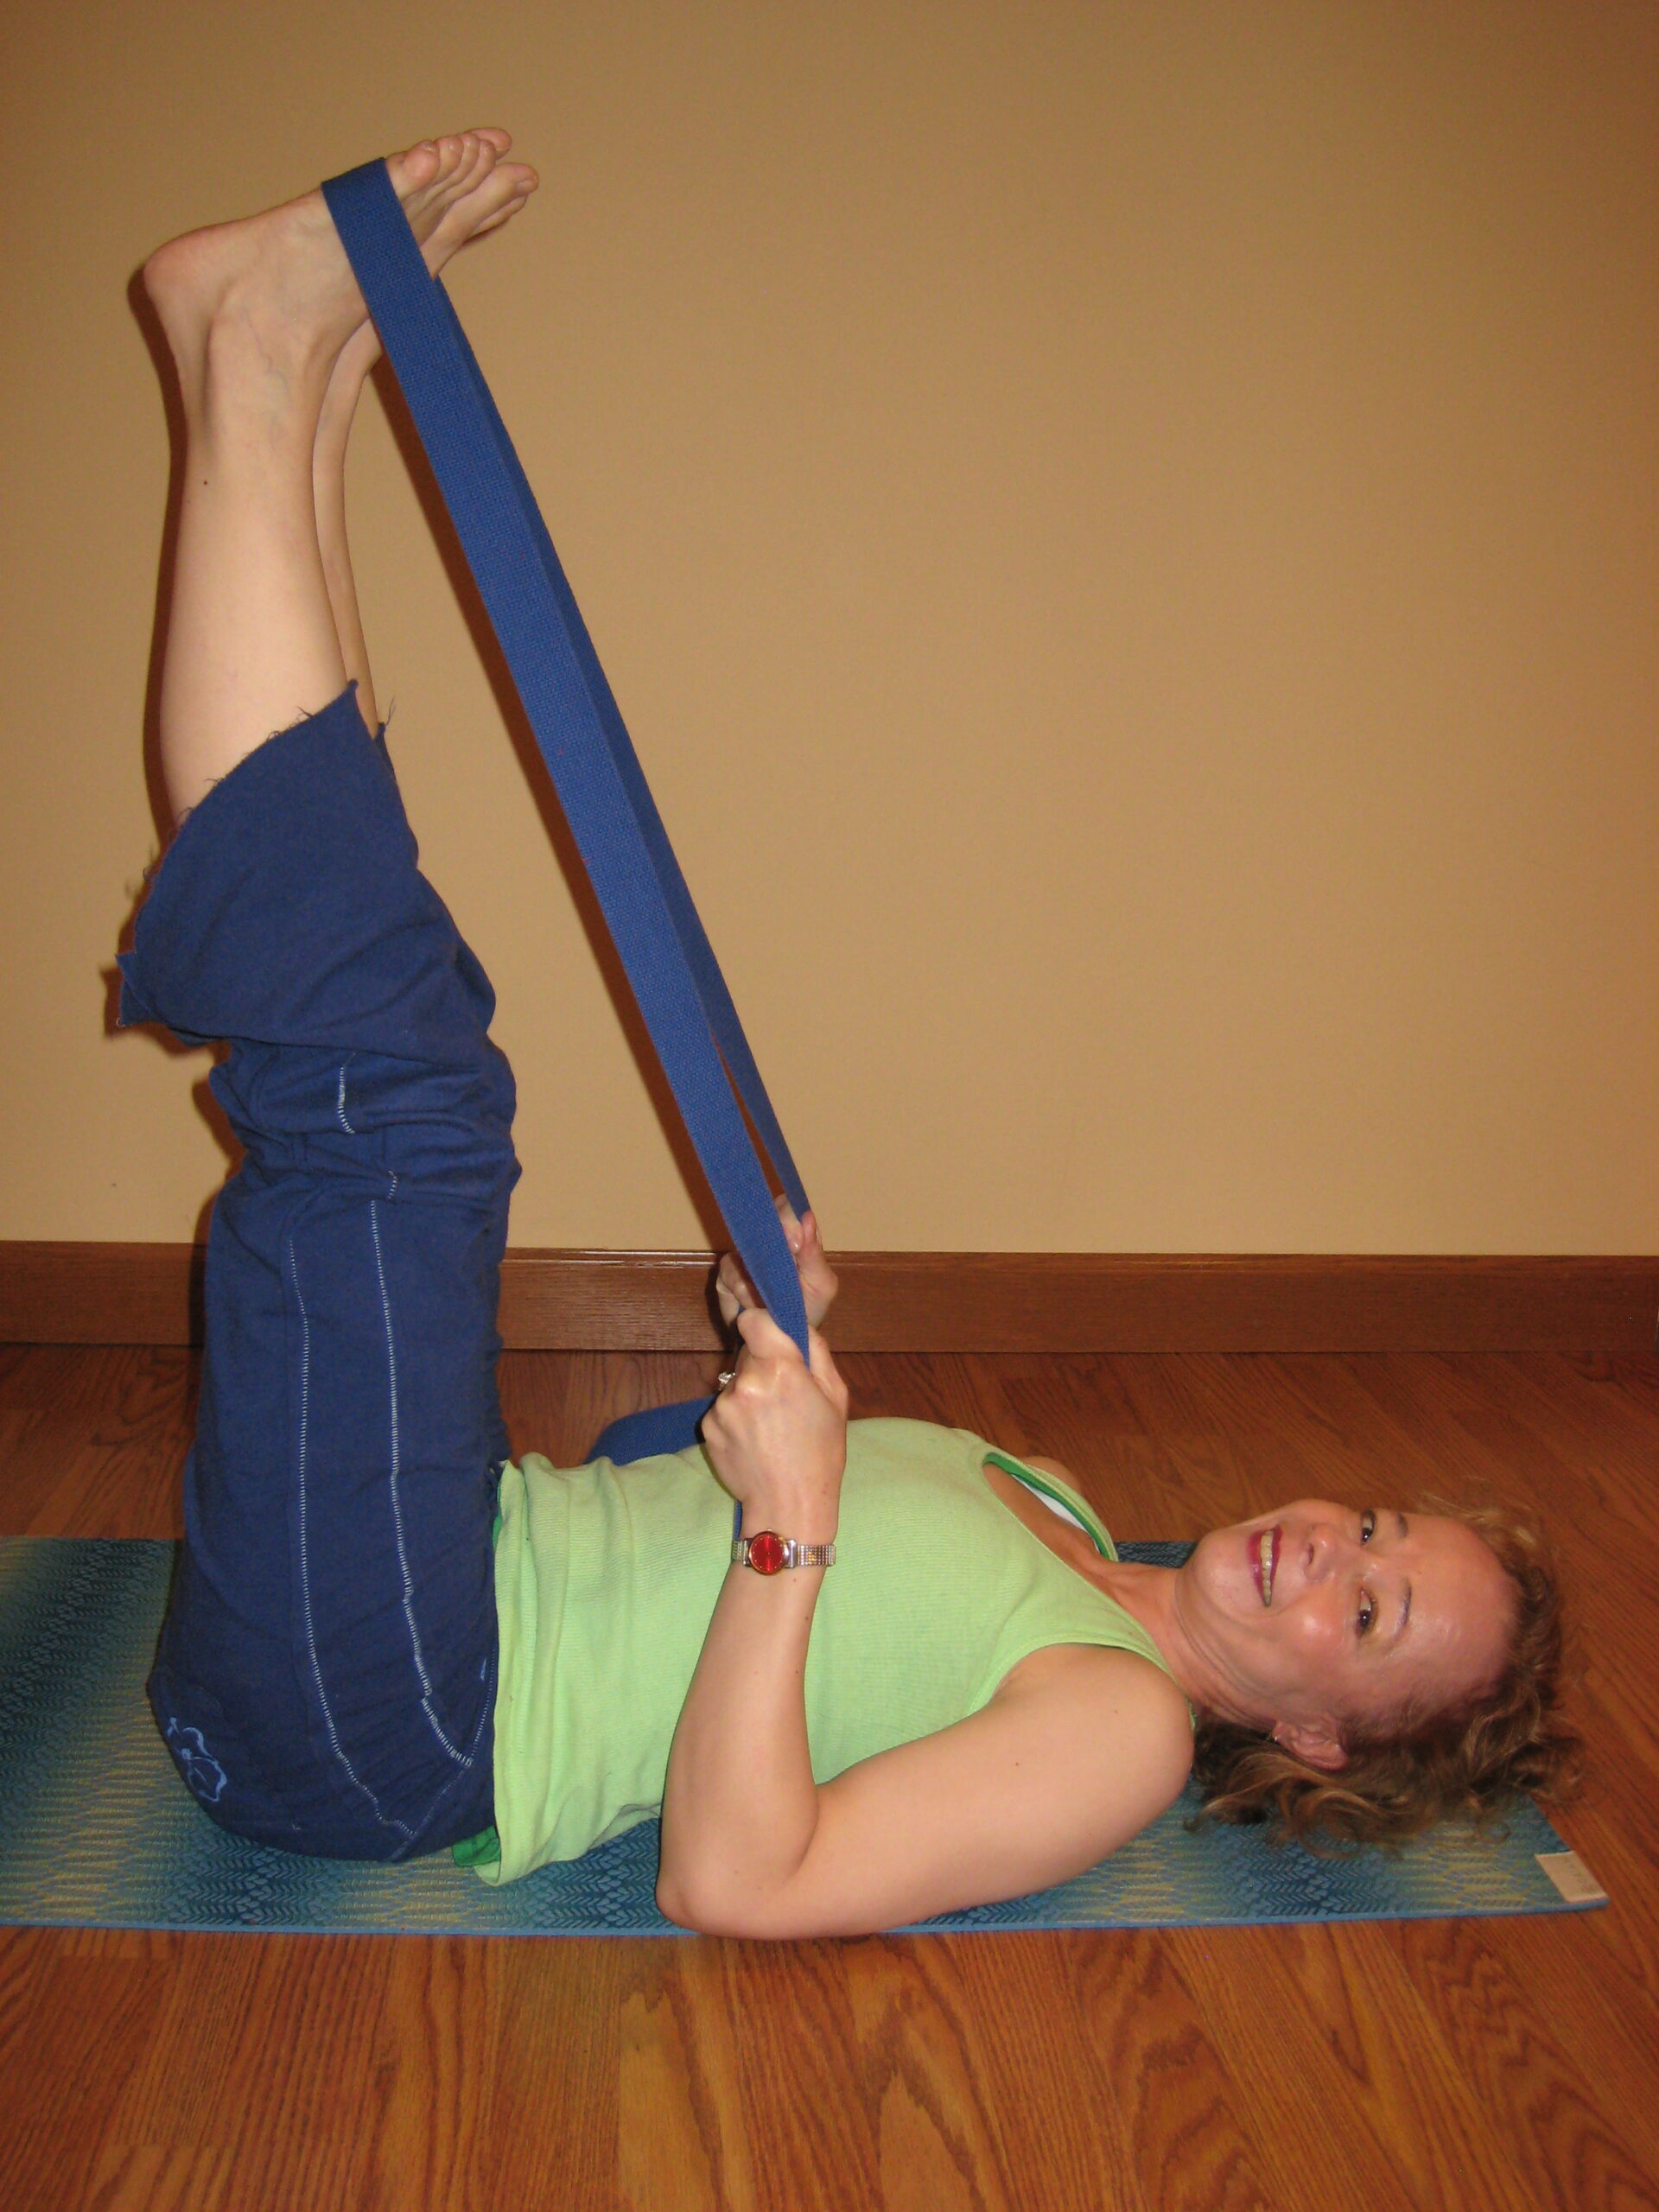
If you don’t have a bolster or wall space (or perhaps you want to save the time of having the class move to the wall), you can also use a strap to rest the heels into.
I’ve mentioned the benefits of legs up the wall pose earlier. I found this great reference from Yoga Journal: Modern teachers believe that Viparita Karani is good for most everything that ails you, including:
- Anxiety
- Arthritis
- Digestive problems
- Headache
- High and low blood pressure
- Insomnia
- Migraine
- Mild depression
- Respiratory ailments
- Urinary disorders
- Varicose veins
- Menstrual cramps
- Premenstrual syndrome
- Menopause
Contraindicated for:
- Individuals with hiatal hernias, eye pressure, retinal problems, heart problems, neck problems, and some say menstruating women. (Always discuss any concerns with your health care professional.)
- If your lower back is uncomfortable in the prop version, try the “happy baby” version described above with the soles of the feet to the wall instead, or cross your ankles loosely and let your wall support your legs and feet.
- Do not practice this pose if it creates pressure in the head
- Do not practice this pose after the third month of pregnancy or if at risk for miscarriage
Sources: Relax and Renew by Judith Lasater, PhD, PT, and Beth Shaw’s YogaFit
Thanks for the mention of Guiding Yoga’s Light. Legs up on the wall is the perfect inverted pose after a challenging class or long and tiring day. It literally “unwinds” the stuck energies in the lower chakras.
Many blessings,
Nancy Gerstein
Guiding Yoga’s Light
Thank YOU for taking the time to reach out, Nancy! I am honored! I simply LOVE your book and use it in my teaching practice often. It’s one of my absolute favorite books, and if you knew how many yoga books I have…you’d know I REALLY like yours! 🙂 Many blessings back to you! Sandy Krzyzanowski, Better Day Yoga LLC