Side Plank / The one-armed balance pose (Sanskrit terms: Vasisthasana)
Last month we broke down Gate Pose. I often teach a flow with gate pose and the kneeling side plank version of side plank pose since they both use the one knee on the floor and the other leg straight out to the side. This connection inspired me to break down Side Plank this month.
There are a few ways to come into Side Plank pose. My favorite way is to start with the kneeling side plank option. Then I offer the option from there to go into full side plank, and then progress to the advanced version. I like progression options that you can either choose to do or not do.
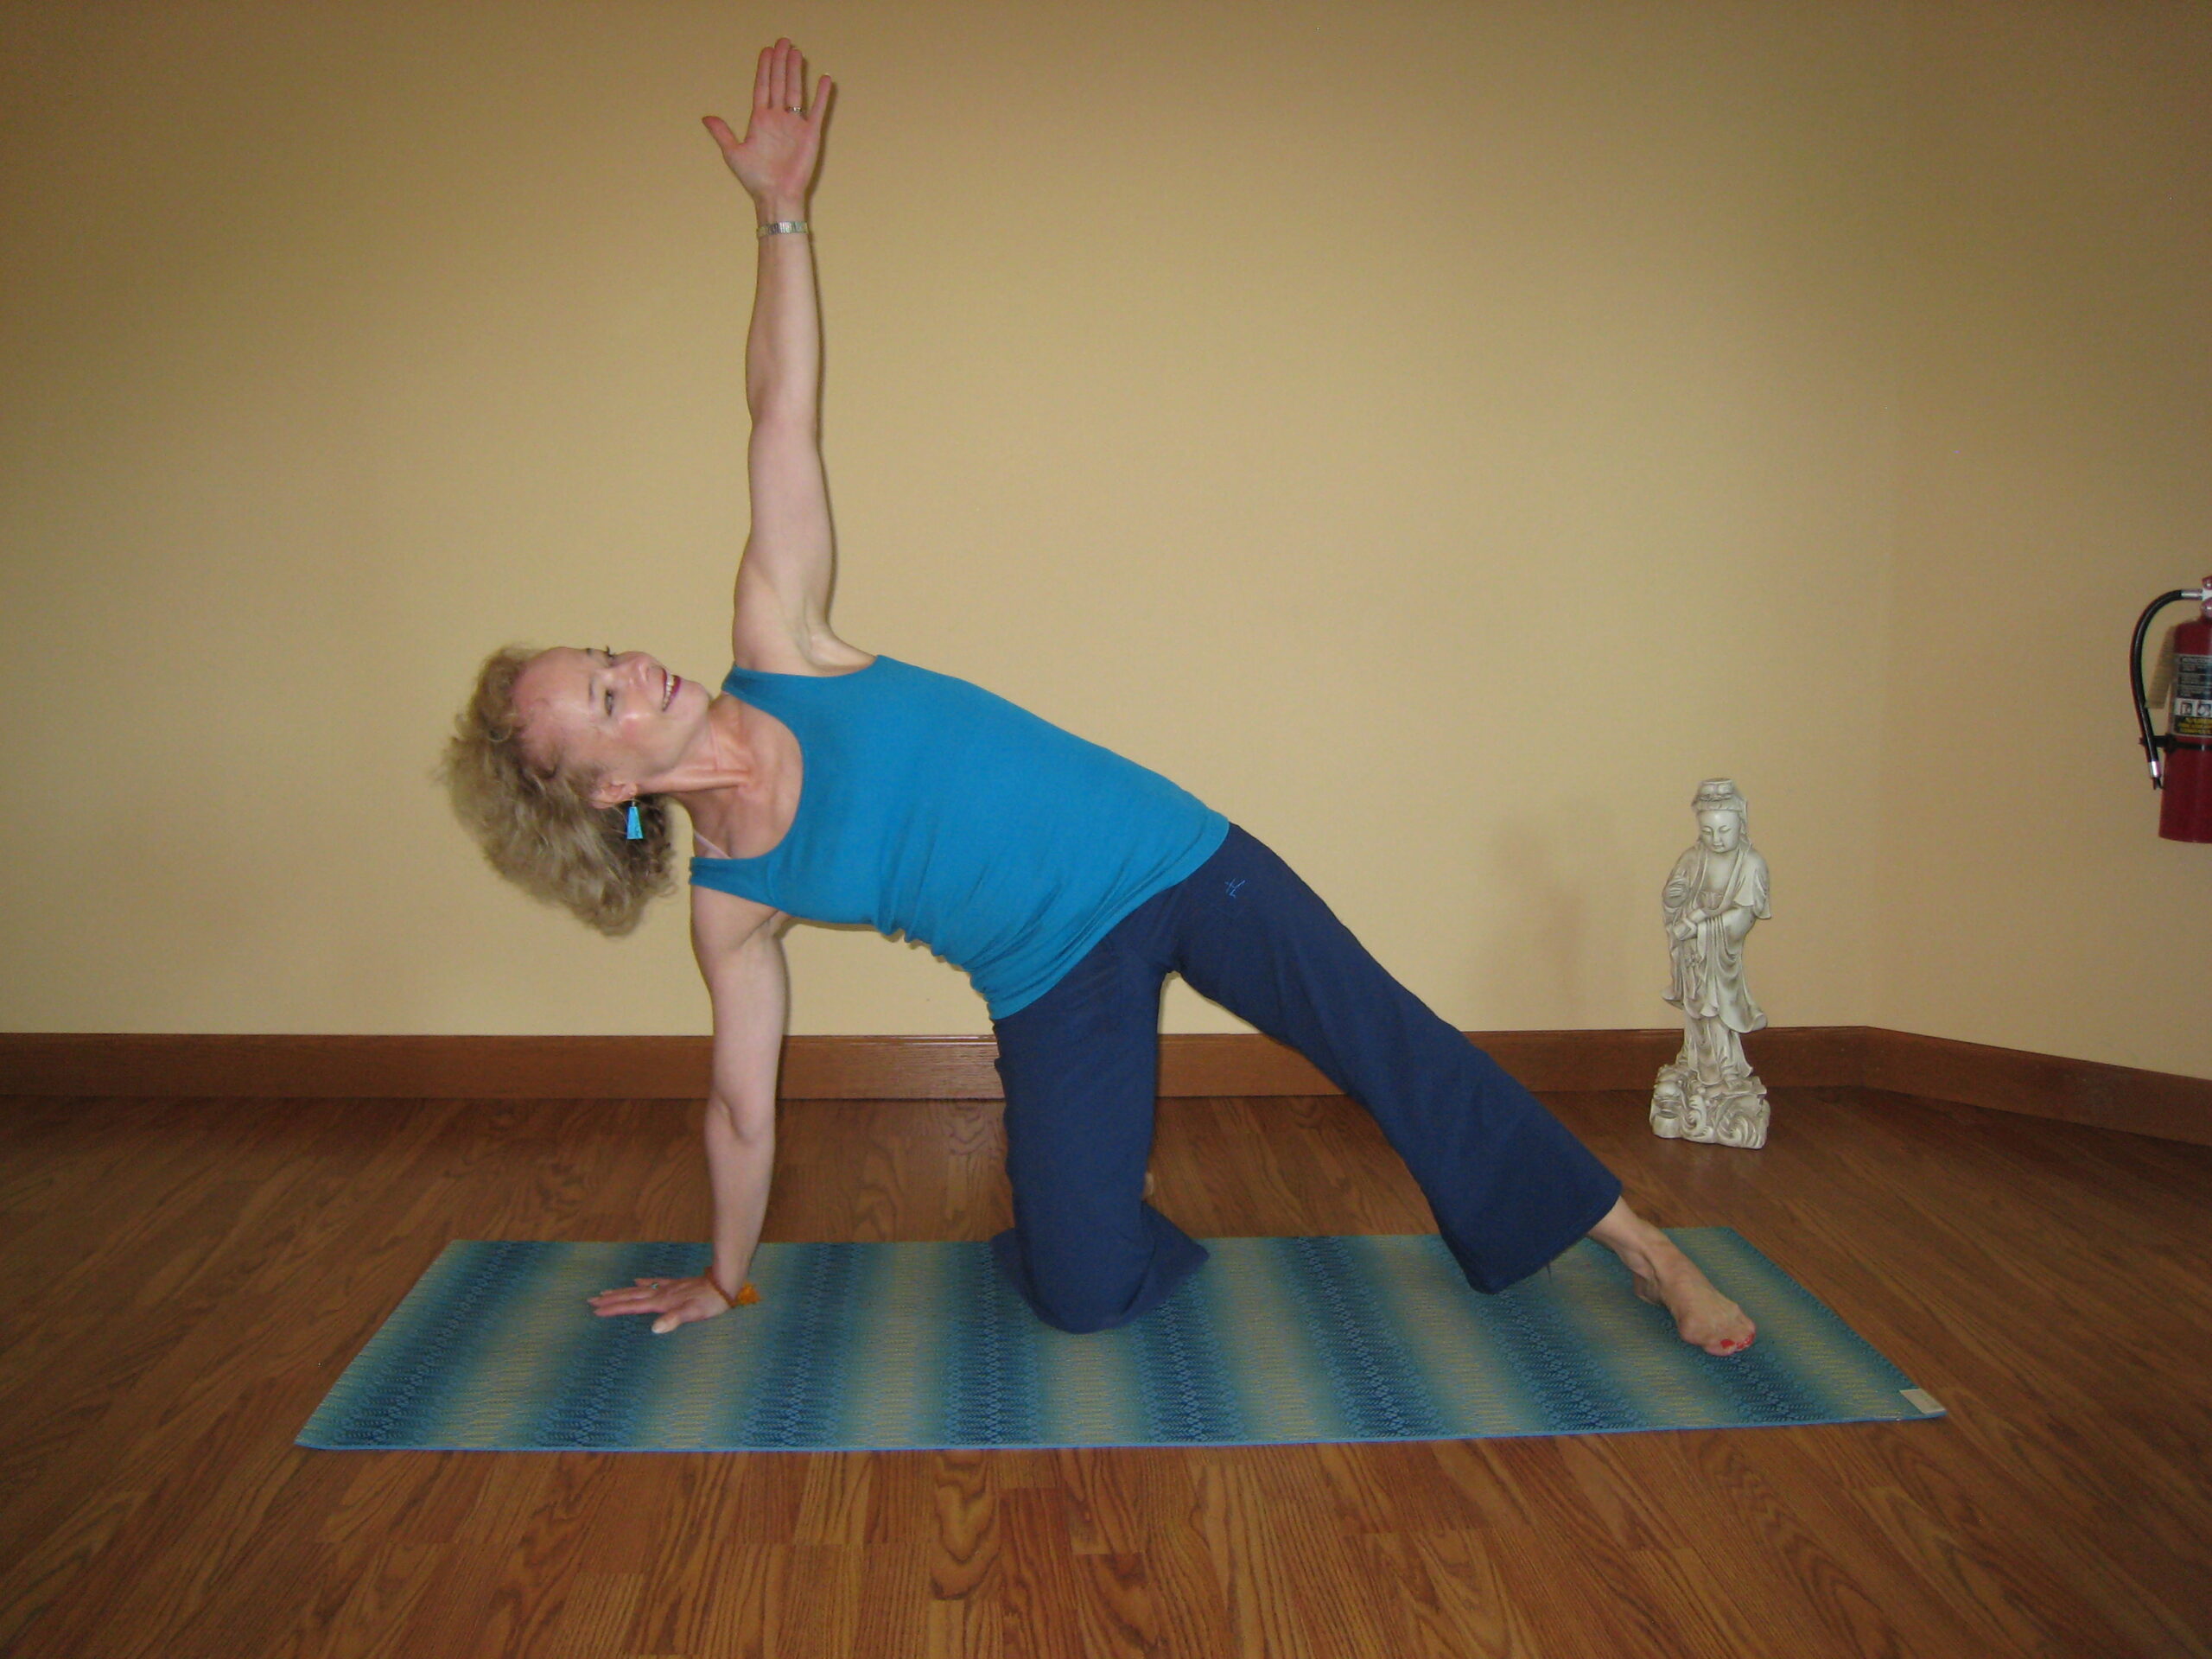
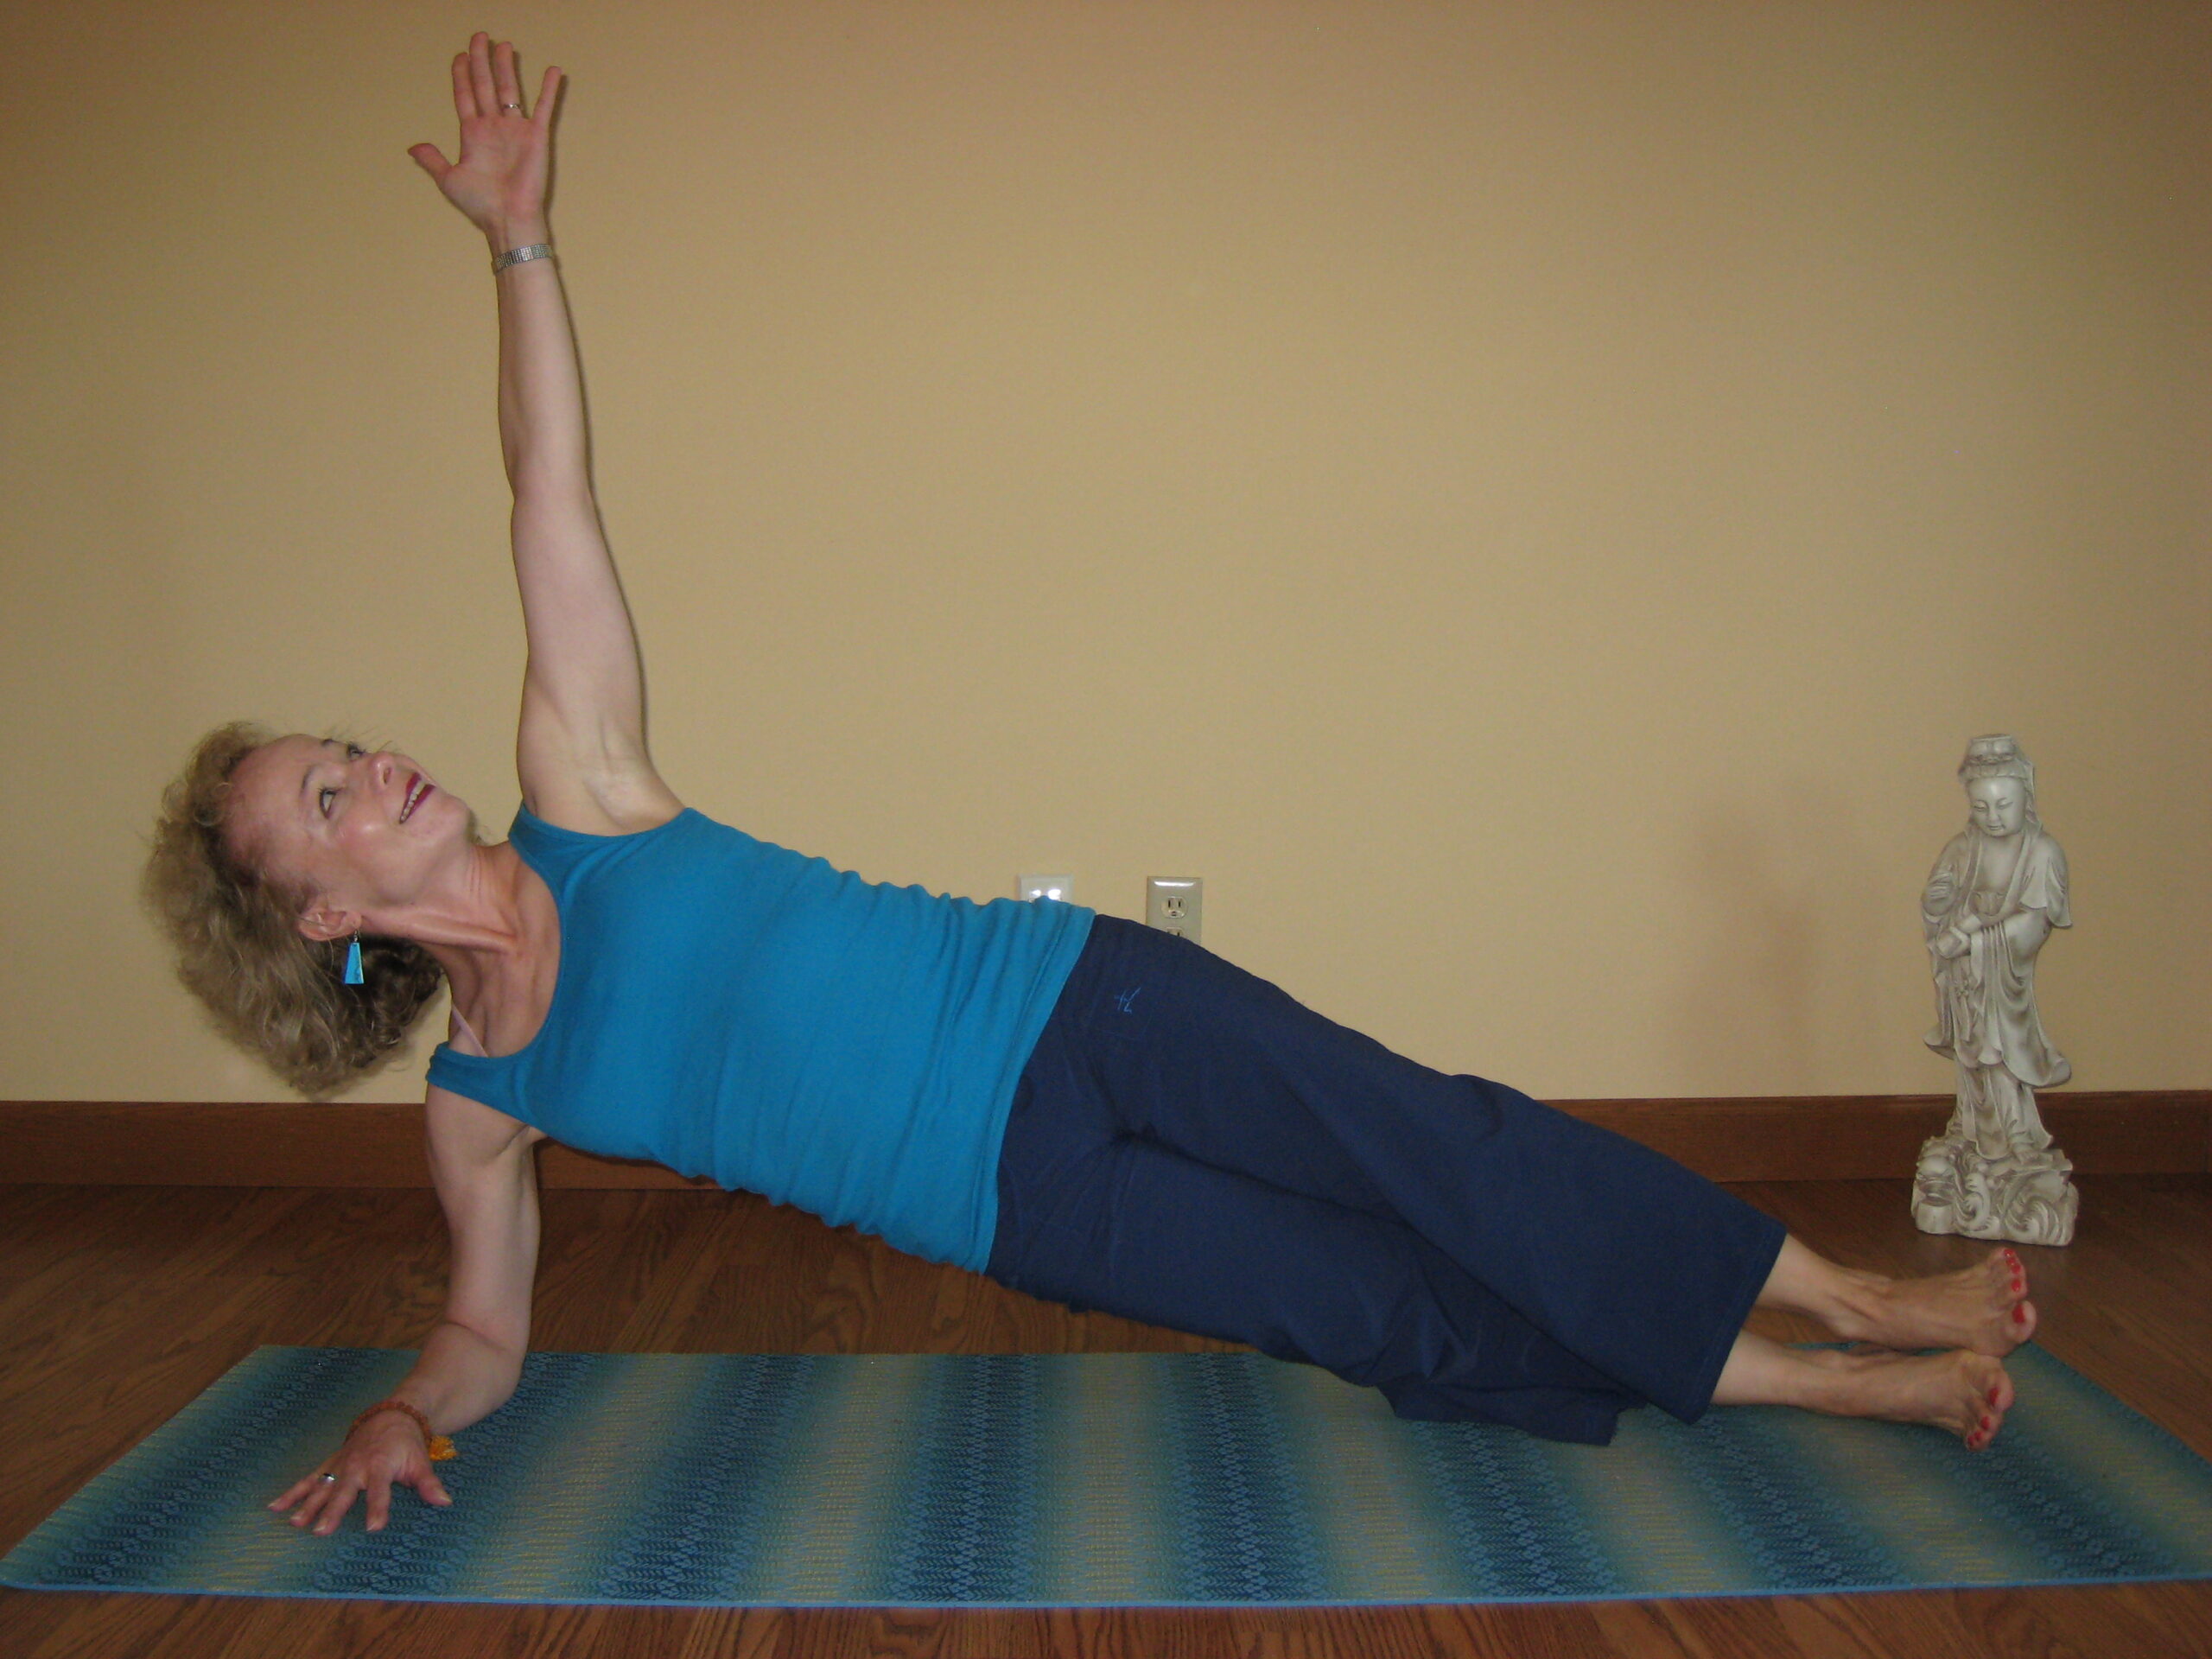
Kneeling Side Plank: My favorite way to enter kneeling side plank pose is to start this pose from all fours. From all fours, bring your right arm over to the right in line with your right bent knee, fingers pointing away from the body, wrist stacked under your shoulder. Keep a slight bend in the elbow. Then as you lift the left arm up to the sky, stacking the raised wrist over the shoulder and palm facing out, you straighten the left leg out to the left and place the big toe side of the foot on the floor in line with the bent right knee. The sole of the left foot will be facing the wall to your left with the ankle flexed. Let the sole of the left foot come to the floor.
Your toes and your knee are facing in the same direction. Your right wrist, right knee, and left foot are all in a straight line. Your back, bent leg provides stability. In all the versions of side plank mentioned here, you have the option to keep your head looking forward in neutral, or looking up at the raised hand (Photo #1). Also, for all versions of side plank discussed here, keep lifting through the waist and hips so they don’t sag toward the floor. Your hips press forward.
Optional way to come into the pose: You could also come into this pose from plank pose, bringing the right knee in to just below the hip, and before dropping the knee to the ground, kickstand the foot out to the right. THEN place the right knee to the ground so you aren’t grinding the knee into the floor as you kickstand out. As you reach your left arm to the sky, shift your weight to the right wrist and arm, and roll onto the sole of the back left foot with the toes facing away from you (Back leg stays straight). Your right shoulder is directly over your right wrist and you keep that slight bend in the supporting elbow.
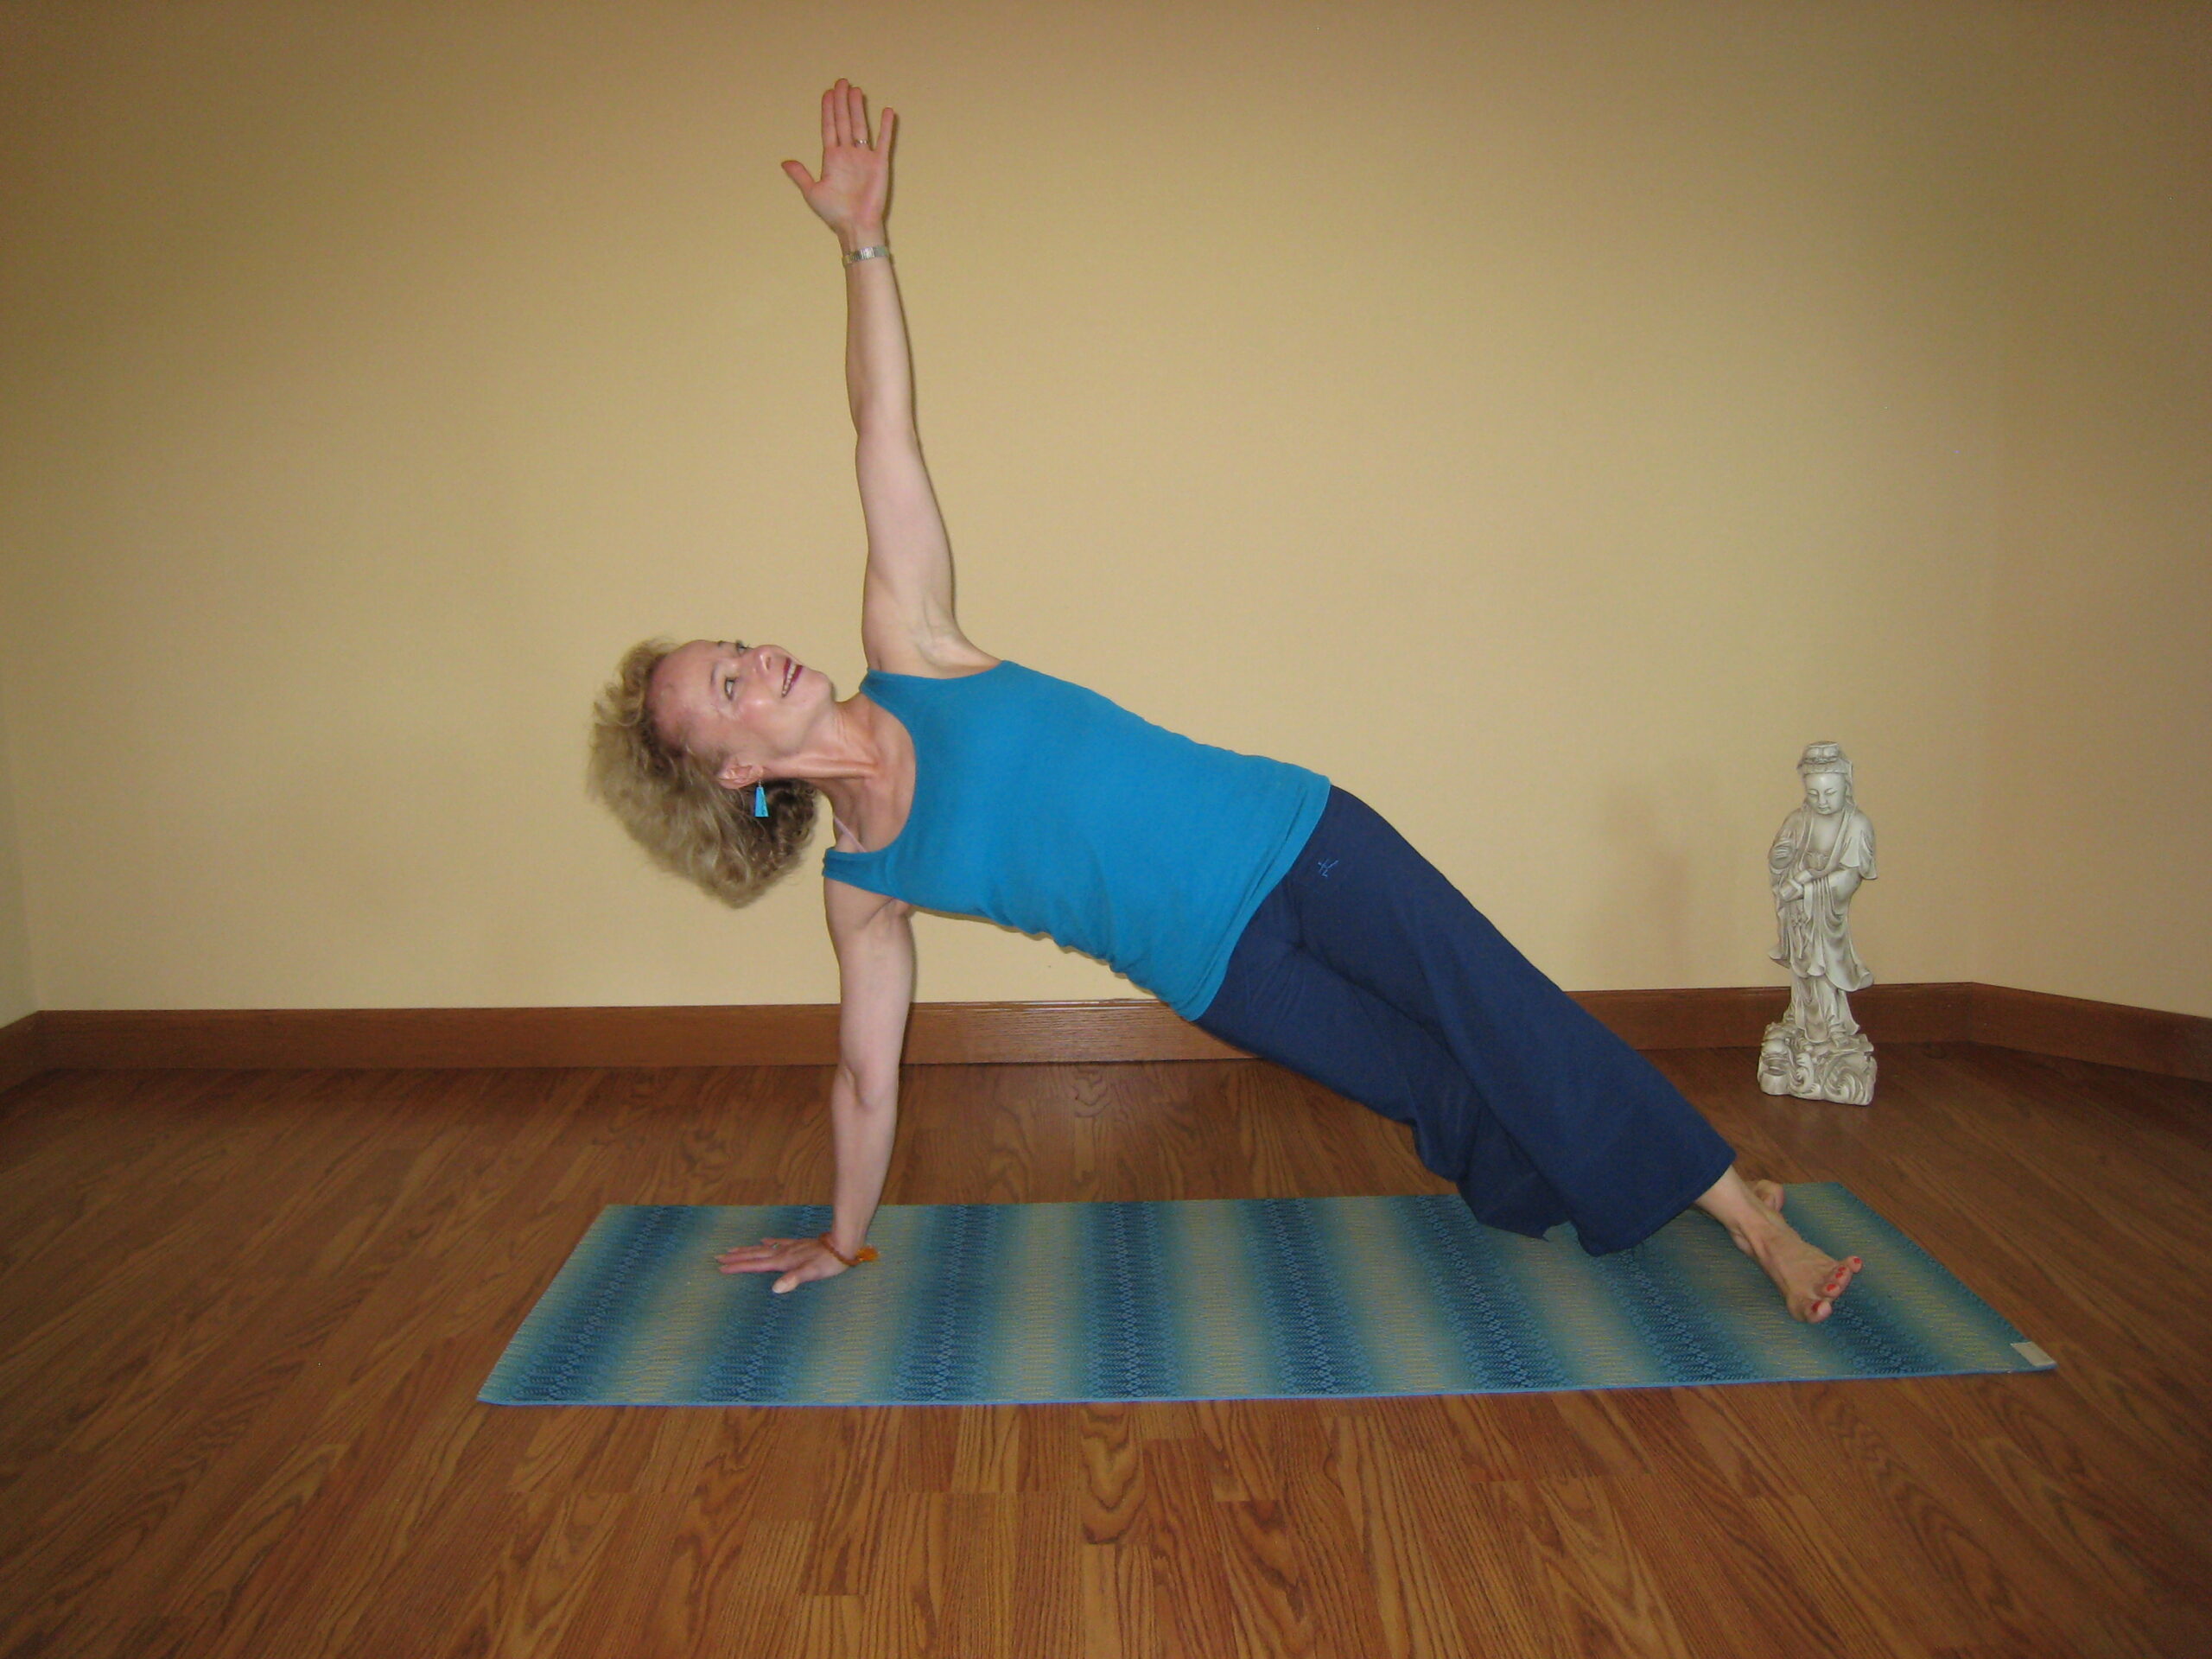
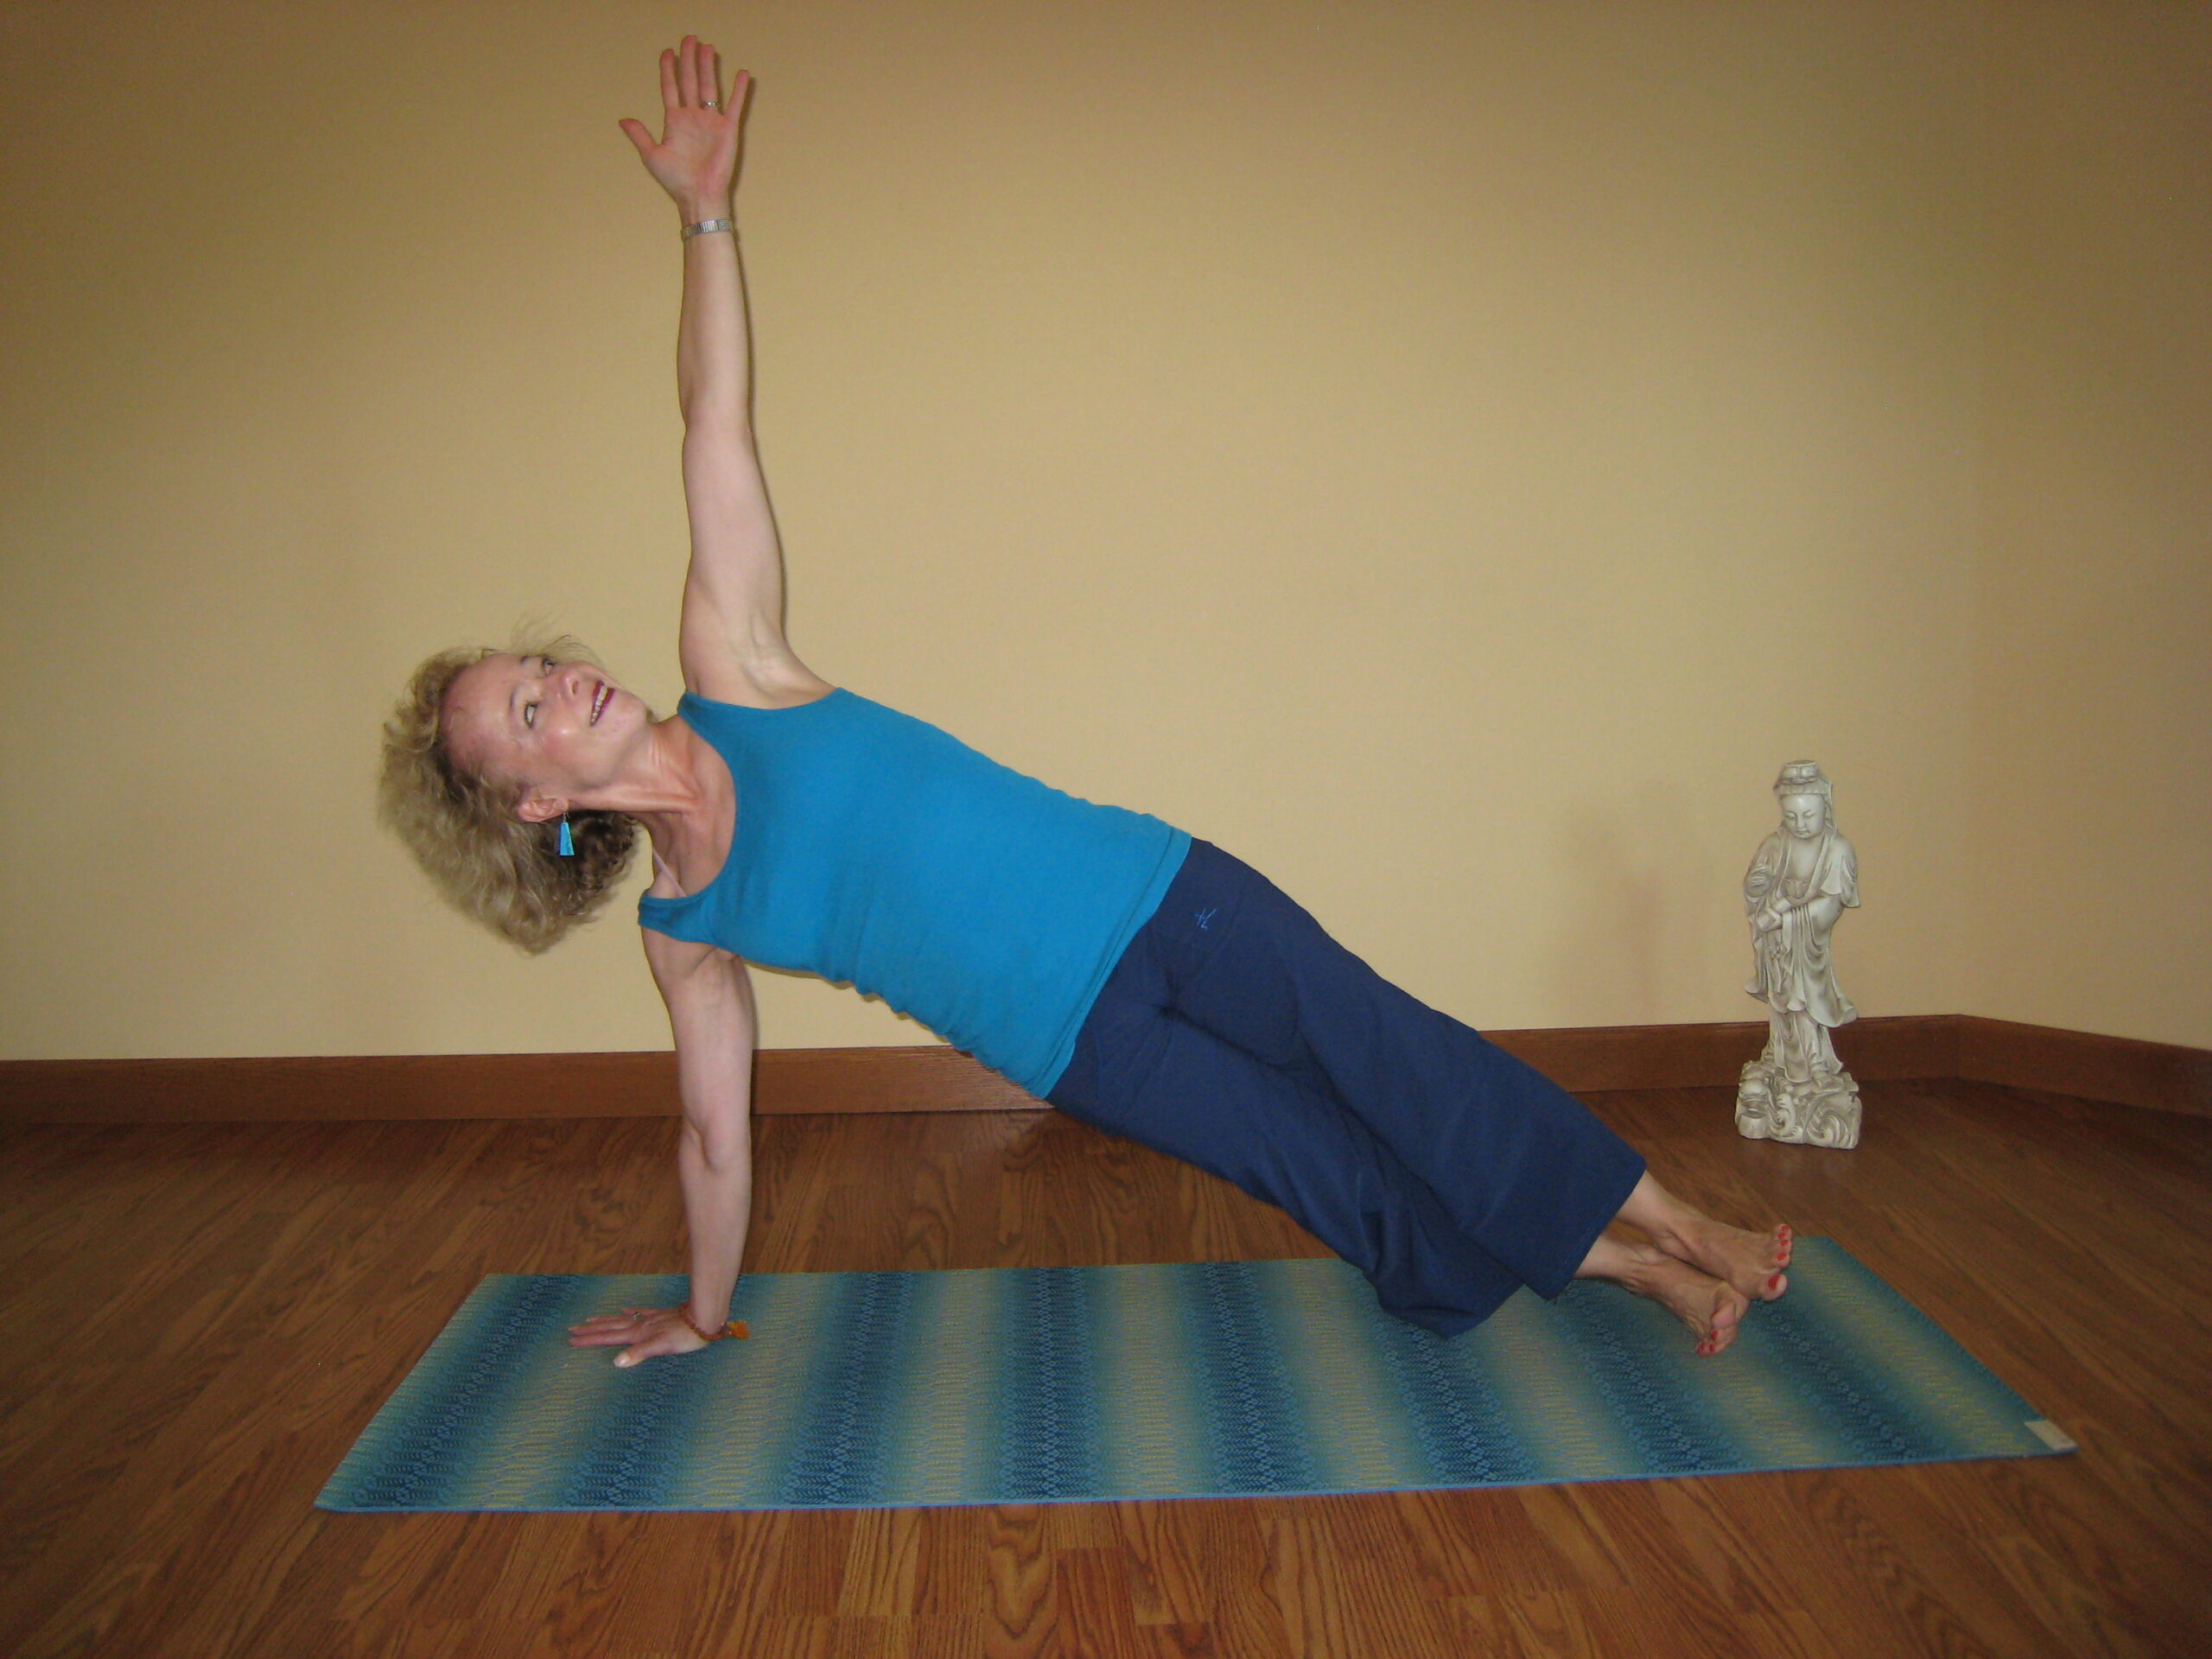
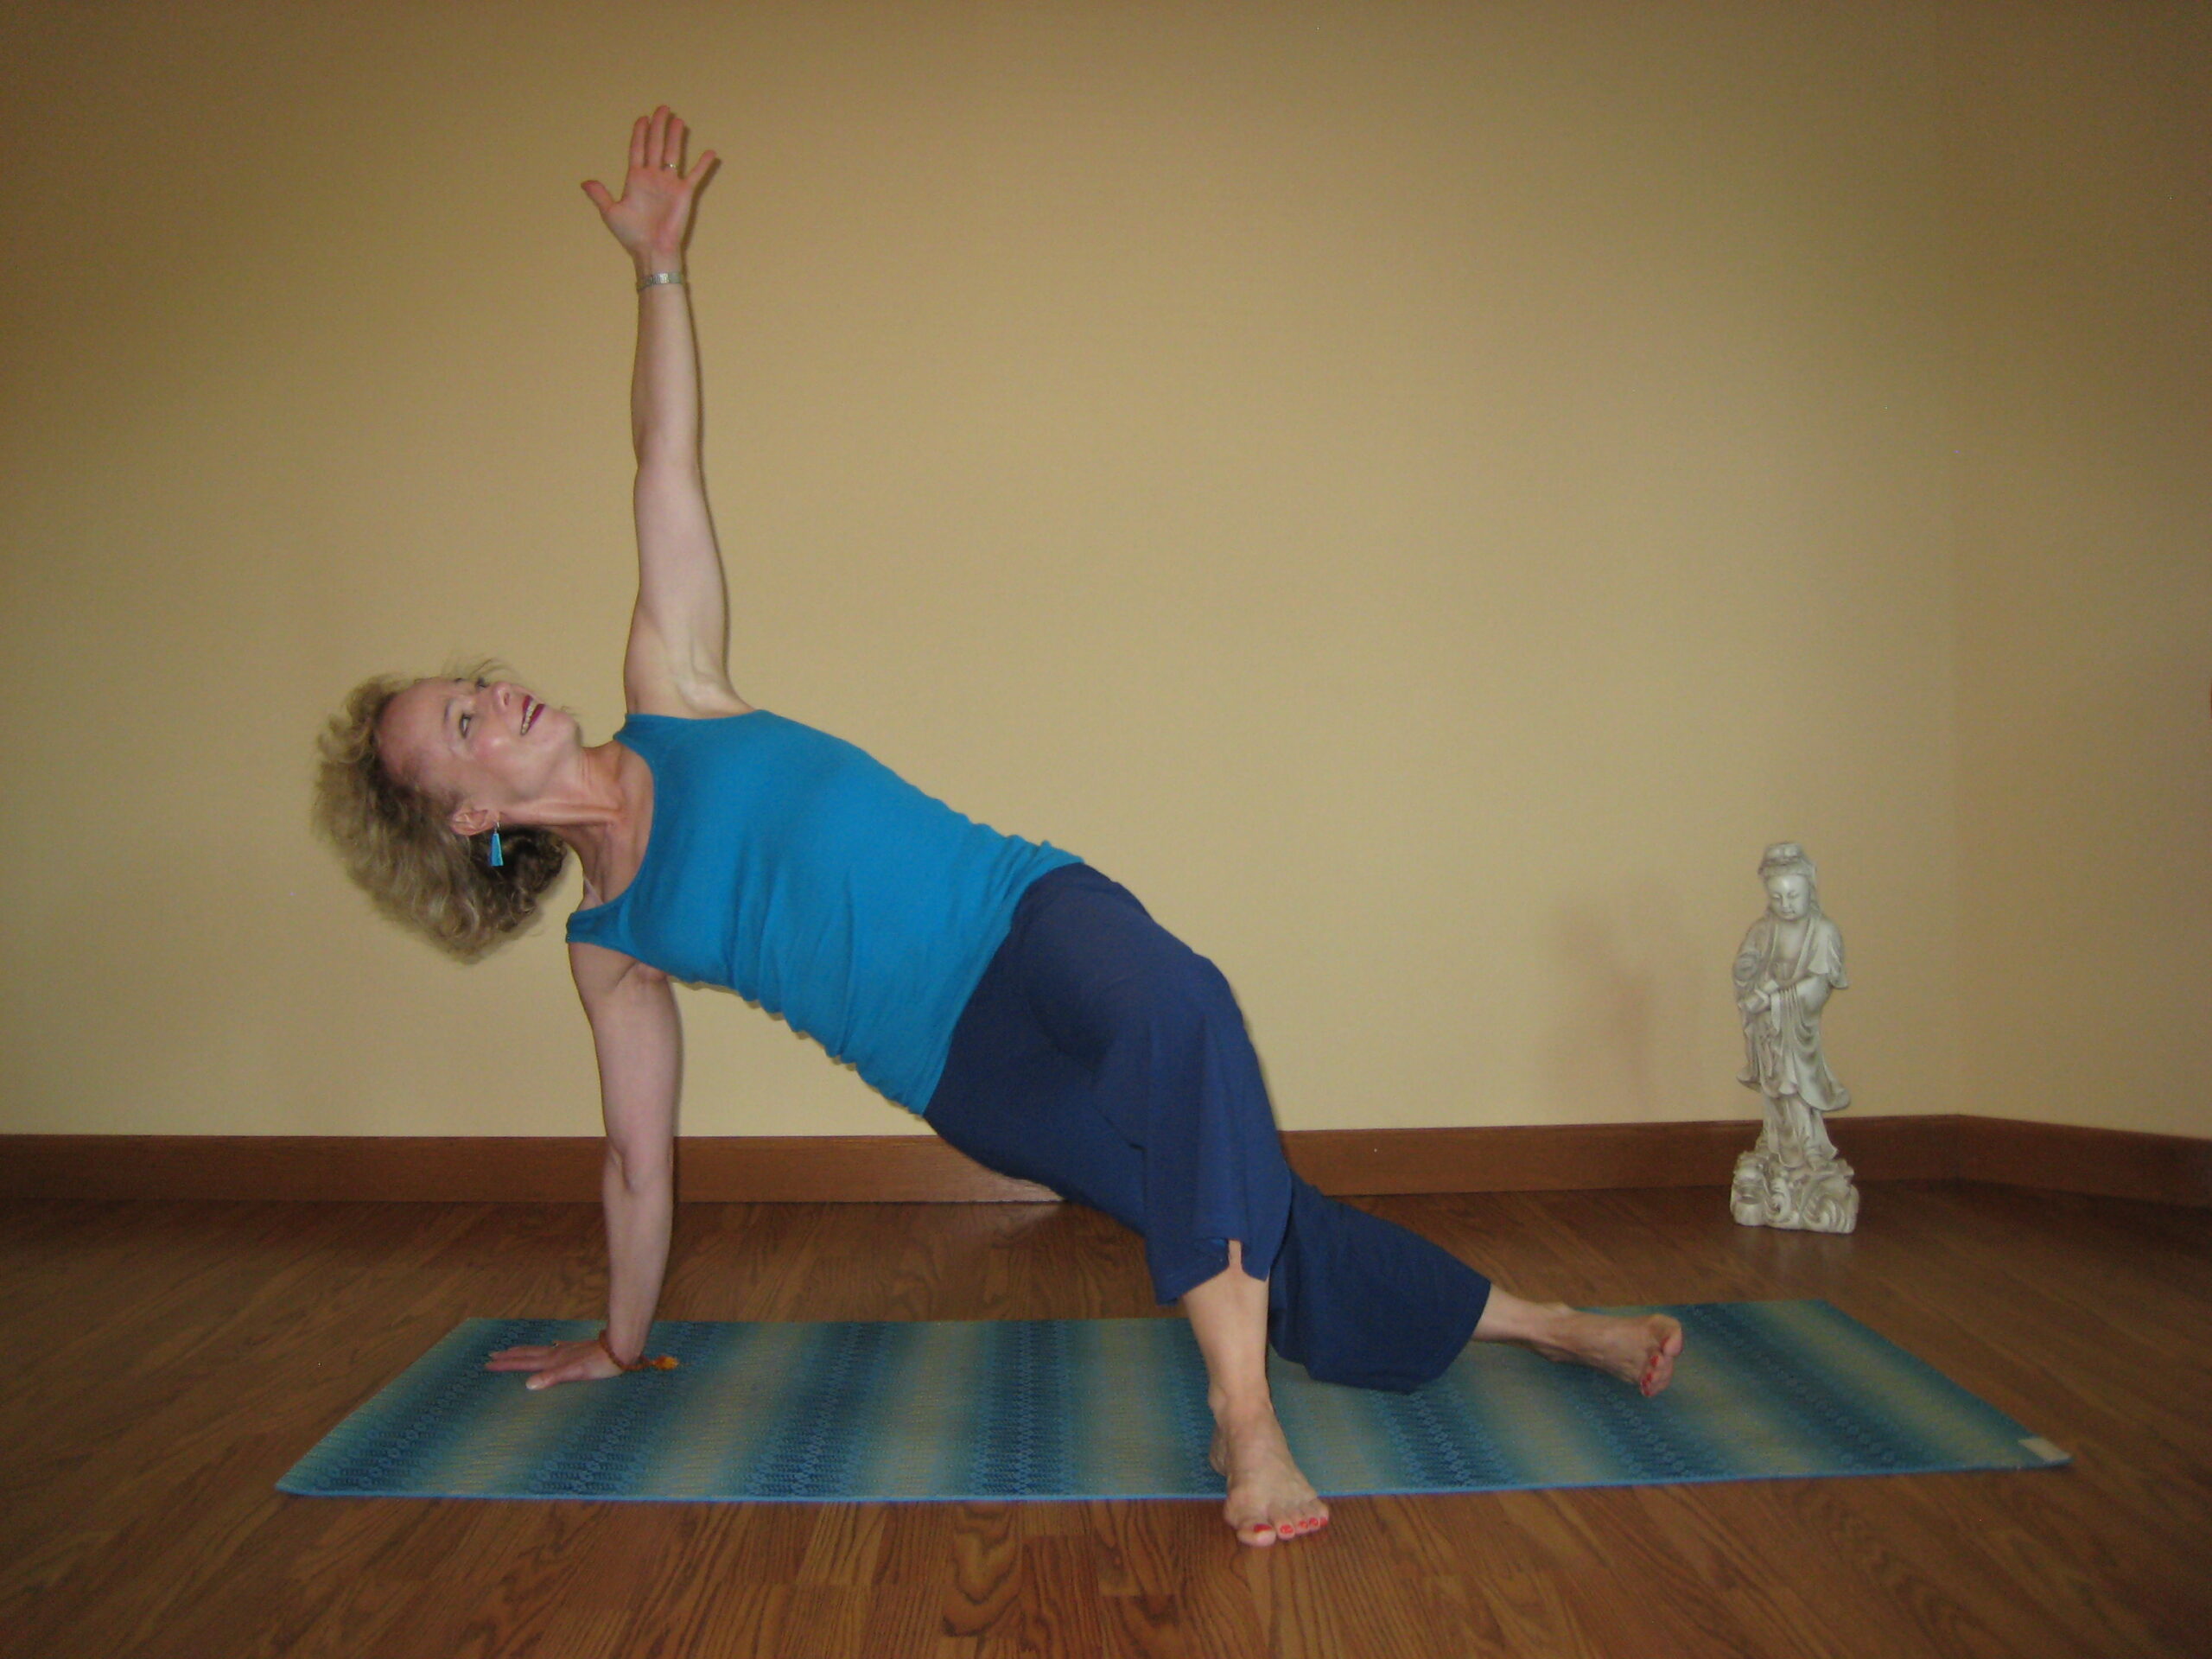
Full Side Plank transition: From here we have the option to go into full plank pose by straightening the bent right knee and bringing the pinky side of the right foot in front of and in line with the left foot. Lift the left foot to the big toe side of the foot (Photo #2). I’ve seen some versions that say to place the bottom leg’s foot in back of the top leg’s foot so the top foot is in the back. “Yogi’s choice.” Option: Stack both feet for more challenge. (Photo #3)
You could also come into this pose from full plank by reaching your left arm to the sky and shifting your weight over to the right wrist as you roll to the pinky side of the right foot and the big toe side of the left foot. (Again, with the option to place the top foot on the floor behind your bottom foot, or stacking both feet for more challenge.) Keep your right wrist directly under the right shoulder. Keep a slight bend in the supporting elbow.
Forearm Side Plank: Start lying down on the right side of your body with your right forearm resting on the ground, elbow stacked under the shoulder, and fingers pointing away from you. Your top left leg rests on top of the right leg, and your feet are stacked one on top of the other, big toe joints and the inner side of the heels touching. Lift your hips to the sky, lifting through the waist and hips so they don’t sag to the ground, and push the hips forward as in the previous versions. Your top arm can be raised to the sky (Photo #4) or resting on the hips.
Benefits:
- Strengthens arms, abdominals, lower back, legs, and shoulders
- Stretches Obliques
- Stretches and strengthens the wrists
- The advanced version stretches the back of the legs
Beginner’s tip: Still unsure on your form or new to yoga? You can try a practice pose.
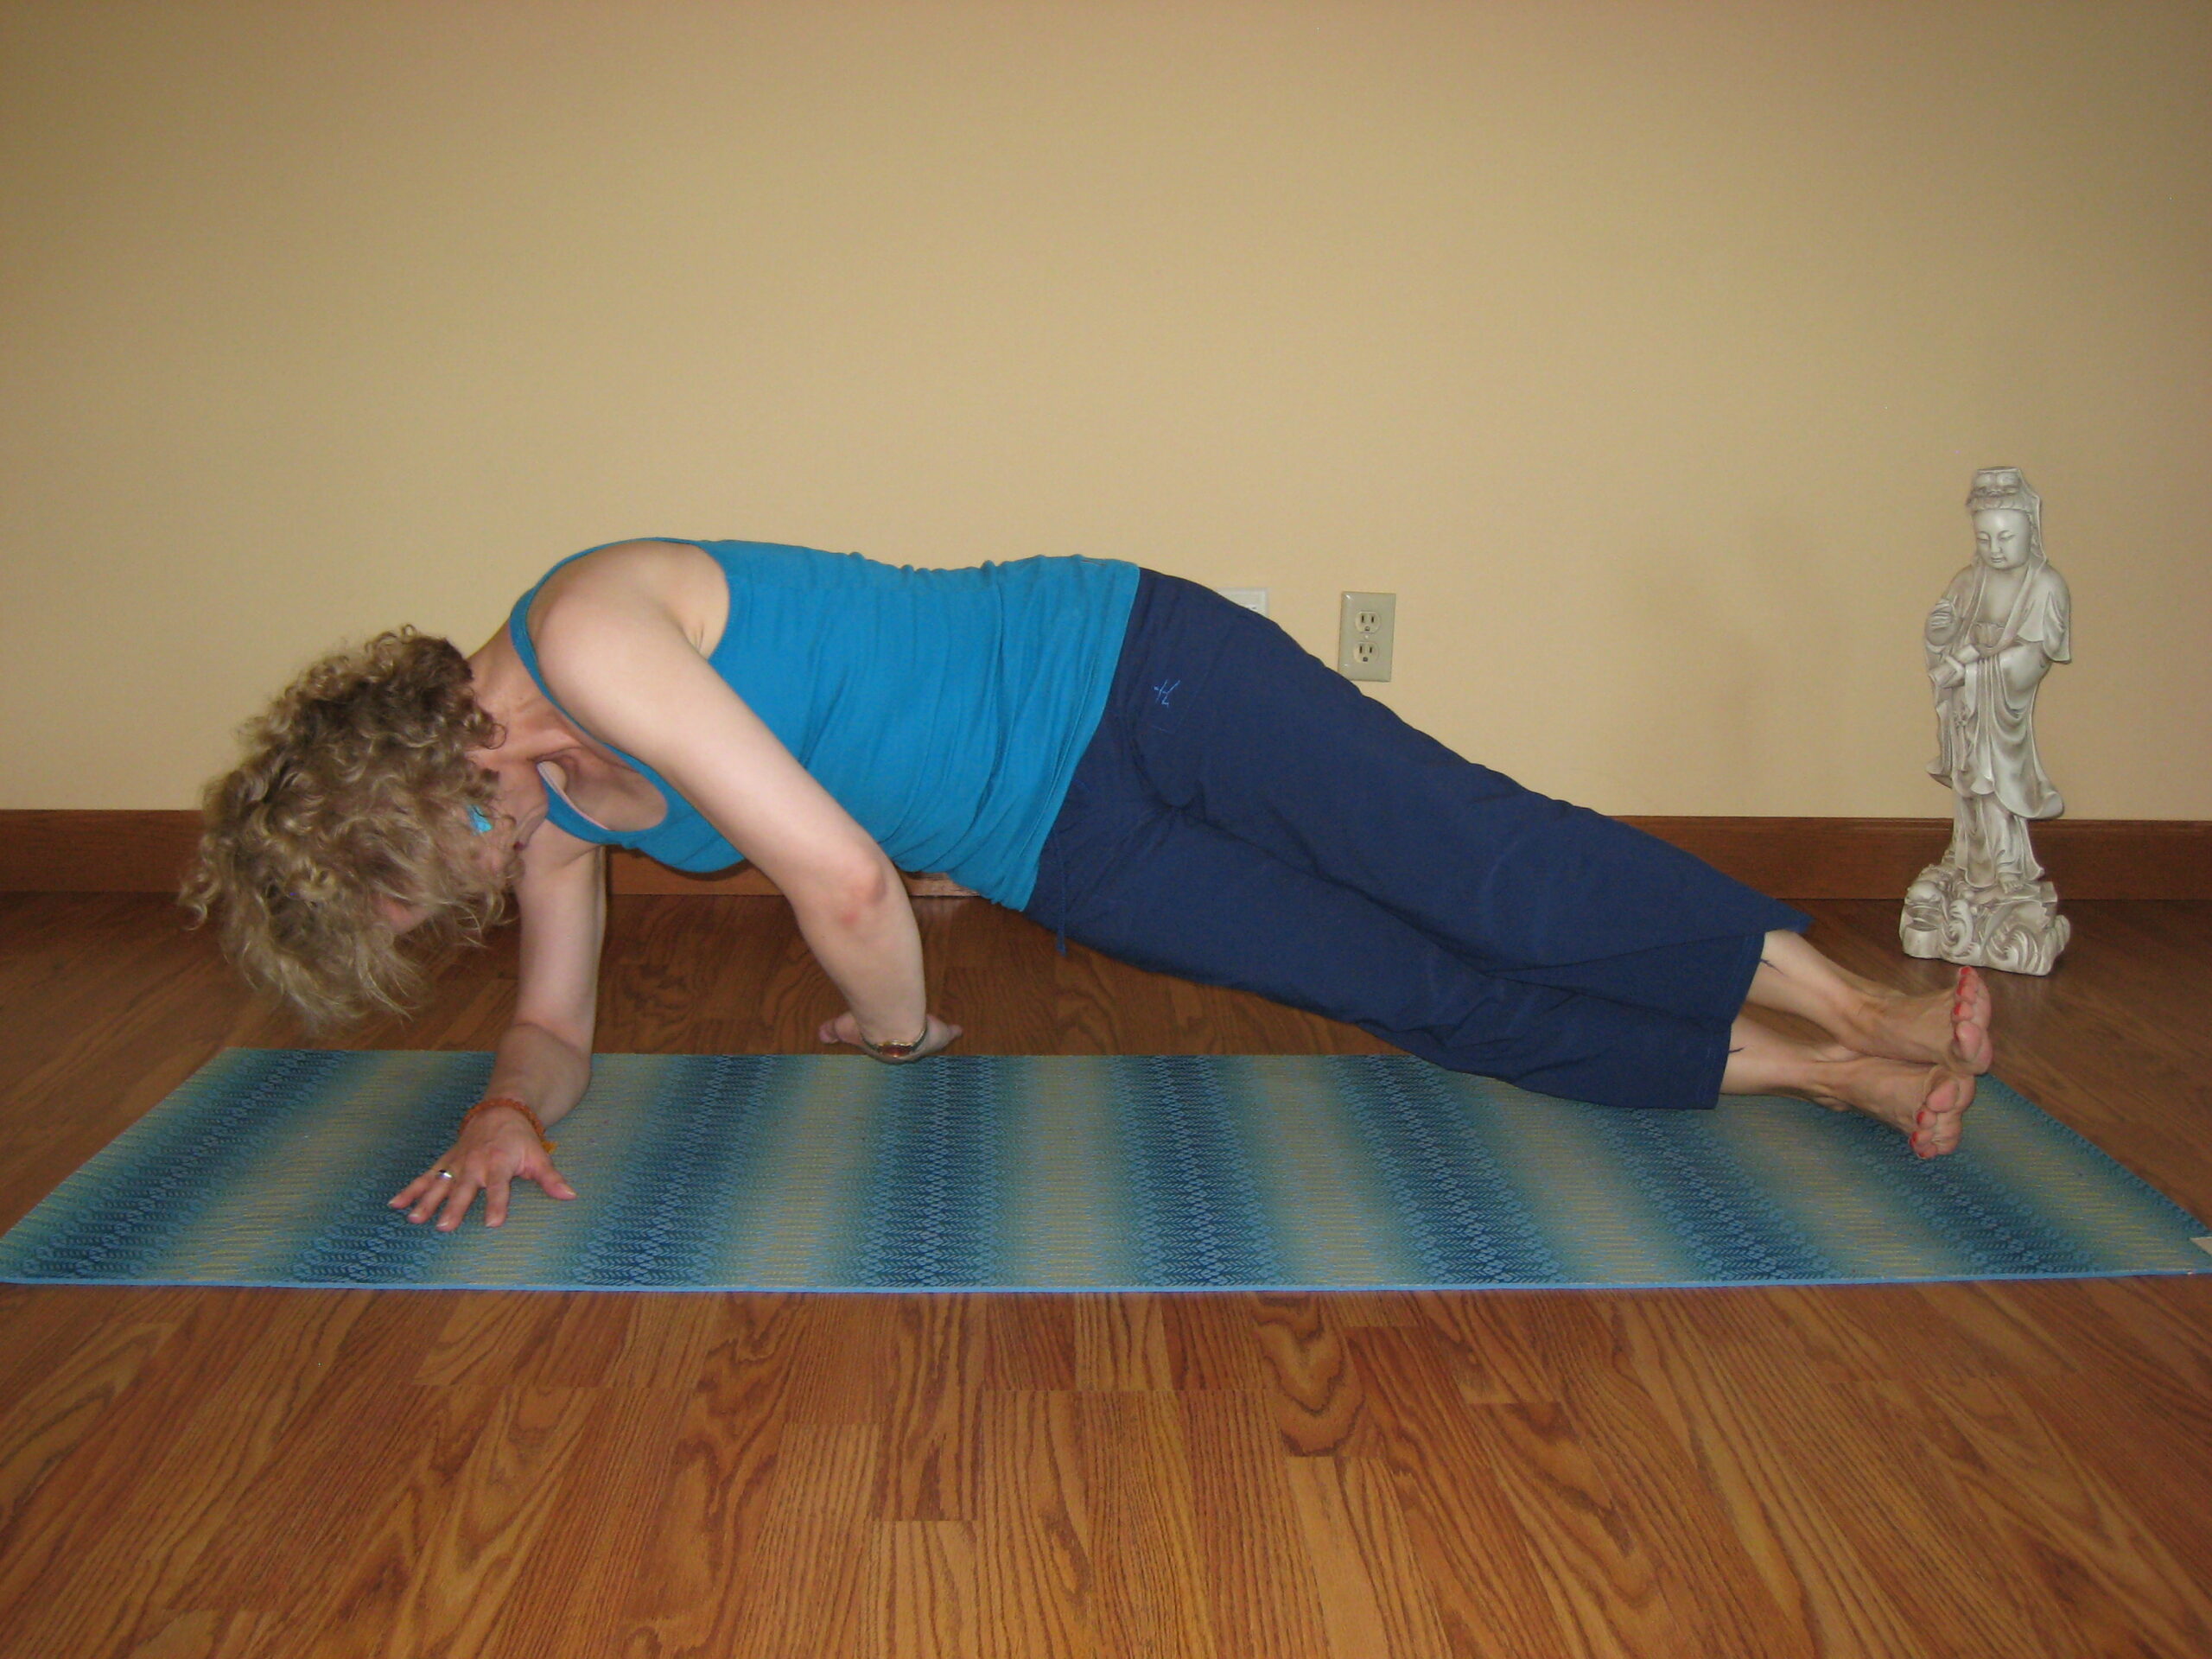
The kneeling side plank, already discussed, is a great place to start, as is the following version. From kneeling side plank with the right knee to the floor, bring the left leg forward to the center of your body in line with, and in front of, the bent, left knee and rest the sole of the foot to the floor with the toes facing away from you—i.e. turn the toes out. Then take the right leg and straighten it, bringing the pinky side of the toe of the right foot to rest on the floor while flexing the ankle so the toes on both feet face away from you.
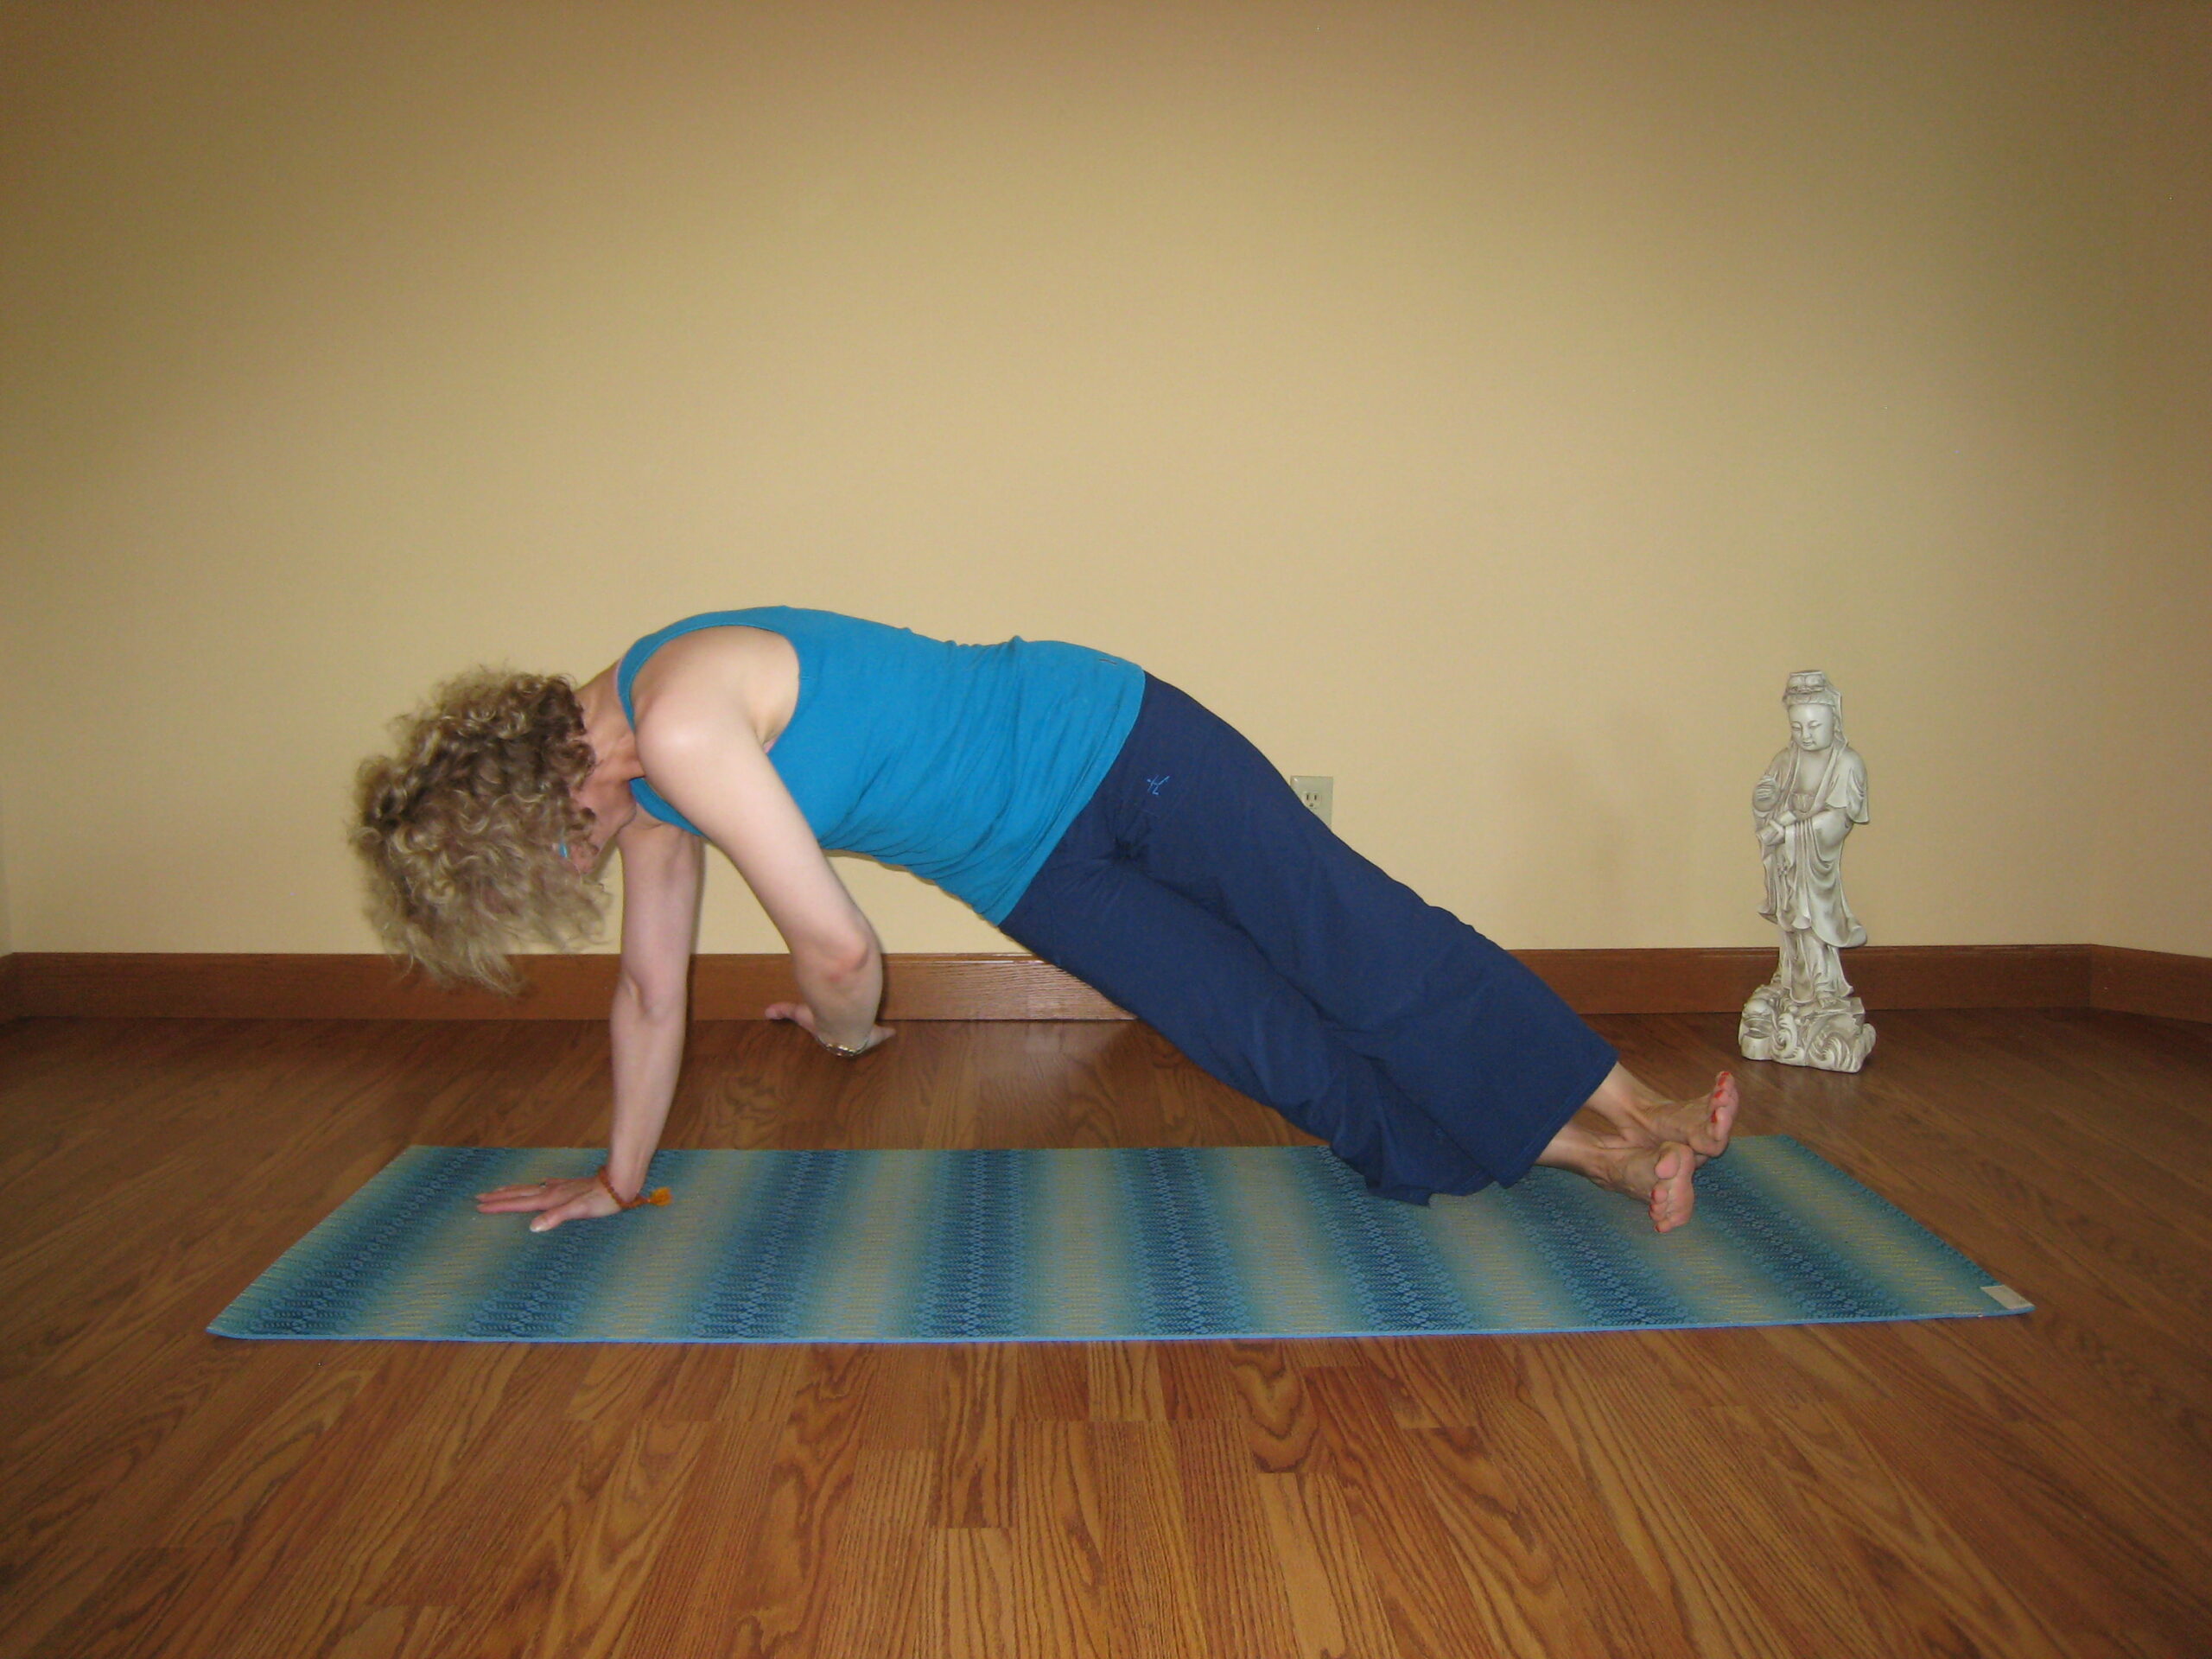
You could also come into this pose from Down Dog or full plank pose by stepping the left foot half way up toward the hands and placing the sole of the left foot on the ground with the toes pointing away from you (turn the toes out). Then shift to the pinky side of the right foot as you open your chest to the sky while reaching your left arm up to the sky. Support the weight of your body on your right wrist and pinky side of the right foot. The right wrist is stacked under the right shoulder, your left arm is raised to the sky—palm facing out, and your left wrist stacked directly over the left shoulder. (Photo #5) In both the kneeling side plank and this version, the bent leg provides extra support.
Remember, for all versions of side plank discussed here, keep lifting through the waist and hips so they don’t sag toward the floor. Your hips press forward.
Remember to repeat the pose on both sides perhaps resting in down dog in between if you like.
Advanced options:
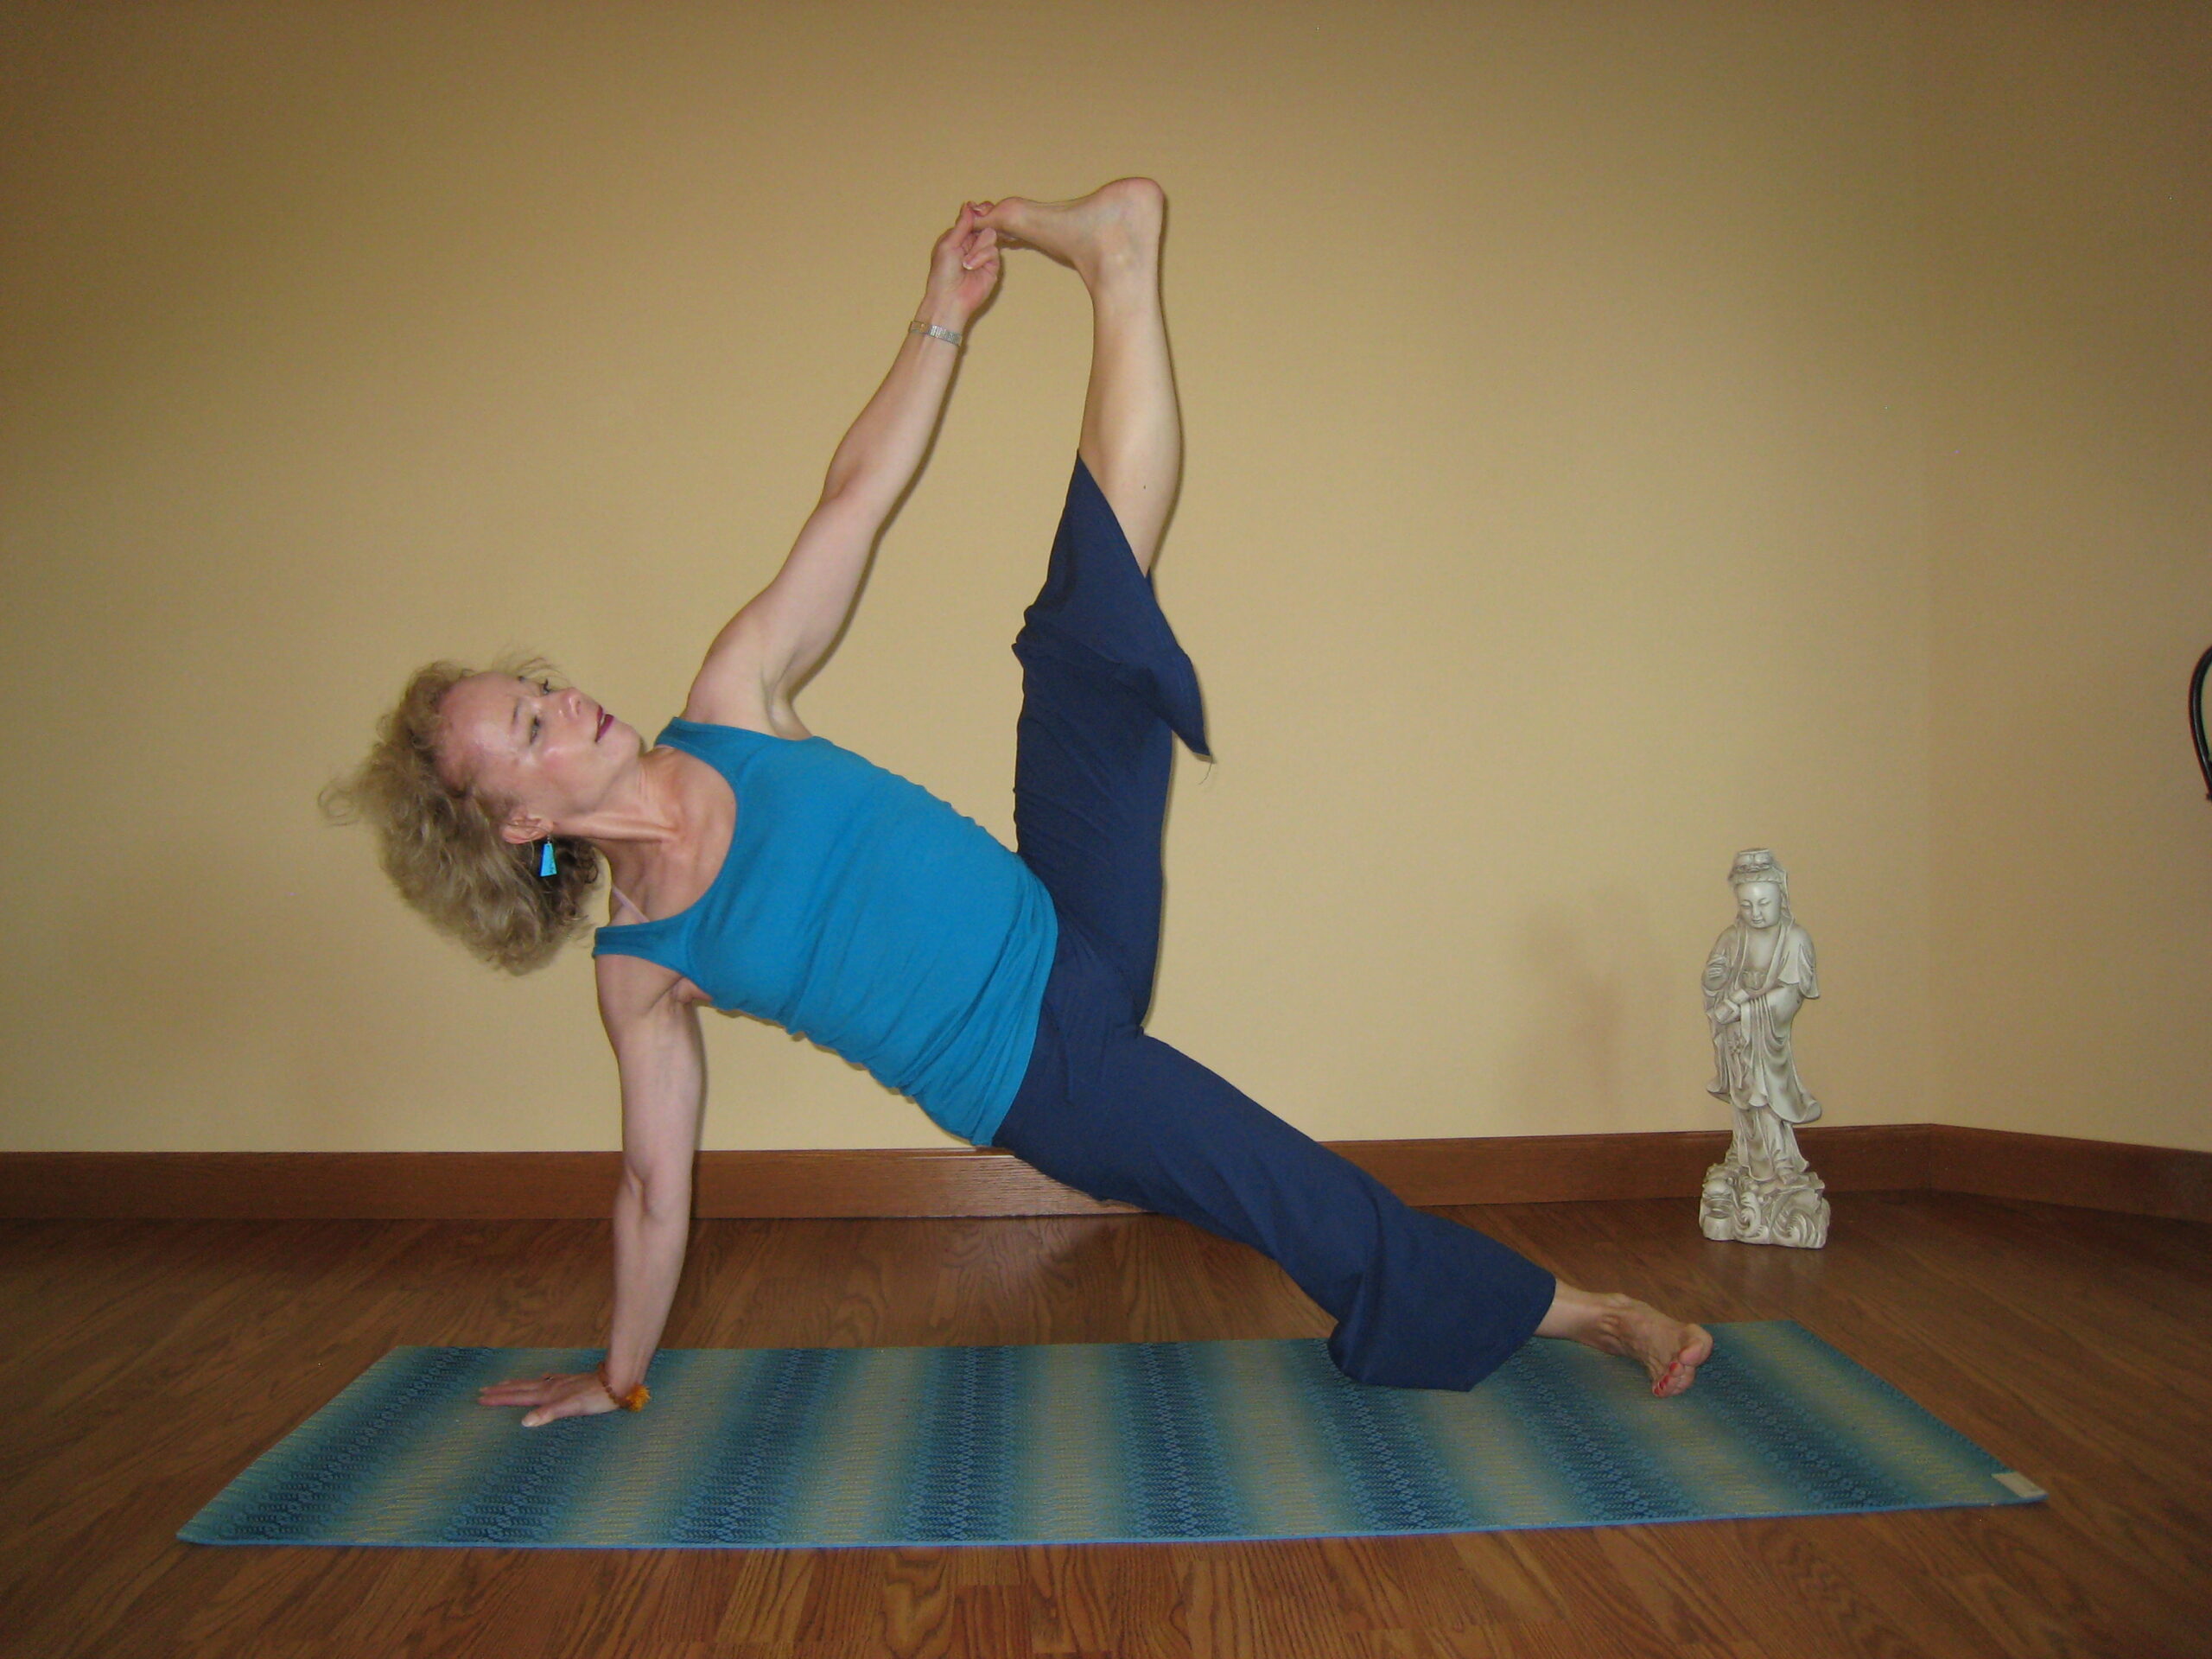
From full side plank, bend the top knee in toward the chest. Reaching into the inside of the bent knee, grab the big toe of the foot with the index and middle fingers of the top arm and cap the big toe off with the thumb. Then, while holding the big toe, inhale the top leg up to the sky aiming for the leg to stretch perpendicularly to the ceiling. (Photo #6) To come out of the pose, release the toe hold and return the top leg to the previous position. Repeat on the other side. Option to add top leg pumps up and down as an outer thigh workout of the top leg.
Abdominal work-out options while in Side Plank:
- Use either the full side plank base (Photo #7), the kneeling side plank base (not shown), or the forearm side plank base (not shown) and create an abdominal workout by reaching the top arm down under the raised body on an exhale and back up to the sky on an inhale.
- Use the forearm side plank base to do simple lifts up and down with the hips—inhaling the hips up and exhaling them down to rest on the floor (not shown). Top arm can be raised to the sky or resting on the hip.
- Use the forearm side plank base to combine the above two options—inhale the hips down and reach the top arm to the sky, exhale the hips up and reach the top arm down under the raised body. (Photo #8)
Contraindicated for:
- Knee, shoulder, elbow, or wrist injuries.
- Option to make a fist for the bottom wrist if you are taking care of a wrist issue.
- Option to use a blanket/cushion under the bottom knee in kneeling plank if you are protecting your knees.